
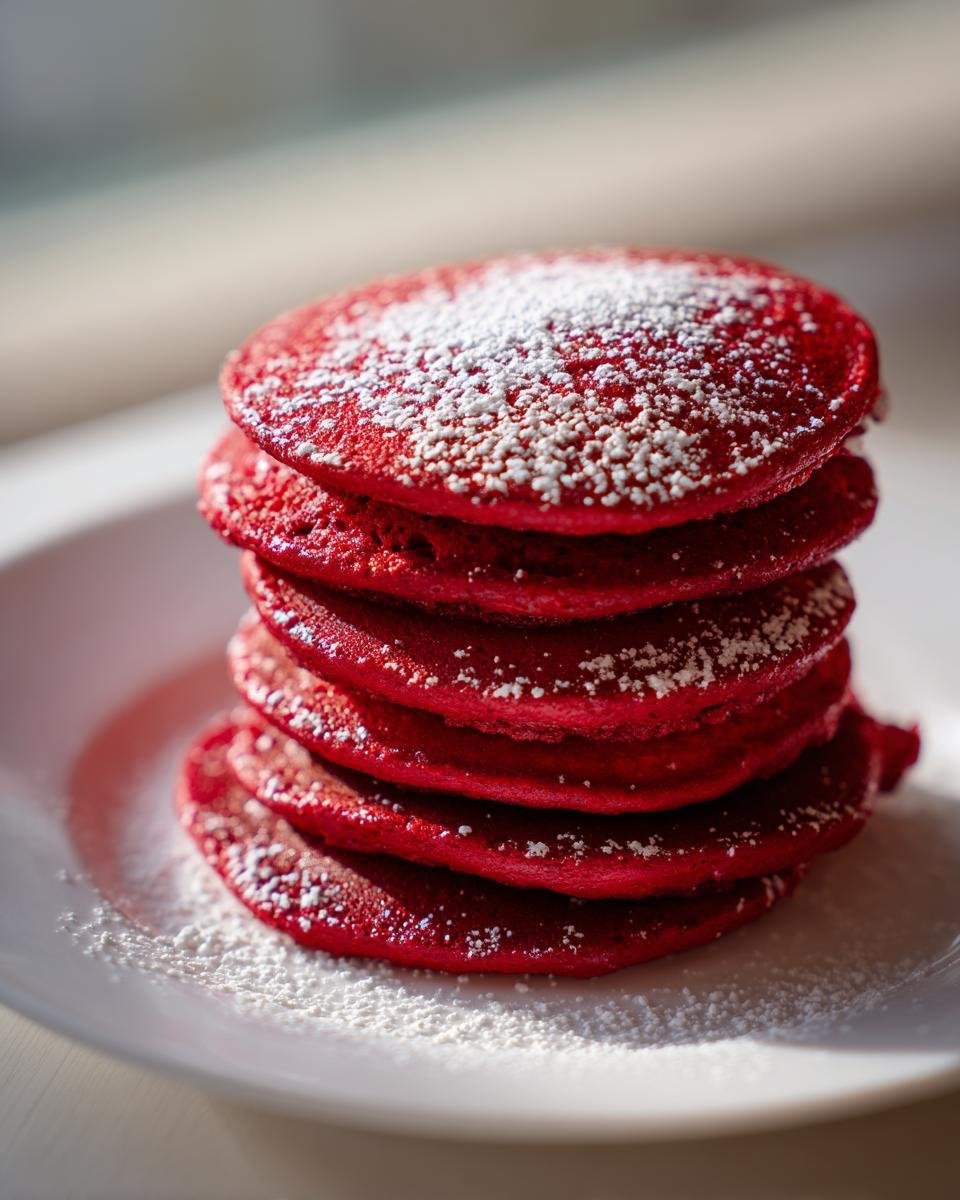
Who wants boring old flapjacks on the weekend? I know I don’t! We deserve a breakfast that feels like a genuine celebration, and that’s exactly what we get when we cross the line between dessert and morning meal. I’m talking about transforming that rich, decadent flavor of classic red velvet cake into easy, fluffy pancakes. Trust me, I first tried making Red Velvet Pancakes for a special brunch last spring, and honestly, I realized how spectacularly simple they are to whip up on a Tuesday morning if the mood strikes!
Forget waiting for a holiday; you need that tangy cocoa flavor now. We’re going to use a few easy tricks so these cook up perfectly every time, much faster than a cake ever could. If you love my carrot cake pancake recipe but crave that deep cherry-red hue, you are going to adore this one.

Why This Red Velvet Pancakes Recipe Works So Well
You might think turning a fancy cake into a breakfast staple means sacrificing texture or flavor, but not here! These Red Velvet Pancakes are genuinely special because they capture that authentic red velvet tang without messing up your morning routine. It’s all about balancing the acid and the base so you get lift without getting tough.
They are so much easier than baking a whole cake, but you get that gorgeous, indulgent payoff. We keep a few traditional cake steps, but we speed everything up so you can be sitting down eating them faster than your coffee brews!
Perfect Texture: Fluffy Red Velvet Pancakes Every Time
The secret to that airy lift is the power couple: buttermilk and vinegar! When that acid hits the baking soda quicker than a lightning bolt, you get immediate, gorgeous bubbles in your batter. That’s why you only mix until just combined. I seriously stop stirring the second I don’t see huge streaks of dry flour anymore; overmixing is the enemy of fluffiness, making your pancakes chewy instead of tender.
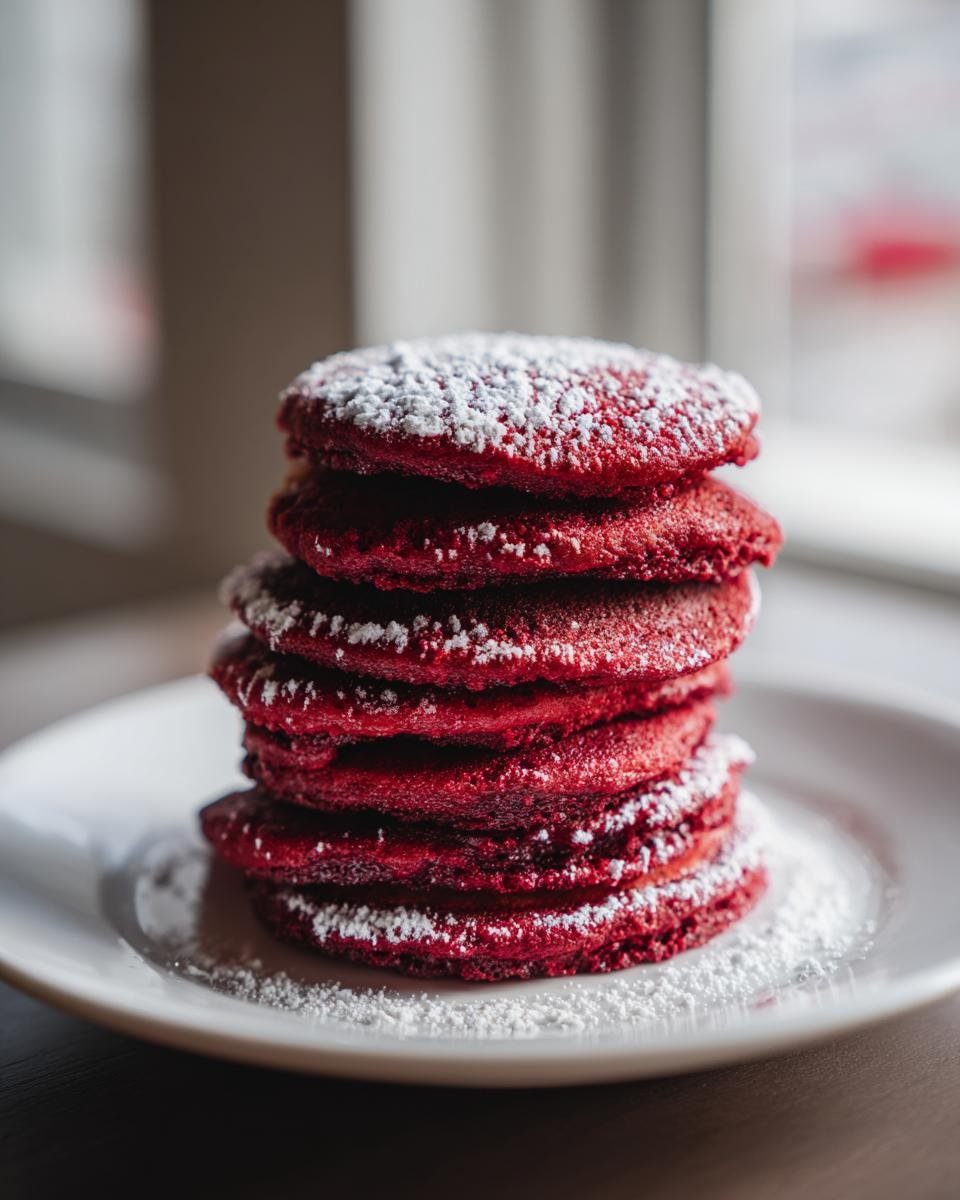
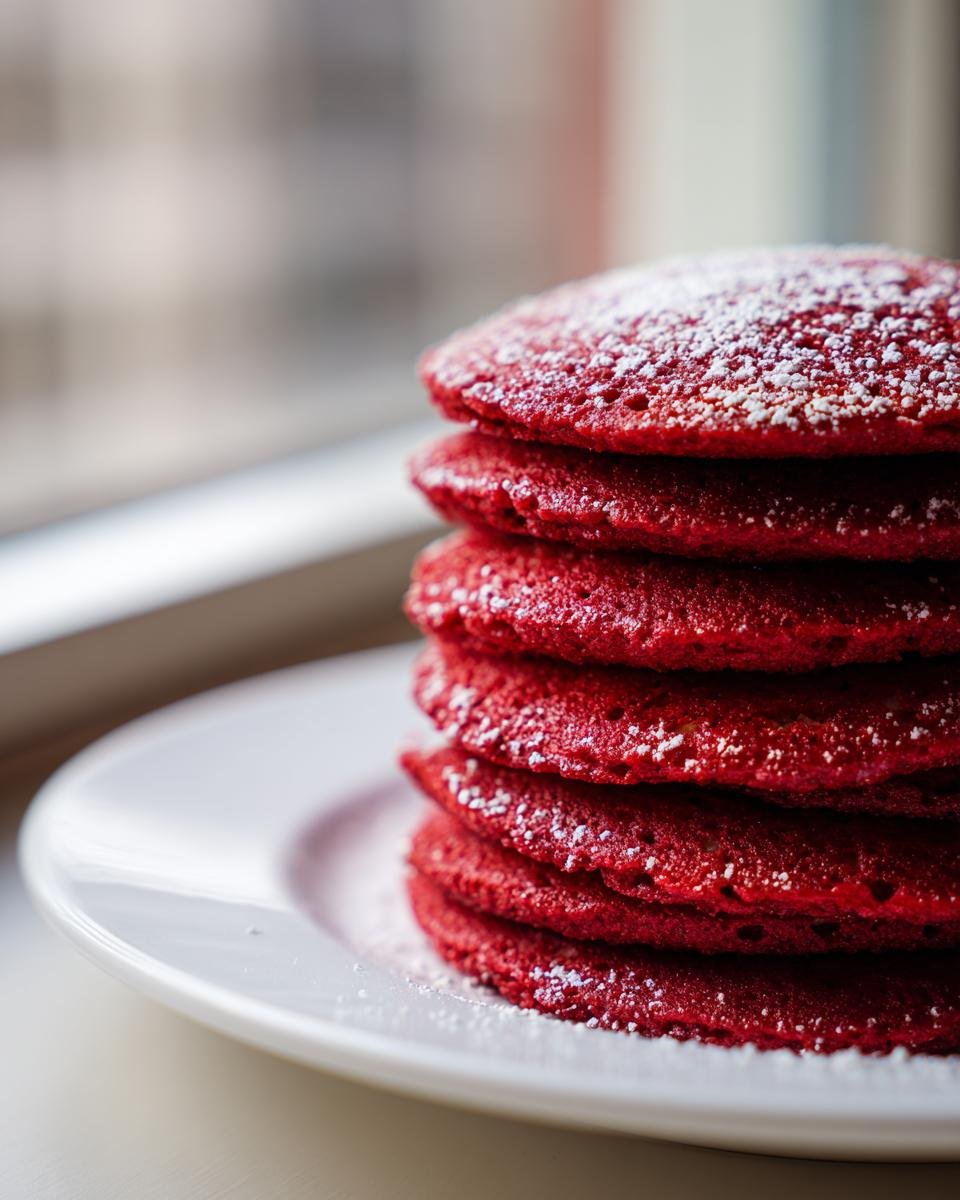
Vibrant Color and Deep Cocoa Flavor in Red Velvet Pancakes
If you want that signature look, you can’t skimp on the coloring, but you also can’t overpower the flavor with cocoa. We use just enough cocoa powder—that’s where the real flavor comes from—and then supplement with the food coloring. If you really want that deep, vibrant red without needing half a bottle of the liquid stuff, definitely reach for the gel food coloring next time. That small swap makes a huge visual difference!
Essential Ingredients for Perfect Red Velvet Pancakes
Okay, even though this is super quick, we can’t just throw stuff in haphazardly! For these Red Velvet Pancakes to hit that sweet spot between cake and breakfast, you need clear measurements. Seriously, don’t try to eyeball the leavening agents; that’s how you get flat, sad pancakes.
You’ll need to whisk together one and a half cups of all-purpose flour with two tablespoons of regular granulated sugar, one teaspoon of baking soda, and half a teaspoon of salt. Then, for the wet side, grab one and a quarter cups of real buttermilk—that acid is *key*—one large egg, two tablespoons of melted unsalted butter, a good teaspoon of vanilla extract, one teaspoon of white vinegar, and, of course, your red coloring. I highly recommend using a quality red food coloring, maybe even a gel if you have it, to keep the flavor pure. Finally, don’t forget the secret weapon for depth: a quarter cup of unsweetened cocoa powder. It’s this mix that makes them taste authentically like red velvet, not just sweet pancakes. If you want to see how I make my buttermilk biscuits, you’ll see I use that cultured goodness whenever I can!
Step-by-Step Instructions for Making Red Velvet Pancakes
This part is fast, so make sure you have your griddle warming up while you’re mixing; you don’t want that delicate batter sitting around too long! These Red Velvet Pancakes go from bowl to plate in under 20 minutes once you get into the rhythm. Pay close attention to how little you mix—that’s the game-changer here.
Combine Dry Ingredients for Your Red Velvet Pancakes Batter
First things first, grab your biggest bowl! Toss in all the dry stuff: that cup and a half of flour, the sugar, the baking soda, and the salt. Give it a good whisk around until everything looks totally uniform. We want those leavening agents spread out so every pancake puffs up evenly. It’s tedious, sure, but I always feel like I’m doing my due diligence for a good rise!
Prepare the Buttermilk Mixture
Now for the wet team! In a separate bowl—don’t save on dishes here—whisk together your buttermilk, your egg, the melted butter, vanilla extract, and that essential teaspoon of white vinegar. The vinegar is key here because it’s going to react strongly with the baking soda shortly. Make sure that egg is nicely broken up before you move on to the next step.
Mixing the Red Velvet Pancakes Batter: Avoid Overmixing
Time to marry the two bowls! Pour all the wet ingredients right into the dry. Now, this is where you need discipline! Mix *just* until the flour streaks disappear. I mean it—a few lumps are totally fine, even encouraged! As soon as it’s combined, quickly swirl in the red food coloring and the cocoa powder until the batter is a solid, gorgeous red color. Less mixing equals fluffier pancakes, always!
Griddle Prep and Cooking Your Red Velvet Pancakes
Get your skillet or griddle going over medium heat, and make sure you lightly oil it. I like to test the heat by flicking a drop of water; if it sizzles and vanishes right away, you’re ready. Ladle about a quarter cup of that bright red batter onto the hot surface for each pancake. You’ll cook them for about two to three minutes per side. Wait until you see steady bubbles forming across the top and the edges look totally set. Then, flip quickly and cook the other side until golden brown. Wipe down the pan between batches, and repeat until the batter is gone. If you need a great recipe for reheating leftovers, check out my tips on make-ahead gravy—it’s super handy for next-day breakfast recovery!
Expert Tips for the Best Red Velvet Pancakes
Listen, I know the basic steps are simple, but if you want these Red Velvet Pancakes to really wow everyone, you need to focus on a couple of tiny details I’ve figured out over trial and error. These small adjustments take zero extra time but make a huge difference in the final texture and look. If you want truly luxurious breakfast treats, keep these pointers in mind!
Achieving Deep Red Color in Red Velvet Pancakes
We’ve talked about it, but I have to stress this again: the cocoa powder we use for flavor naturally gives the batter a brownish tint. Liquid food coloring often requires way too much volume to overcome that, which can thin out your batter or add unwanted flavor. I find that using the concentrated gel coloring is the only way to get that gorgeous, deep red hue without compromising the structure of your cocoa pancakes. A little goes a long, beautiful way!
Resting the Red Velvet Pancakes Batter
This is my favorite little secret, similar to what I do when I want my produce to stay crisp—a little patience pays off! Once you’ve mixed everything, let that batter chill out on the counter for about five minutes before you even think about ladling it onto the griddle. This short rest allows the flour to fully hydrate. You’ll notice the batter thickens just slightly, which gives you a better structure for fluffier, more evenly cooked buttermilk pancakes.
Serving Suggestions for Your Red Velvet Pancakes
These Red Velvet Pancakes are so rich they almost don’t need anything else, but you know we can’t stop there! Forget maple syrup for a minute—we need toppings that honor the cake flavor profile. My absolute favorite way to serve these is with a thick, tangy cream cheese glaze drizzled right on top. It tastes exactly like the frosting on a perfect slice of cake. You can also keep it light and airy with a big dollop of freshly whipped cream.
If you’re feeling extra fancy, I sometimes make a quick batch of homemade caramel sauce just to drizzle alongside the cream cheese. A few chocolate shavings over the top and honestly, you’ve got dessert disguised as breakfast. It’s totally decadent!
Storage and Reheating Red Velvet Pancakes
If you somehow manage to have leftovers (which I rarely do!), you’ll be happy to know these reheat beautifully. Store your leftover Red Velvet Pancakes in a single layer separated by wax paper inside an airtight container. They’ll stay good in the fridge for about three days. Don’t stack them tightly without separation, or they’ll stick into one giant red disk!
When you’re ready to enjoy them again, the microwave is fastest—just zap them for about 20-30 seconds. For the crispiest texture, though, toss them into the toaster for a minute or two. It brings back that slightly crisp edge they had right off the griddle!
Frequently Asked Questions About Red Velvet Pancakes
I always get so many lovely questions after people try these—it just shows how much love there is for a good indulgence! Here are the things I hear most often about making these incredible Red Velvet Pancakes at home. If you’re already a fan of my carrot cake pancakes, you’ll love this fruity, tangy twist on breakfast!
Can I make Red Velvet Pancakes without buttermilk?
Oh, yes, totally understandable! Sometimes you just don’t have buttermilk on hand, especially when you decide to make Red Velvet Pancakes at 8 a.m. on a Saturday. Don’t panic! You can easily make your own substitute. Just take one and a half cups of regular milk—whole milk works best—and stir in one and a half tablespoons of white vinegar or lemon juice. Let that sit on the counter for about five or ten minutes until it looks slightly curdled. That acidity works just as well in reacting with the baking soda, giving you the lift you need for great buttermilk pancakes!
How do I prevent my cocoa pancakes from turning brownish instead of red?
This is the number one color confusion! Cocoa powder is naturally a bit acidic, and acid can sometimes fight with the red dye, dulling it down to a brownish-maroon if you mix them too early. That’s why I always recommend mixing your coloring *after* you’ve combined the wet and dry ingredients and *just* before you’re done mixing. Adding the red coloring last, after the cocoa is already introduced, ensures that the dye is the last thing blended in, giving you the brightest, most beautiful result possible. It preserves that gorgeous red, even when using dark cocoa pancakes batter!
Are these Red Velvet Pancakes better suited for breakfast or dessert?
That is such a fun question! When I developed this recipe, I absolutely envisioned a special brunch event—maybe a birthday morning or a holiday breakfast. They are certainly rich enough to serve as dessert; just stack them high and drench them in that cream cheese topping I mentioned earlier, and nobody is going to complain! However, their true place, in my book, is as the most indulgent breakfast you can possibly have. They feel celebratory, but they cook faster than coffee brews, so I say eat them whenever your heart desires them!
Nutritional Estimate for Red Velvet Pancakes
Now, I have to give you the grown-up talk for a second, even though these are practically cake! While these Red Velvet Pancakes are a treat, it’s good to have a rough idea of what’s in them, especially since we’re dealing with sugar and a good amount of butter. Please remember this is just an estimate, based on the ingredients I listed for two pancakes—a completely reasonable serving size if you ask me!
If you look at the totals, you can see that calories and sugar are definitely on the higher side, which is what you expect from a sweet breakfast like this. They do clock in with about 7 grams of protein, which is better than nothing! I try to balance the sweetness by serving them with fresh fruit sometimes, though I rarely skip the cream cheese topping.
For those of you counting macros or just curious, here is the rundown per serving size (which again, is two pancakes):
- Serving Size: 2 pancakes
- Calories: 250
- Sugar: 8g
- Sodium: 350mg
- Fat: 8g (with 4g saturated)
- Carbohydrates: 38g
- Protein: 7g
If you ever want to look into boosting your iron intake on other days, I have a great list of plant-based foods loaded with iron that you can check out. But for today, enjoy your sweet, gorgeous stack of red velvet goodness!
Share Your Red Velvet Pancakes Creations
I truly hope you enjoy making these Red Velvet Pancakes as much as I love eating them! Once you give them a try, I really want to know what you think—did you go with the cream cheese glaze or try something completely different?
Please, leave a star rating right down below in the comments section. It helps other bakers know they’re on the right track! And if you snap a picture of your gorgeous, vibrant stack, share it with me on social media. Tagging me is the best way to make sure I see your masterpiece!
It makes my day to see my recipes living large in your kitchens. If you have any burning questions or suggestions while you’re here, feel free to head over to my contact page, or just drop a line below. Happy flipping!
Print
Red Velvet Pancakes
- Total Time: 25 min
- Yield: About 8 pancakes 1x
- Diet: Vegetarian
Description
Make classic red velvet cake flavors into easy breakfast pancakes.
Ingredients
- 1 1/2 cups all-purpose flour
- 2 tablespoons granulated sugar
- 1 teaspoon baking soda
- 1/2 teaspoon salt
- 1 1/4 cups buttermilk
- 1 large egg
- 2 tablespoons unsalted butter, melted, plus more for the griddle
- 1 teaspoon vanilla extract
- 1 teaspoon white vinegar
- 1 tablespoon red food coloring
- 1/4 cup cocoa powder
Instructions
- In a large bowl, whisk together the flour, sugar, baking soda, and salt.
- In a separate medium bowl, whisk together the buttermilk, egg, melted butter, vanilla extract, and vinegar.
- Pour the wet ingredients into the dry ingredients. Mix until just combined; do not overmix.
- Stir in the red food coloring and cocoa powder until the batter is uniformly red. A few small lumps are acceptable.
- Heat a lightly oiled griddle or large non-stick skillet over medium heat.
- Pour about 1/4 cup of batter onto the hot griddle for each pancake.
- Cook for 2 to 3 minutes per side, until bubbles appear on the surface and the edges look set. Flip and cook the other side until golden brown.
- Repeat with the remaining batter.
Notes
- Serve with cream cheese glaze or whipped cream for a true red velvet experience.
- For a richer color, use gel food coloring instead of liquid.
- Prep Time: 10 min
- Cook Time: 15 min
- Category: Breakfast
- Method: Griddling
- Cuisine: American
Nutrition
- Serving Size: 2 pancakes
- Calories: 250
- Sugar: 8
- Sodium: 350
- Fat: 8
- Saturated Fat: 4
- Unsaturated Fat: 4
- Trans Fat: 0
- Carbohydrates: 38
- Fiber: 2
- Protein: 7
- Cholesterol: 50
Keywords: Red Velvet Pancakes, buttermilk pancakes, cocoa pancakes, breakfast recipe, sweet pancakes