
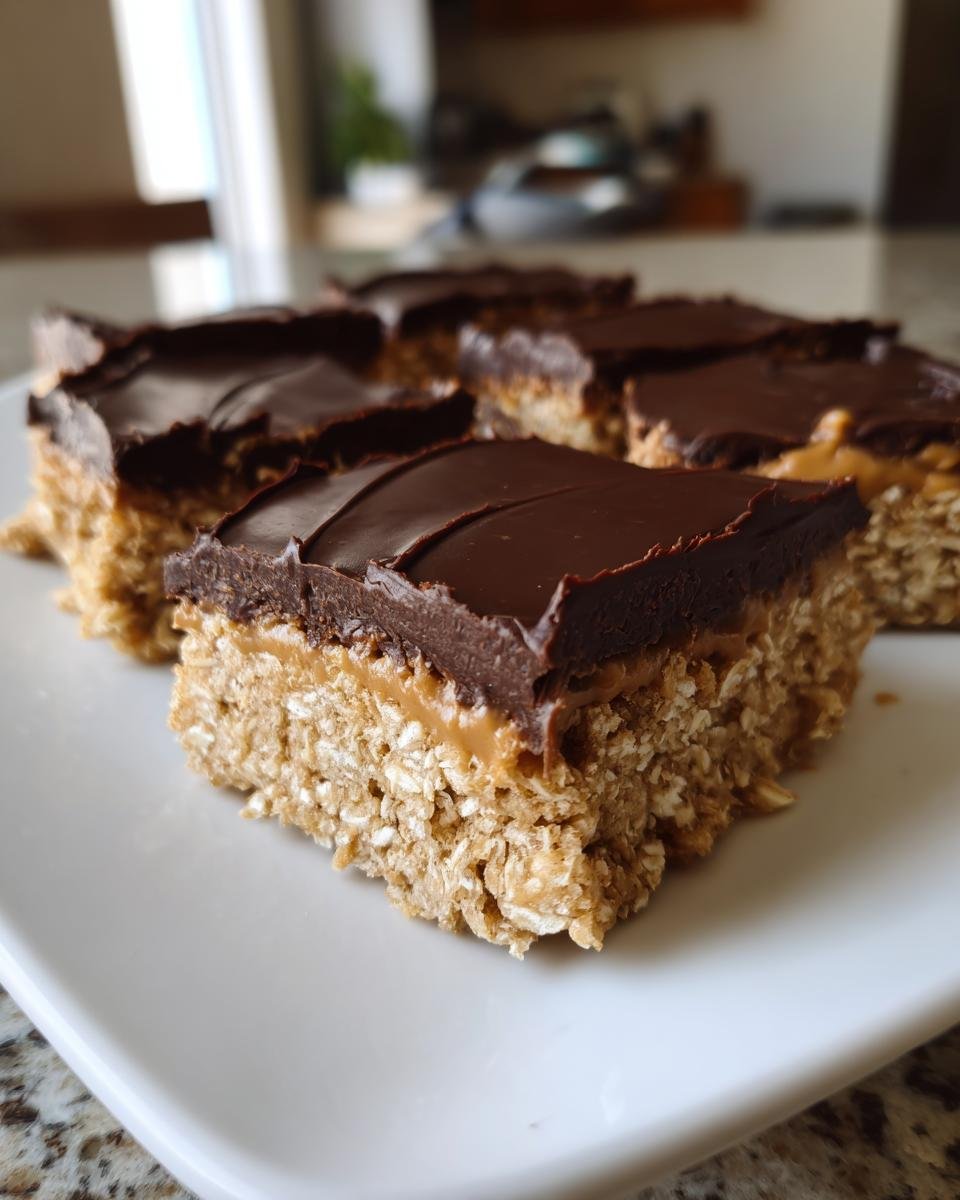
You know those days, right? It’s 3 PM, the kids are home from school, and suddenly *everyone* needs a treat, but you are absolutely done with turning on the oven in this heat. That’s when I pull out the magic recipe—the one that saves my life every single time: my **No Bake Chocolate Peanut Butter Oat Bars**! Seriously, these are possibly the easiest, fastest, zero-fuss treats you will ever whip up. There’s no waiting, no worrying about cake sinking, nothing!
I’m telling you, last week, my neighbor showed up unexpectedly right when I thought I had nothing to offer. Ten minutes later, I was setting a tray of these glorious, fudgy bars on the table. They are the ultimate emergency dessert because the whole process takes maybe 15 minutes of actual work. The flavor combo of salty peanut butter, hearty oats, and rich chocolate is just unbeatable. If you’ve been looking for that go-to quick snack, trust me, you need to bookmark this version. You can find some other quick fixes over at my collection of energy balls, but these bars are on another level!
Why You Need These No Bake Chocolate Peanut Butter Oat Bars Today
Honestly, these bars fly off the cooling rack faster than you can clean the mixing bowl. They are a total winner, and here’s the lowdown on why they need to be in your kitchen rotation immediately:
- They are ridiculously fast. Prep time is like 15 minutes, tops!
- You don’t even need an oven! Perfect for summer, or when you’re just feeling lazy.
- They use pantry staples. We’re talking oats, peanut butter, and chocolate chips—easy peasy.
- That perfect salty-sweet balance is exactly what a mid-day craving calls for.
If you love super simple treats, you might also want to check out how I make my Butterfinger dessert balls—another great no-bake wonder!

Essential Ingredients for Perfect No Bake Chocolate Peanut Butter Oat Bars
The best part about these bars being so minimal is that you probably already have everything sitting in your pantry right now. Seriously, it’s just five main things! When you only use a few ingredients, you have to make sure they are good quality because there’s nowhere for weak flavors to hide.
For the base, you absolutely need one cup of good, good rolled oats—I like them rolled, not the instant kind, for texture. Then we bring in the glue: one cup of creamy peanut butter. Trust me, creamy is the way to go here! We sweeten that up with half a cup of powdered sugar. For the glorious topping, we melt down half a cup of reliable semi-sweet chocolate chips along with two tablespoons of real butter. That’s it! Simple, right? If you want to see another great instant dessert, you should peek at my Funfetti Oreo Icebox Cake.
Equipment Needed for Your No Bake Chocolate Peanut Butter Oat Bars
You don’t need much, which is another reason I love pulling this recipe out when time is tight. Forget pulling out the stand mixer or anything complicated. We’re keeping this super streamlined!
First things first, you need an 8×8 inch baking pan. That size is perfect for getting bars that are thick enough to satisfy but not so deep that they take three days to chill. The most important tool, though, is parchment paper. You’re going to cut a sheet big enough to line that pan with an overhang on two sides—this is our little handle for lifting the whole thing out later. Don’t skip that overhang; it saves you from scraping bits off the bottom!
Make sure you have a nice medium mixing bowl ready for the oat base. For the chocolate topping, you’ll need a small saucepan—nothing crazy, just big enough to melt the chips and butter without scorching them. And naturally, you’ll need a spatula for pressing that base layer down firmly. If you want to see how I tackle equipment mishaps, check out my Scotcheroos post—it’s full of little kitchen fixes!
Step-by-Step Instructions for No Bake Chocolate Peanut Butter Oat Bars
Okay, are you ready to watch magic happen with minimal effort? This process is so straightforward, you’ll be wondering why you didn’t start making these bars years ago! First things first: get that 8×8 pan lined up. I always cut the parchment paper so it hangs over two opposite sides—think of it as built-in handles for lifting the hardened bars out later. Don’t skimp on the overhang!
Next, grab your medium bowl. Dump in the rolled oats, your creamy peanut butter, and the powdered sugar. Now, mix this situation up! You need to stir and mash until every last oat flake is coated. There shouldn’t be any dry pockets of sugar left anywhere. Once it looks uniform, transfer that entire mixture into your prepared pan.
This next part is where you need passion, my friend: Press the base down firmly! I mean it. Use the bottom of a flat glass or another smaller measuring cup to pack that oat mixture down until it’s evenly dense right to the edges. A loose base will crumble when you cut it later, and we aren’t having that! That ensures your **No Bake Chocolate Peanut Butter Oat Bars** hold their shape.
While the base is settling, get the topping ready. In a teensy saucepan over low heat, gently melt your butter and chocolate chips together. Stir it constantly until it’s completely smooth and glossy. Don’t let it get too hot! Immediately pour that liquid chocolate gold right over your pressed oat base. Work quickly now, spreading it evenly from edge to edge while it’s still wonderfully runny.
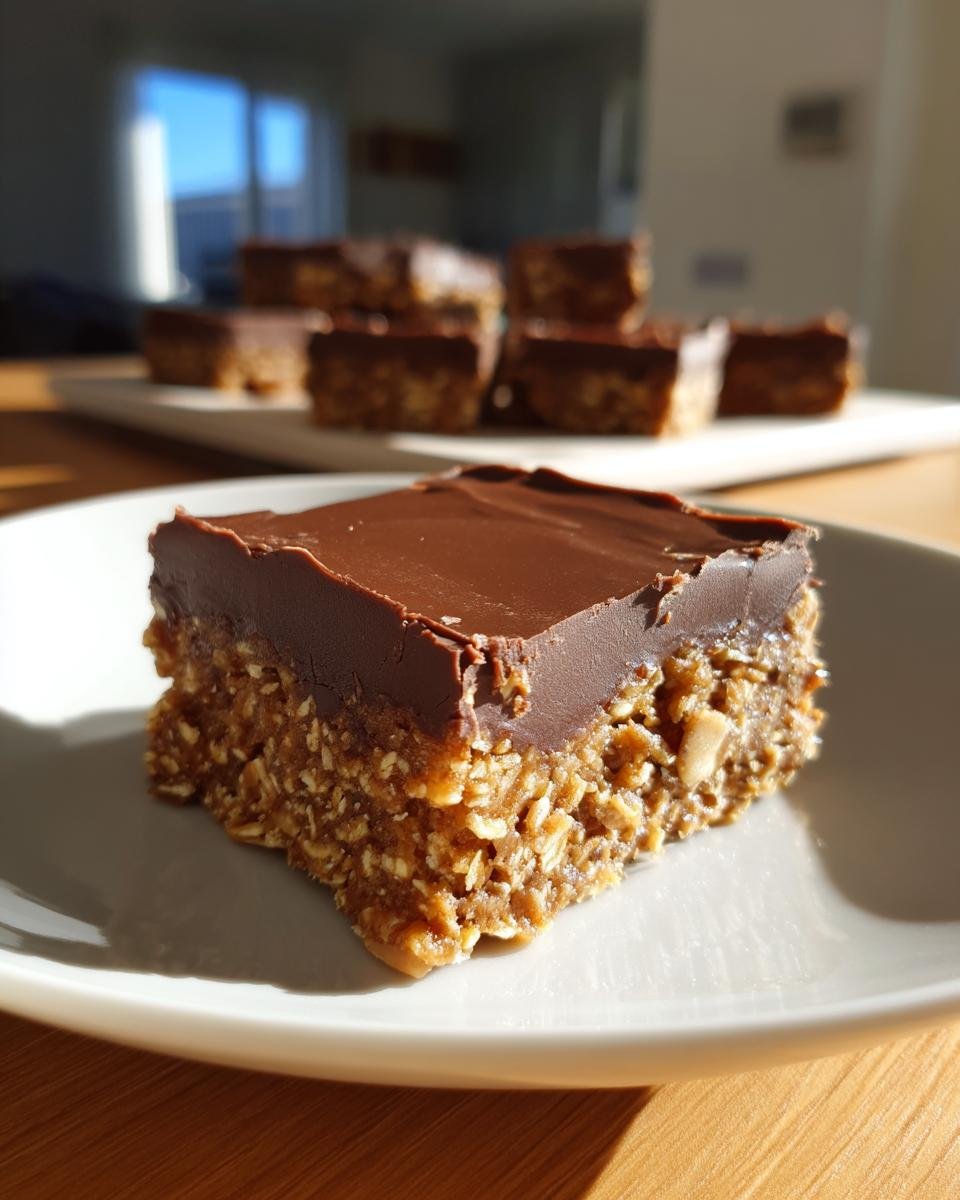
And now, the hardest part: waiting! You need to get these into the refrigerator for at least two hours. This chilling time is crucial for the chocolate topping to set up nice and firm. Once they’re rock solid, just use those parchment handles to lift the whole slab out! Then, grab a sharp knife and slice them into 16 perfect squares. It’s truly that easy. If you’re looking for another quick chocolate fix, don’t miss my recipe for no-bake chocolate marshmallow pie!
Tips for Making the Best No Bake Chocolate Peanut Butter Oat Bars
Even though these bars are famously easy, a few little tricks can take them from “good” to “Oh my gosh, what is in these?!” The chilling time is non-negotiable, but how you prep and pour can make a real difference in the final look and feel of your creation. Remember what I said about texture? Using quick-cooking oats is my secret if I want a softer, chewier bite. Rolled oats are firmer, but if you want melt-in-your-mouth magic, quick-cooking oats are the answer!
When you melt that chocolate topping, you need to move fast once it’s off the heat. That butter helps keep it soft, but the second it hits the room-temperature oat base, it starts seizing up. Don’t waste time admiring your smooth chocolate mixture! Pour it immediately and use an offset spatula—or even the back of a metal spoon—to spread it RIGHT to the corners before it locks into place. If you’re looking for other quick-fix treats, you absolutely have to try my 10-minute cookie delights. They are just as fast!

Ingredient Notes and Substitutions for No Bake Chocolate Peanut Butter Oat Bars
I know some of you amazing bakers have allergies or just don’t keep one specific thing in your cupboard. That’s fine! Because this recipe is so simple, you can absolutely make safe swaps, but you need to know what happens when you change the original lineup! We want those bars to set up beautifully, not end up as a puddle!
Let’s talk about peanut butter first, because that’s the star here. If you need to go nut-free, sunflower seed butter is a fantastic stand-in. It has a similar texture, so your base should still press together nicely. Just be prepared—the flavor will shift slightly, but it’s still delicious! If you prefer a chunkier bar, swapping creamy for crunchy peanut butter will give you little pockets of crunch in the base. It’s totally your call, but make sure you press that crunchy mixture down extra-hard!
What about the oats? I mentioned using quick-cooking oats for a softer bar, but if you only have old-fashioned rolled oats, go ahead and use those. They will give you a chewier texture, which I personally love, especially when cold. Don’t use instant oats, though; they break down too much and result in something way too mushy. Nobody wants a mushy bar!
And finally, the chocolate topping. If you’re a dark chocolate fan, feel free to swap the semi-sweet chips for dark chocolate chips. They’ll give you a richer, less sweet cap to the bar. If you don’t want to melt chips at all, you can use chocolate wafers or even real baking chocolate—just make sure you add that two tablespoons of butter for the necessary fat content. Fat helps the chocolate stay smoother longer, which is critical when you are spreading it before chilling. If you want to see how I use peanut butter in another quick format, check out my dessert cups recipe!
Storing and Serving Your No Bake Chocolate Peanut Butter Oat Bars
You’ve made the perfect **No Bake Chocolate Peanut Butter Oat Bars**, and now you need to keep them amazing! Good news: storage is super simple. Once they are fully chilled and cut, slide them into an airtight container. Keep that container right in the refrigerator. That cold temperature is what keeps the chocolate topping firm and the base from getting too crumbly!
They last really well in the fridge for about a week, maybe longer if you hide them super well! When you’re ready to enjoy one, let it sit out on the counter for just five minutes before digging in. That tiny bit of warming takes the chill off the chocolate just enough. They are honestly amazing paired with a mug of black coffee or a tall, cold glass of milk. Speaking of legendary peanut butter treats, you must see my recipe for the giant Reese’s pie—it holds up great too!
Common Questions About No Bake Chocolate Peanut Butter Oat Bars
I always get questions about these bars because people are scared to mess up something so simple! Since they rely on chilling instead of baking, people naturally wonder about stability. Here are the things I hear most often when folks are making their first batch of these chocolate peanut butter oat bars.
Can I use crunchy peanut butter instead of creamy?
You absolutely can! Talk about tailoring a treat to your preference! If you swap the creamy peanut butter for crunchy peanut butter, you are just adding extra texture to the base layer. My only warning? Make sure you really, really pack that base down firmly when you press it into the pan, because you want those crunchy bits to hold together! If you want to see another super simple peanut butter treat, check out my three-ingredient peanut butter balls.
How long do these no-bake bars last once they are made?
They last quite a while, provided you keep them cold! Because we aren’t baking out any moisture, they rely on the fridge for structure. Pop them in an airtight container right in the refrigerator, and they stay fantastic for up to a week. I wouldn’t leave them on the counter, especially if your kitchen is warm, because the chocolate topping will get soft quickly.
Is the butter melted in the chocolate topping absolutely essential?
Yes, that little bit of butter is the secret weapon for the topping! Without it, melted chocolate chips alone (especially the semi-sweet ones) tend to set up rock hard. That tablespoon or two of butter adds the necessary fat to keep the chocolate topping fudgy and smooth, making it easy to slice through cleanly when you cut the bars.
Can I use quick oats instead of rolled oats?
If you like a softer, less chewy bar texture, then switch right over to quick-cooking oats! They absorb moisture a little faster and create a slightly more cake-like base, even though there’s no baking involved. Just stick to the same measurement listed! They are great for people who don’t want a ton of chew in their quick treat.
Estimated Nutritional Information for No Bake Chocolate Peanut Butter Oat Bars
I always feel a little sheepish sharing nutrition facts for treats like these, because, let’s be honest, these **No Bake Chocolate Peanut Butter Oat Bars** are meant for pure indulgence! But, if you’re tracking things, I put together an estimated breakdown for you. This information is based strictly on the ingredients listed in the recipe above and is meant to give you a general idea, not a certified lab reading. Please remember that ingredient brands change, and how much you eat changes everything!
We’re aiming for 16 bars out of the batch, which keeps the numbers manageable for a nice afternoon snack. If you grab one of these goodies, here is what you can expect, roughly speaking:
- Calories: Around 180 per bar. That’s not bad for a treat this satisfying!
- Fat: About 11 grams total. Remember, a good amount of that fat is coming from healthy fats in the peanut butter, which is great for keeping you full!
- Carbohydrates: Hanging in there around 18 grams.
- Protein: You get about 6 grams of protein, thanks to all that peanut butter and those oats working hard!
- Sugar: Expect about 12 grams of sugar per bar.
It’s pretty amazing that you get this much flavor and staying power from such a simple mix! If you are looking into other quick-fix goodies with nutrition info, you should definitely take a look at my 5-minute peanut butter mug cake; it’s another one where I broke down the numbers so you know exactly what you’re snacking on!
Print
No Bake Chocolate Peanut Butter Oat Bars
- Total Time: 20 min
- Yield: 16 bars 1x
- Diet: Vegetarian
Description
Simple, quick bars made with oats, peanut butter, and chocolate, requiring no oven time.
Ingredients
- 1 cup rolled oats
- 1 cup creamy peanut butter
- 1/2 cup powdered sugar
- 1/2 cup semi-sweet chocolate chips
- 2 tablespoons butter
Instructions
- Line an 8×8 inch pan with parchment paper, leaving an overhang.
- In a medium bowl, mix the rolled oats, peanut butter, and powdered sugar until fully combined.
- Press the mixture evenly into the prepared pan.
- In a small saucepan over low heat, melt the chocolate chips and butter together, stirring until smooth.
- Pour the melted chocolate mixture over the oat base and spread evenly.
- Refrigerate for at least 2 hours, or until firm.
- Lift the bars out using the parchment paper overhang and cut into squares before serving.
Notes
- Use quick-cooking oats for a softer bar texture.
- Store leftovers in an airtight container in the refrigerator.
- Prep Time: 15 min
- Cook Time: 5 min
- Category: Dessert
- Method: No Bake
- Cuisine: American
Nutrition
- Serving Size: 1 bar
- Calories: 180
- Sugar: 12
- Sodium: 90
- Fat: 11
- Saturated Fat: 4
- Unsaturated Fat: 7
- Trans Fat: 0
- Carbohydrates: 18
- Fiber: 2
- Protein: 6
- Cholesterol: 5
Keywords: no bake, chocolate, peanut butter, oat bars, easy dessert, quick treat