
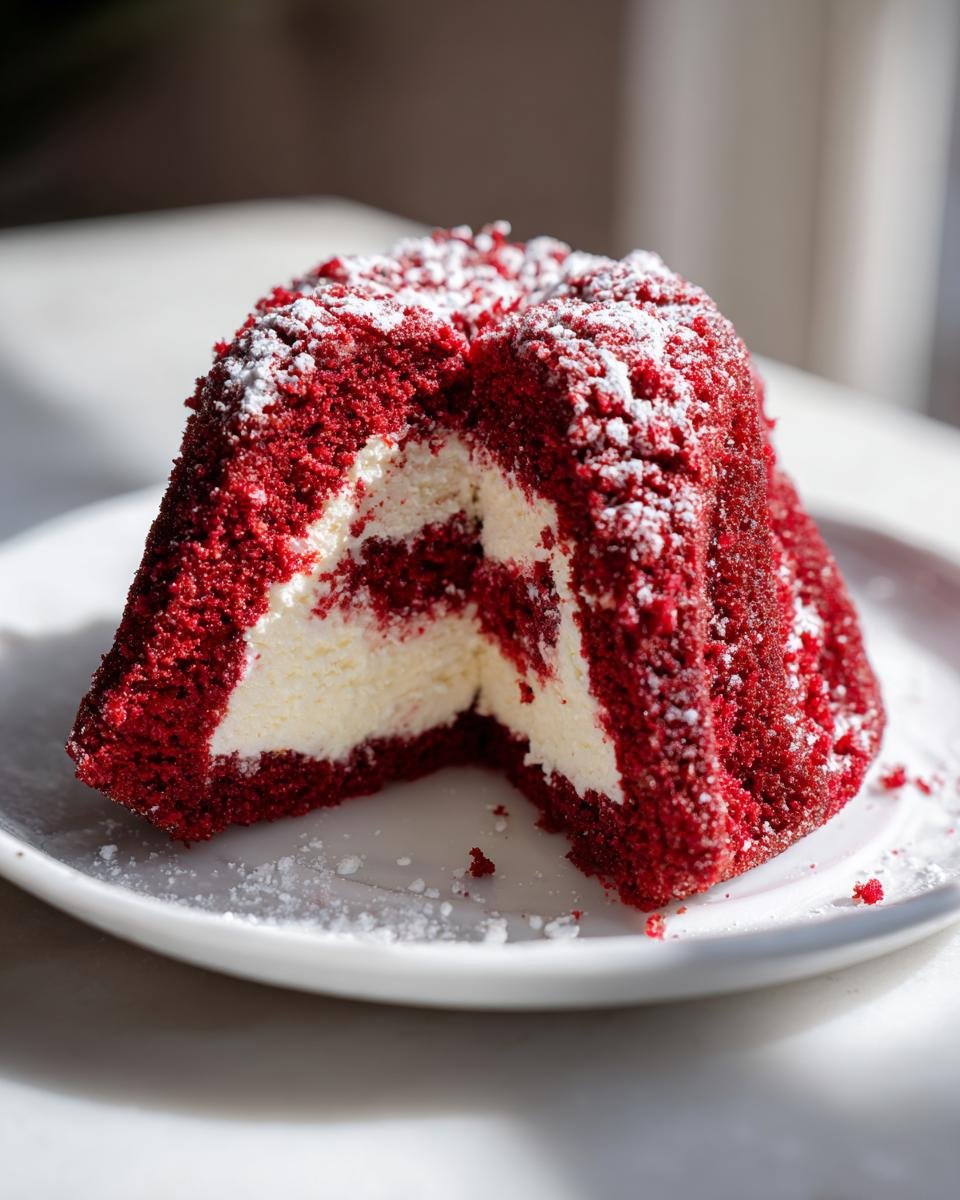
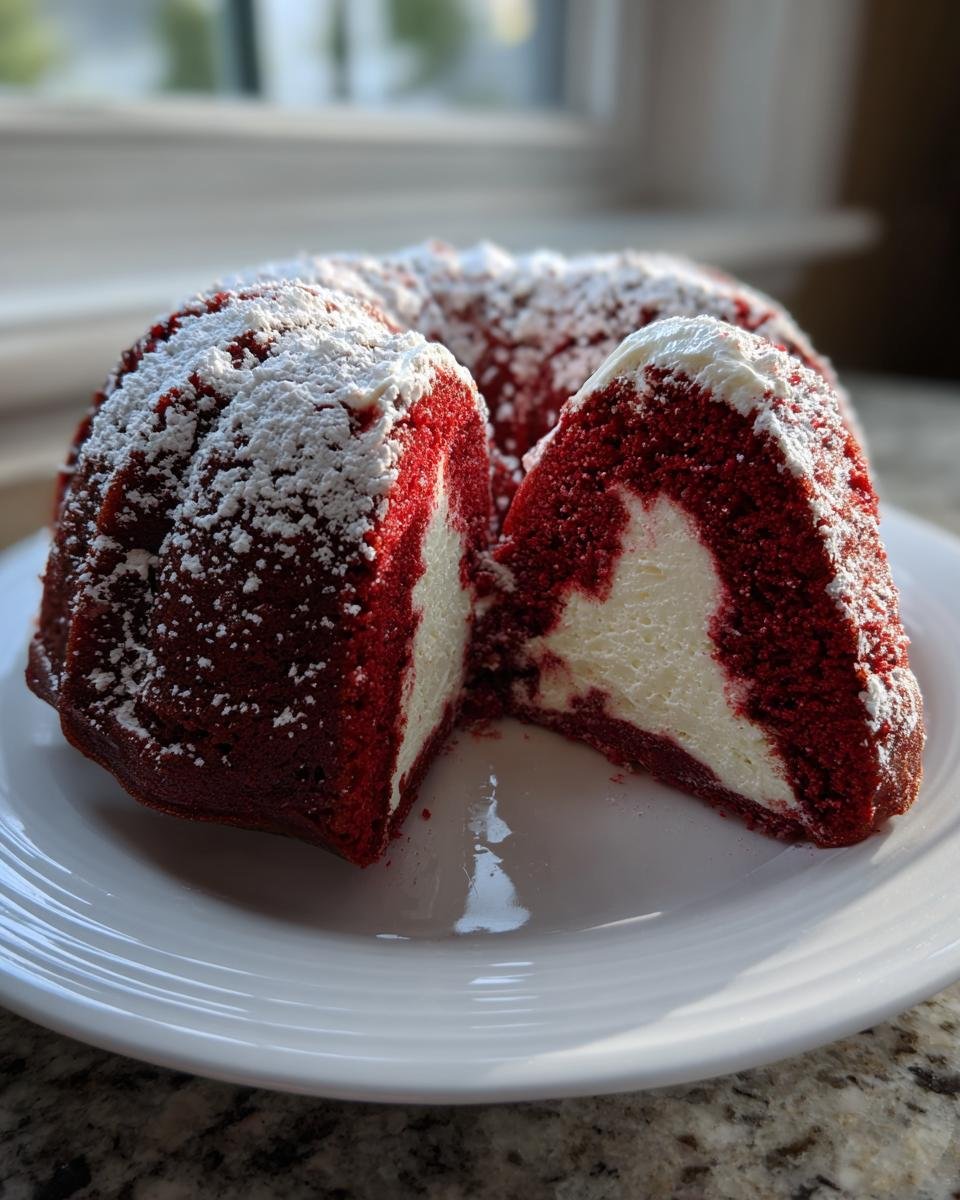
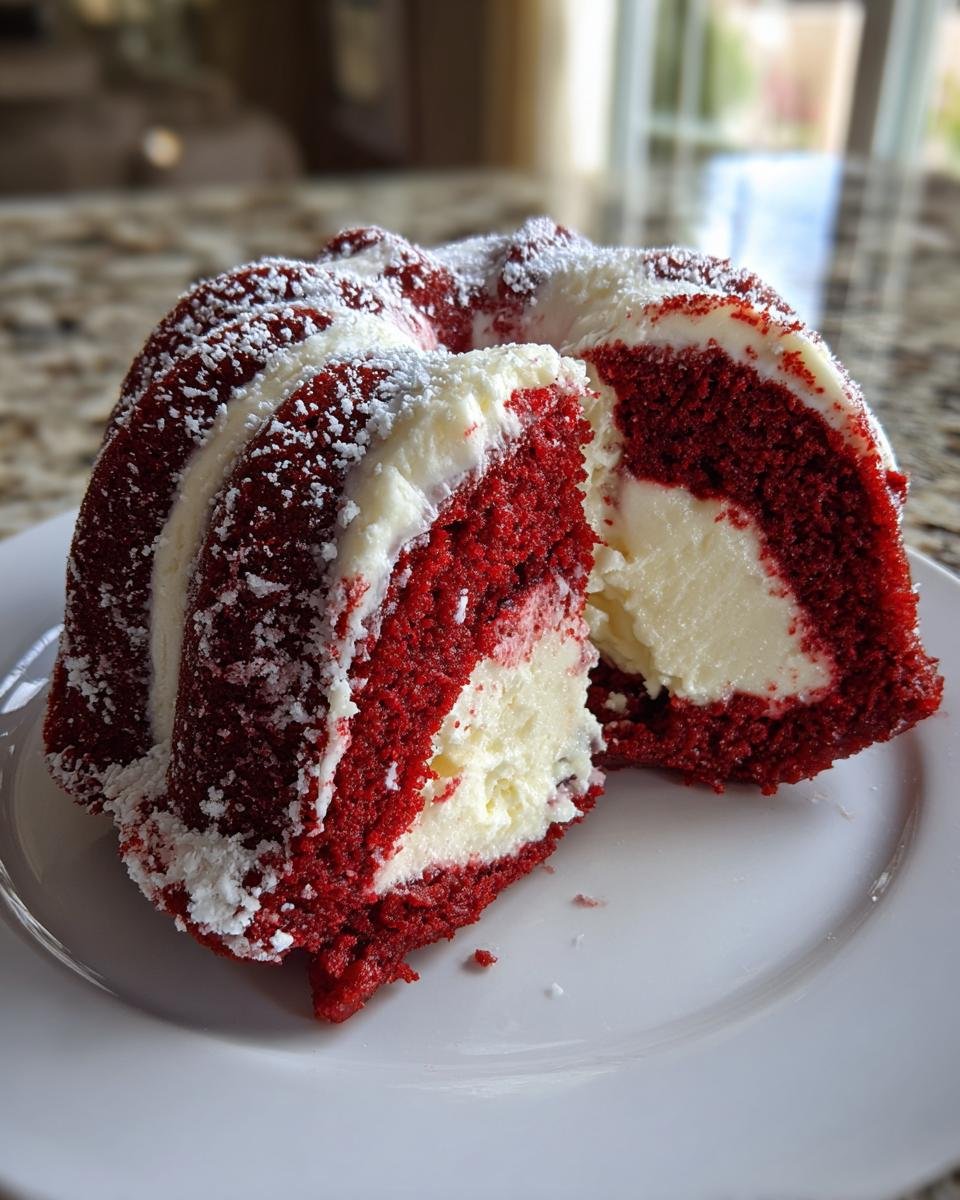
Oh, my gosh, get ready because if you love rich desserts that look like they took three days to make but secretly come together using just a few easy steps, you are going to be obsessed with this one! Seriously, I dream about the contrast in textures here. We’re talking about that deep, slightly tangy red velvet cake hugging the creamiest, smoothest cheesecake filling you can imagine. And baking it all in a beautiful Bundt pan? That just seals the deal on presentation!
The first time I nailed the ratio for this Layered Red Velvet Cheesecake Bundt Cake, I almost cried, it was so gorgeous coming out of the pan. It means you get all the celebratory effort of a layered cake without the fuss of leveling and frosting a towering structure. Trust me, once you try this combination, nothing else will quite stack up! If you want to know more about our kitchen philosophy, check out our page here, because we believe baking should always be this exciting.
Ingredients for Your Layered Red Velvet Cheesecake Bundt Cake
Don’t let the fancy name scare you! We are sticking mostly to the box for the cake part, which is honestly such a brilliant shortcut for busy bakers like us. For the cheesecake swirl, you’ll need full fat ingredients to make sure it stays nice and rich, not runny. Make sure you grab the full box mix and all the things listed on the side—you need those eggs and that oil!
Here’s the complete shopping list for this incredible dessert. And just a quick note, when you grab your cream cheese, make sure it’s been sitting out for a bit—that’s important!
- 1 box (15.25 ounces) red velvet cake mix, plus all the other ingredients called for on that box (usually water, oil, and eggs, check yours though!).
- 1 package (8 ounces) cream cheese, and this has to be fully softened, please!
- 1/4 cup granulated sugar for the cheesecake swirl.
- 1 large egg, just for the cheesecake part.
- 1 teaspoon vanilla extract—use the real stuff if you have it!
- 1/4 cup sour cream—this keeps the filling unbelievably creamy.
- 1/4 cup powdered sugar for dusting when we’re done.
Sometimes I look at this list and just think, “Wow, that’s it?” It proves you don’t need a pantry full of fancy stuff to make something truly show-stopping. If you are looking for more simple recipes that pack a punch, I keep my favorites cataloged over here!
Preparing the Pan and Oven for the Layered Red Velvet Cheesecake Bundt Cake
Okay, before we even mix the first thing, we need to talk about the oven and that gorgeous Bundt pan. Get your oven heated up to 350 degrees F (175 degrees C). If the oven isn’t ready when the batter is, we lose precious time, and that’s not good for any cake!
Now, the pan. You absolutely cannot skip or rush greasing and flouring a Bundt pan, especially when you have a dense cake like this Layered Red Velvet Cheesecake Bundt Cake. I use shortening for greasing because it sticks better than butter, getting right into all those lovely ridges. Then, dust it generously with flour, tapping out all the excess. My little trick? If you’re nervous, use butter and flour for greasing, and then dust with cocoa powder instead of flour—it prevents that white coating on dark cakes!
If you want to see the best way to prep pans for any tricky cake, check out my guide on pan prepping right here. It’s a lifesaver!
Making the Red Velvet Cake Batter for the Layered Red Velvet Cheesecake Bundt Cake
This is the easy part, folks! We’re sticking to the box mix, which is smart because we need maximum effort focused on that cheesecake swirl. Grab your biggest bowl because you’re going to mix up the red velvet batter exactly as the instructions on the box tell you to. Don’t try adding extra liquid or anything, just follow those steps!
Once it’s mixed smooth—but not too fluffy, don’t overdo it—set that beautiful, vibrant red batter aside. Everything needs to be ready to go for layering the Layered Red Velvet Cheesecake Bundt Cake. Need a refresher on the best mixing techniques for cake bases? I wrote a quick post about that for you here!
Crafting the Creamy Cheesecake Filling
Now we move to the star of the middle layer: the cheesecake filling. This step needs a bit more attention, but trust me, it’s worth the few minutes of electric mixing! First things first, make sure that cream cheese is *really* soft. If it’s cold, you’ll end up with lumps, and nobody wants lumpy cheesecake in their cake!
Get your mixer out—the hand mixer is perfect here—and beat that softened cream cheese with the granulated sugar. You want this mixture to be completely smooth, almost like silk. This is where you build the foundation for that creamy texture in the final bake.
Once it looks perfect, gently add in the egg, the vanilla extract, and that sour cream. Mix it only until everything just comes together. Seriously, stop as soon as you don’t see white streaks anymore! Overmixing that cheesecake batter when it has eggs in it adds too much air, and that can cause sinkholes or a slightly grainy texture when it bakes. We want smooth and dense, remember?
If you want to see how I use my favorite immersion blender for smaller mixing jobs like this, it’s a game-changer! You can read about it over at this short post. It really helps cut down on cleanup!
Layering the Perfect Layered Red Velvet Cheesecake Bundt Cake
This is the moment of truth where everything comes together, and honestly, it’s surprisingly quick! Remember, your pan is prepped, your cake batter is waiting, and your cheesecake mixture is smooth. We are building this beauty in alternating layers to make sure you get both flavors in every single slice of your Layered Red Velvet Cheesecake Bundt Cake.
Start by pouring exactly half of your beautiful red velvet batter into the bottom of that prepared Bundt pan. Don’t stress about making it perfectly level; the cheesecake helps fill in any gaps!
Next, take half of that creamy cheesecake mixture and gently spoon it right over the cake layer. Try to spread it out evenly, but don’t push too hard against the red batter underneath.
Once the first cheesecake layer is down, pour the rest of your red velvet batter on top. Finally, dollop the remaining cheesecake mixture over the very top layer. If you’re feeling extra fancy, take a butter knife and gently swirl it once or twice to create a marbled effect—but don’t overdo it! Too much swirling mixes them together, and we want distinct layers. For more great layering tips, check out what I’ve learned about stacking recipes right here!
Baking and Cooling the Layered Red Velvet Cheesecake Bundt Cake
Time to put this masterpiece into the heat! Pop that beautifully layered Bundt pan right into your preheated 350°F oven. The baking time is usually around 50 to 60 minutes, but you know I always say use your senses, not just the clock. You want a wooden skewer inserted right near the center to come out clean, which tells you the cake part is done, and the cheesecake has set up nicely.
Don’t rush the cooling, please! This is where so many amazing Bundt cakes get ruined when people try to rush them out too soon. Let your Layered Red Velvet Cheesecake Bundt Cake sit right there in the pan on a wire rack for a full 15 minutes. This critical waiting period allows the cake structure to firm up, especially since we have that creamy cheesecake running through it.
After those 15 minutes, gently invert the whole thing onto the rack and let it cool completely—and I mean completely, maybe even chill it a bit before cutting. If you try to slice it hot, the cheesecake layer will just smear everywhere. Learning how long to wait is the secret to getting those clean slices! If you need a little inspiration on oven science, I’ve got some great reads about testing for doneness over here!

Tips for Success with Your Layered Red Velvet Cheesecake Bundt Cake
No one wants a dramatic cake fail after all that layering work! The key here is just remembering those three crucial little details that guarantee a stunning Layered Red Velvet Cheesecake Bundt Cake. It’s all about control, my friends, not complicated cooking.
Make Sure That Cream Cheese Is Truly Soft
I hammered this point home before, but honestly, it bears repeating. If your cream cheese is cold when you start whipping it, you’re going to get little lumps of cheese in your smooth filling. Take it out early! It needs to be soft enough that you can easily push your finger into it without resistance. It makes that cheesecake layer look professional and taste divine.
Do Not Overbake—Moisture Is Everything
Because we have two different textures happening, timing is everything. The red velvet mixture can dry out fast, and if you bake it too long, you’ll lose that wonderful moist crumb we worked so hard for. Start checking early! Pull the cake out as soon as that skewer comes out with just moist crumbs clinging to it, not wet batter, of course. A little underdone is always better than totally dry with this dessert.
The Trick to Leveling Your Bundt Cake
When you invert this cake, the top layer might settle lower since it’s the cheesecake. If you notice right after you pull it out of the oven that one side looks significantly lower, you can gently prop up the lower side of the cooling rack with a small folded towel for the first 15 minutes of cooling. This nudges the liquids to settle more evenly before you flip it out. A slightly level cake just looks better once it’s dusted!
If you want to know more about managing baking temperatures, I talk about how I use my oven thermometer all the time in this little guide!
Serving Suggestions and Storage for Your Dessert
The moment of truth! Patience has paid off, and your cake is completely cool on the rack. Before you even think about cutting this beauty, we have to do the final, simple flourish: dusting it with powdered sugar. It just pops against that deep red velvet, making the swirls of cheesecake filling underneath look even more dramatic and delicious.
I usually just use a small sifter and give it a light, even dusting. That’s all this dessert needs! Trying to add a heavy cream cheese frosting on top of the cheesecake layer tends to get messy, so trust me on the simple sugar finish.
Simple Ways to Serve This Cake
This dessert is so rich, it really doesn’t need much else, but if you want to jazz up the plate, try these ideas:
- A few fresh raspberries or sliced strawberries scattered on the plate provide a lovely color contrast and a little brightness.
- A simple dollop of lightly sweetened whipped cream on the side is divine.
- Honestly, my favorite way to serve it is just with a strong, piping hot cup of black coffee. The bitterness cuts through the richness perfectly.
If you want to see how I make the absolute easiest whipped cream topping, I shared my favorite ratio in this short post!
Keeping Leftovers Fresh
Now, this is important! Because we have that wonderful, creamy cheesecake baked right into the middle, this cake *has* to be stored in the refrigerator. You can’t just leave it on the counter like a regular cake, okay?
Once you’ve sliced what you need, cover the remaining cake tightly with plastic wrap, or better yet, place the slices in an airtight container before chilling. It stays perfectly good in the fridge for about four days. When you want to serve a piece, give it about 20 minutes on the counter before slicing again—it tastes much better when it’s not fridge-cold!
Frequently Asked Questions About the Layered Red Velvet Cheesecake Bundt Cake
Okay, I know you’re going to have questions, because this cake is a mix of two amazing things, and sometimes mixes can be tricky! Baking is science, but it’s also intuition, so let’s clear up any worries you have before you start mixing up your next Layered Red Velvet Cheesecake Bundt Cake. Fire away!
Can I use a regular 9×13 cake pan instead of a Bundt pan?
You absolutely *can* use a standard 9×13 inch baking dish! If you do this, you’ll skip the pan greasing and flouring step and just use cooking spray or line it with parchment paper. The trade-off is that you lose that beautiful, decorative shape, and the baking time will be much shorter because the heat reaches the center faster in a wide, shallow pan. I’d start checking for doneness around 35 minutes if you switch pans!
What should I do if my cheesecake layer sinks or gets lumpy?
Listen, this happens to the best of us, but let’s try to prevent it! If your cheesecake layer sinks or cracks, it’s usually because the cream cheese wasn’t soft enough, or you overmixed the cheesecake batter, introducing too much air which causes it to puff up and then collapse. If you see lumps, it means the cream cheese was cold, so don’t worry too much—it will still taste great, but it won’t look as pretty when sliced. For a smoother result next time, ensure your cream cheese and egg are room temperature!
Can I make this dessert ahead of time?
Yes, and I highly recommend it! Because this cake has a cheesecake component, it actually tastes even better the next day once those flavors have really settled in. You can assemble and bake the whole Layered Red Velvet Cheesecake Bundt Cake the day before. Just let it cool completely before covering it tightly and popping it into the fridge overnight. Just remember to take it out about 30 minutes before serving so it’s not too cold!
How essential is the sour cream in the cheesecake filling?
Oh, that sour cream is my little secret weapon for the texture, I wouldn’t skip it if I were you! It adds a slight tang that cuts through the sweetness of both the red velvet cake and the filling itself. Plus, the fat content helps keep that cheesecake portion incredibly smooth and moist, rather than dense and dry. For the best creamy texture, stick to the recipe! If you are curious about my other favorite ingredient swaps, I cover a few of those over at this handy breakdown.
Print
Layered Red Velvet Cheesecake Bundt Cake
- Total Time: 80 min
- Yield: 12 servings 1x
- Diet: Vegetarian
Description
A recipe for a moist red velvet cake layered with creamy cheesecake baked in a Bundt pan.
Ingredients
- 1 box (15.25 ounces) red velvet cake mix
- Ingredients called for on cake mix box (usually eggs, oil, water)
- 1 package (8 ounces) cream cheese, softened
- 1/4 cup granulated sugar
- 1 large egg
- 1 teaspoon vanilla extract
- 1/4 cup sour cream
- 1/4 cup powdered sugar for dusting
Instructions
- Preheat your oven to 350 degrees F (175 degrees C). Grease and flour a 10-cup Bundt pan.
- Prepare the red velvet cake batter according to the package directions. Set aside.
- In a medium bowl, beat the softened cream cheese and granulated sugar with an electric mixer until smooth.
- Beat in the egg, vanilla extract, and sour cream until just combined. Do not overmix.
- Pour half of the red velvet cake batter into the prepared Bundt pan.
- Gently spoon half of the cheesecake mixture over the cake batter in the pan.
- Pour the remaining red velvet cake batter over the cheesecake layer.
- Spoon the remaining cheesecake mixture over the top layer of cake batter. You can swirl gently with a knife if desired.
- Bake for 50 to 60 minutes, or until a wooden skewer inserted near the center comes out clean.
- Let the cake cool in the pan on a wire rack for 15 minutes.
- Invert the cake onto the wire rack and let it cool completely.
- Dust with powdered sugar before slicing and serving.
Notes
- Ensure the cream cheese is fully softened for a smooth cheesecake layer.
- Do not overbake to keep the cake moist.
- Cooling time in the pan is important for structure.
- Prep Time: 20 min
- Cook Time: 60 min
- Category: Dessert
- Method: Baking
- Cuisine: American
Nutrition
- Serving Size: 1 slice
- Calories: 350
- Sugar: 35
- Sodium: 250
- Fat: 20
- Saturated Fat: 12
- Unsaturated Fat: 8
- Trans Fat: 0.5
- Carbohydrates: 40
- Fiber: 1
- Protein: 5
- Cholesterol: 60
Keywords: red velvet, cheesecake, bundt cake, layered cake, dessert, cream cheese frosting