
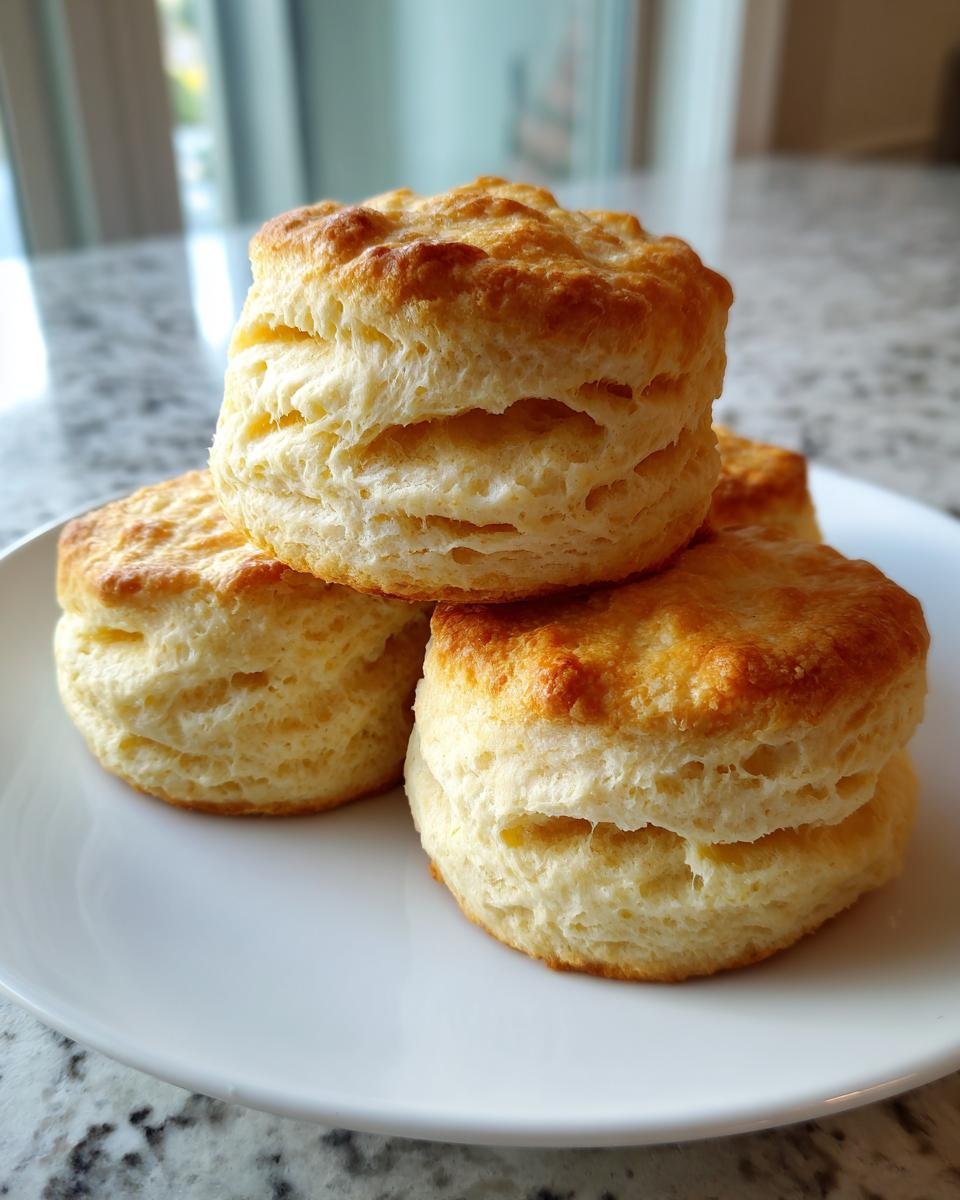
Oh my goodness, there is nothing—and I mean *nothing*—that beats the smell of real baking filling your house on a Saturday morning. Forget those sad, flat disks you get from the can! I’m going to share the secret to my foolproof **Homemade Buttermilk Biscuits** recipe that gives you layers thick enough to split with a spoon. I remember the first time I tried making them; I used melted butter out of impatience and ended up with dense little hockey pucks. Don’t do what I did! This recipe is streamlined, fast, and guarantees incredibly soft, flaky results every single time. Seriously, you can have these on the table faster than you can drive to the store!
Why You Will Master Homemade Buttermilk Biscuits Today
Look, these aren’t fancy French pastries; they are honest, comforting American classics, and they are so easy to nail. If you can whisk four things together and cut some cold butter in, you are already halfway there. Trust me, once you see how simple the process is, you’ll never look back toward the bakery aisle again. I promise!
- You’ll have these ready for the oven in about 15 minutes flat.
- The structure is built for layering—we are chasing that fluff!
- It’s one of the fastest ways to feel like a baking hero. If you want to take them up a notch later, try pairing them with my amazing Biscuits and Gravy Casserole!
Quick Preparation Time for Homemade Buttermilk Biscuits
Honestly, 15 minutes of active work is nothing! By the time you get the oven up to temperature, you can be pulling these out piping hot. They are true ‘quick bread’ perfection because there is no yeast waiting around. It’s instant gratification, which I fully support.
Achieving Ultimate Flakiness in Your Homemade Buttermilk Biscuits
Flakiness is the holy grail here, right? We want visible layers that pull apart beautifully. That delightful texture comes from being quick, being cold, and resisting the urge to overwork the dough. When you master that, you have achieved ultimate flakiness!
Essential Ingredients for Perfect Homemade Buttermilk Biscuits
So, let’s talk about what goes into this magic. You probably have most of this stuff already sitting in your pantry! The beauty of making **homemade buttermilk biscuits** is that they rely on simple foundation ingredients, but their preparation is everything. We need four dry ingredients, the fat, and the star liquid—the buttermilk!
Remember, these measurements are tried and true, so stick to them for the best results. If you ever want a slight variation, check out my recipe for sour cream biscuits, but for this classic, you need the real deal buttermilk!
- 2 cups all-purpose flour – Your structure base.
- 1 tablespoon baking powder – This gives the initial lift.
- 1 teaspoon salt – Never skip the salt; it wakes up the flavor!
- 1/2 teaspoon baking soda – This reacts perfectly with the acid in the buttermilk.
- 1/2 cup cold unsalted butter, cut into small pieces – This has to be ice cold, okay?
- 3/4 cup cold buttermilk – Our essential wet component.
See? Not scary at all! Just make sure that butter goes straight from the fridge to the bowl for maximum lift.

Expert Tips for Making the Best Homemade Buttermilk Biscuits
Okay, now we are moving into the realm of true biscuit mastery! Anyone can mix ingredients, but getting that beautiful, flaky rise? That takes knowing a couple of little secrets. When you’re aiming for the best **Homemade Buttermilk Biscuits**, temperature control and handling are your two biggest allies. Don’t rush this part; these little tips are what separate the good biscuits from the mind-blowing ones.
If you feel like you’re getting things wrong, don’t stress! I’ve made enough wonky batches to know exactly where people usually go wrong, especially when trying out variations like my buttermilk beignets later on.
The Importance of Cold Butter in Homemade Buttermilk Biscuits
Listen to me, if you think your butter is cold enough, chill it for another five minutes. I want that butter rock-solid when it goes into the flour mixture. Why? Because when that super-cold butter hits the hot oven, it creates steam, and that steam is literally what pushes the dough layers apart, giving you that gorgeous, tall, flaky texture.
If your butter is soft, it just melts right into the flour, and you end up with a cookie, not a biscuit! Pop those cubed butter pieces in the freezer for about ten minutes right before you start mixing. You want the pieces to be distinct pea-sized chunks left over after you cut them into the flour; that visibility is key to achieving true lift.
Buttermilk Substitute for Homemade Buttermilk Biscuits
Sometimes I run out of buttermilk, and I refuse to drive to the store for just one cup! That’s when the emergency backup comes out. If you don’t have buttermilk, you can quickly make your own for these **homemade biscuits**. It’s science, really—you need an acid to react with that baking soda we added.
Here’s the trick: take 3/4 cup of regular milk—whole milk is best, but whatever you have works—and stir in 3/4 teaspoon of white distilled vinegar or fresh lemon juice. Let that sit on the counter for five minutes. It will look slightly curdled, and that’s exactly what you want! It’s successfully ‘soured’ and ready to provide the perfect acidic kick for a huge rise. Don’t forget to check out the one crucial mistake people make when they try to substitute ingredients!
Step-by-Step Instructions for Homemade Buttermilk Biscuits
Alright, let’s get these mixed up! Since we talked about keeping everything cold, we need to move quickly but gently when combining the ingredients. Remember, these **homemade buttermilk biscuits** come together so fast, which is fantastic, but haste means you have to be careful not to wake up that gluten in the flour. We want tenderness, not toughness!
First things first: crank that oven up to 425 degrees Fahrenheit and get your baking sheet ready with a little grease. Now, follow this order exactly:
- Take your dry ingredients—flour, baking soda, salt, and powder—and whisk them really well in a big bowl. That ensures the leavening agents are evenly distributed!
- Now, cut in that icy cold butter using your hands or a pastry blender until it looks like coarse crumbs. Keep touching it to a minimum!
- This is the moment of truth: pour in all 3/4 cup of that cold buttermilk all at once.
- Stir it with a fork, and I mean *gently*. Stop mixing the second you see the flour disappear. Seriously, **do not overmix**! A shaggy mess is exactly what you want right now.
- Tip the whole thing out onto a lightly floured space. Give it a few gentle kneads—maybe three or four times—just until it holds together.
- Pat or roll that dough out until it’s a nice 3/4 inch thickness. No rolling pins necessary if you’re in a rush, you can just pat it out with your hands!
- Use your cutter and press straight down—don’t wiggle it! Place them close together on your pan if you like soft sides, or further apart for crispy edges.
- Bake them for about 12 to 15 minutes until they are beautifully golden brown on top. Then, get ready to smother them in gravy or jam! If you’re interested in other lightning-fast fresh breads, you should check out my guide for amazing homemade bread in 1 hour, though biscuits are definitely faster!
How to Cut and Shape Your Homemade Buttermilk Biscuits
This part is actually kind of fun! Once your shaggy dough comes together after those three or four little kneads, it’s time to get it ready for the oven. Getting the thickness right is the secret to that impressive height we are looking for in perfect **homemade buttermilk biscuits**.
You want the dough to be about 3/4 of an inch thick. If it’s too thin, they won’t stand up tall. If it’s way too thick, the middle might not cook before the edges get dark. Pat it out gently until you reach that sweet spot.
The Right Way to Use Your Biscuit Cutter
When you go in with that cutter—and please, use a sharp one!—you need to press straight down and lift straight up. I see people twisting it all the time, trying to give it an extra little wiggle to “cut better.” Don’t do that! Twisting seals the edges shut, and when the edges seal, the steam gets trapped inside and can’t push the layers up. We want those layers to be free to stretch toward the sky!
Placement Matters for Texture: Soft Sides vs. Crispy Sides
This is such a simple trick that makes a huge difference in your final batch. Do you like soft, tender sides that merge nicely with the next biscuit, or do you prefer edges that brown up and get slightly crispy? It all comes down to spacing on that baking sheet.
- For Soft Sides: Place the rounds of dough right next to each other on your greased baking sheet. Touching dough prevents the sides from browning much, forcing the lift to happen straight up. It’s perfect for dripping gravy over!
- For Crispy Sides: Leave about an inch or two of space between each biscuit when placing them down. This gives the heat air circulation around the whole surface, ensuring every side gets nice and golden brown.
Either way you slice it—or cut it—it’s going to taste amazing when it comes out hot, but knowing this small placement difference gives you control over the final texture!
Baking Time and Golden Brown Finish for Homemade Buttermilk Biscuits
Okay, we’ve mixed gently, we cut straight down, and they are nestled perfectly on that pan. Now, the exciting finish line: the oven! Baking these **homemade buttermilk biscuits** is actually pretty fast, which is why they are such a perfect breakfast staple when you need something great in a hurry. Remember, we cranked that heat up high for a reason!
The Required Temperature for Maximum Rise
Make sure your oven is definitely standing steady at 425 degrees Fahrenheit before those biscuits even think about going in. That blast of high heat is crucial! It’s what immediately starts turning the little pockets of butter we created into powerful steam, forcing those layers apart for a massive lift. If your oven isn’t hot enough, the butter melts slowly before it can steam, and those layers just lay flat.
Visual Cues: When Are They Done?
The recipe says 12 to 15 minutes, but you should always use your eyes more than your timer when baking bread. You are looking for that gorgeous golden brown color on the tops. They shouldn’t be pale when they come out; they should be a rich, warm brown.
If you happen to have nestled them really close together (for soft sides, remember?), you might want to quickly rotate the pan halfway through. This ensures even browning along the exposed tops. When they look beautifully bronzed and smell like heaven, they are ready! Pull them out immediately and get them onto a cooling rack—or, better yet, straight onto the table for slathering with honey butter while they are still steaming hot!
Serving Suggestions for Your Homemade Buttermilk Biscuits
Okay, you’ve pulled those beauties out of the oven, and they are steaming hot—this is the absolute best moment for **Homemade Buttermilk Biscuits**! Don’t walk away and forget about them for an hour while you answer emails. They need to be enjoyed right away! I honestly think there’s no better breakfast in the world than splitting one open while it’s still hot enough to melt butter instantly.
For my family, these biscuits are almost always paired with something savory, but they work wonderfully with sweet toppings too. It all depends on what kind of mood I’m in!
The Classic Pairing: Biscuits and Gravy
You can’t talk about biscuits without talking about gravy! Whether you’re going light with a simple black pepper white gravy or going all out with sausage gravy, these flaky layers are the perfect vessel. In fact, if you’re planning a big brunch, you really need to try my ultra-fast country gravy recipe—it’s ready in minutes, so you don’t have to stress about timing everything perfectly. You can find it here: amazing homemade country gravy mix ready in 5. A pile of flaky biscuits soaking up that warm gravy? Pure heaven.
Sweet Fixings for Your Homemade Buttermilk Biscuits
Sometimes, though, I just want something simple. These biscuits are fantastic split, toasted lightly under the broiler if they’ve cooled a touch, and smothered in high-quality jam. Strawberry, blackberry, or even peach preserves work perfectly. And let’s not forget the absolute classic: honey butter!
To make quick honey butter, just whip some softened butter with a drizzle of honey until it’s creamy and pale. It’s so much better than straight cold butter because it spreads without tearing up those gorgeous layers you worked so hard to create.
My Personal Favorite Way to Serve Them
If I’m serving them as a quick side to fried chicken or just for an afternoon snack, my personal go-to is very simple: a thin swipe of butter, a sprinkle of flake salt on top, and a tiny drizzle of maple syrup. It hits every note—salty, sweet, rich, and warm. Honestly, you don’t need much else when the biscuit itself is this good!

Storage and Reheating Homemade Buttermilk Biscuits
I know, I know—they taste best the second they come out of the oven, but sometimes life gets in the way, and you end up with leftovers! Don’t sweat it. These **homemade buttermilk biscuits** store surprisingly well, provided you treat them right. The biggest mistake people make when storing baked goods is letting them dry out or get soggy.
If you are lucky enough to have any left over from breakfast, you need to plan for their storage right away. Don’t leave them sitting on the counter uncovered for hours; we need to lock in that beautiful tenderness we achieved with the cold butter and buttermilk.
Keeping Leftover Homemade Buttermilk Biscuits Fresh
The key here is an airtight container. Once the biscuits have cooled completely—and I mean completely, or you’ll steam them in the container and make them damp—tuck them into a good quality, sealable container. A large zip-top bag works in a pinch, but a hard-sided container is better. They usually stay perfectly soft on the counter for about two days this way.
If you know you won’t get to them by day three, you can absolutely freeze them! Wrap them tightly first in plastic wrap and then slip them into a freezer bag. They should be fine for up to two months. Just remember to unwrap them before you try to warm them up!
The Best Way to Reheat Homemade Buttermilk Biscuits
Look, I’m going to be honest: the microwave is the enemy of a good biscuit. It makes them taste soft and chewy in a bad way, and it steams them until they are dense again. We worked so hard to get those fluffy layers, so please promise me you won’t zap them in the microwave for too long!
Your best bet for reheating is the oven or a toaster oven. Preheat it to around 350 degrees. Pop the biscuits right onto a baking sheet—no need to add moisture back in—and let them warm up for about 5 to 7 minutes. You just want them hot all the way through. That little bit of dry heat reactivates the crispy outside and makes the inside tender again without making them tough. If you are reheating a frozen biscuit, let it thaw on the counter for 30 minutes first, or add 2-3 extra minutes to the baking time!
Frequently Asked Questions About Buttermilk Biscuits
I get so many wonderful questions about these **homemade buttermilk biscuits**! It’s natural to have questions when you’re trying a new baking technique, but I want to assure you that once you get the hang of the cold-ingredient rule, you’ll be set for life. Here are some of the things I hear most often from folks baking along.
Can I use regular milk instead of buttermilk in Homemade Buttermilk Biscuits?
You absolutely can, but you have to mimic the buttermilk’s acidity, which is what helps these biscuits rise so beautifully alongside that baking soda! If you swap, take 3/4 cup of regular milk and stir in 3/4 teaspoon of white vinegar or lemon juice. Let that little mix sit on your counter for about five minutes until it slightly curdles. That sour milk acts just like the real thing and ensures your biscuits get a nice, tall lift. If you skip that step, they’ll likely turn out dense, which is totally not what we want!
What is the best way to get tall, fluffy biscuits?
It all comes down to two things: temperature and technique when cutting! First, make sure that butter is absolutely icy coming into the bowl. Second, when you use your biscuit cutter, press straight down and pull straight up. Do not, under any circumstances, twist the cutter! Twisting seals the side edges, which prevents the layers from separating in the oven. When the steam can’t escape perfectly up the sides, the biscuit can’t puff up to its full fluffy potential. Straight down, straight up—that’s the secret to height!
Can I make the dough ahead of time for Homemade Buttermilk Biscuits?
I generally don’t recommend making the dough way ahead of time, maybe more than an hour or so. Once the wet and dry are fully mixed, that chemical reaction for the rise has already started, and we want to bake them right away at 425 degrees! However, I often cut out my rounds, place them on the sheet, cover them loosely, and chill them in the fridge for 20 to 30 minutes before baking.
Chilling the cut biscuits right before they go into the oven is actually a pro move! It gives the butter one last chance to chill back down, which can result in an even better steam explosion when they hit the heat. I sometimes even do this if I feel like my hands warmed up the dough too much while patting it out. If you’re ever trying to get a full large meal together, checking out this recipe might help you multitask, but keep those biscuits cold!
Print
Homemade Buttermilk Biscuits
- Total Time: 30 min
- Yield: 8 biscuits 1x
- Diet: Vegetarian
Description
A simple recipe for making soft, flaky buttermilk biscuits from scratch.
Ingredients
- 2 cups all-purpose flour
- 1 tablespoon baking powder
- 1 teaspoon salt
- 1/2 teaspoon baking soda
- 1/2 cup cold unsalted butter, cut into small pieces
- 3/4 cup cold buttermilk
Instructions
- Preheat your oven to 425 degrees Fahrenheit. Lightly grease a baking sheet.
- In a large bowl, whisk together the flour, baking powder, salt, and baking soda.
- Cut the cold butter into the dry ingredients using a pastry blender or your fingers until the mixture resembles coarse crumbs.
- Pour in the cold buttermilk all at once. Stir gently with a fork until just combined. Do not overmix.
- Turn the dough out onto a lightly floured surface. Knead the dough 3 or 4 times until it comes together.
- Pat or roll the dough to about 3/4 inch thickness.
- Use a biscuit cutter to cut out rounds. Place the biscuits on the prepared baking sheet, close together for softer sides or further apart for crispier sides.
- Bake for 12 to 15 minutes, or until the tops are golden brown.
Notes
- For the flakiest biscuits, keep your butter very cold.
- If you do not have buttermilk, mix 3/4 cup of milk with 3/4 teaspoon of white vinegar or lemon juice and let it sit for 5 minutes before using.
- Prep Time: 15 min
- Cook Time: 15 min
- Category: Breakfast
- Method: Baking
- Cuisine: American
Nutrition
- Serving Size: 1 biscuit
- Calories: 220
- Sugar: 1
- Sodium: 350
- Fat: 11
- Saturated Fat: 7
- Unsaturated Fat: 4
- Trans Fat: 0
- Carbohydrates: 26
- Fiber: 1
- Protein: 4
- Cholesterol: 25
Keywords: buttermilk biscuits, homemade biscuits, quick bread, baking, breakfast