
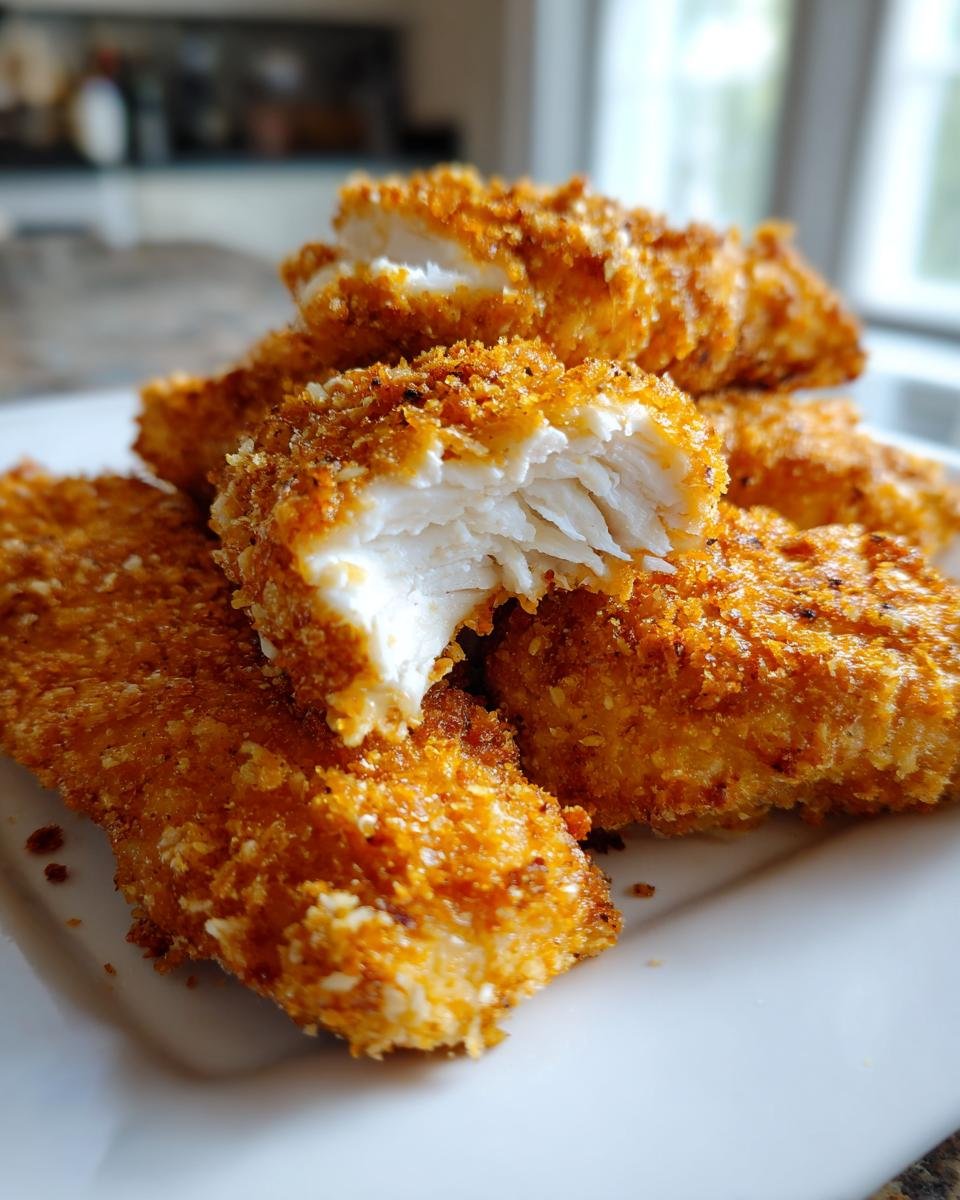
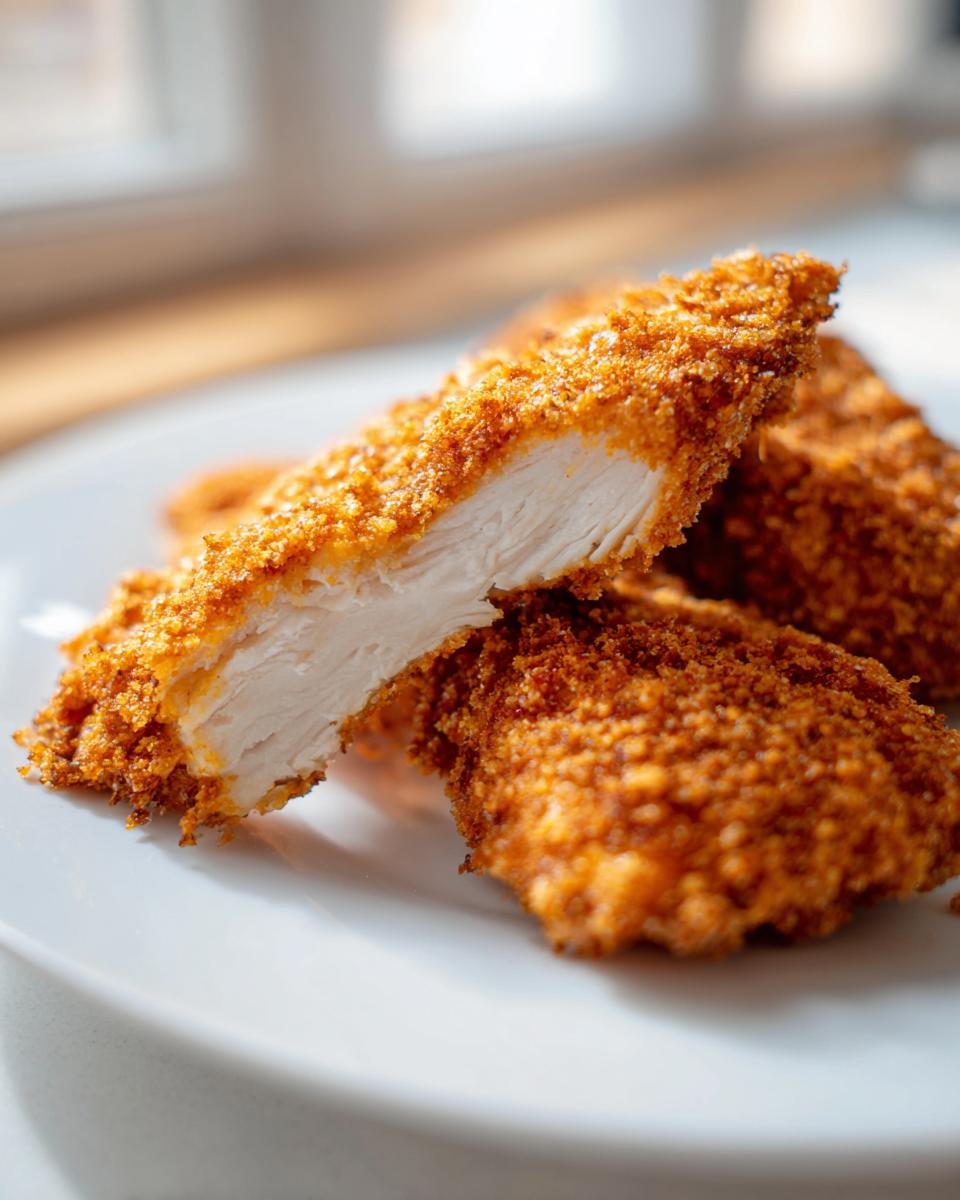
Oh, you know those days. You’re craving that amazing, jaw-dropping, audible *crunch* of fried chicken, but you just can’t face the mess or the sheer amount of oil involved. Trust me, I’ve been there a million times! I spent what felt like ages—seriously, maybe six months of failed batches—trying to crack the code on getting real crispiness from the oven. But folks, I finally found it! This recipe delivers the absolute best Homemade Baked Chicken Tenders you will ever try. I promise you, they come out golden, crunchy, and you don’t even need the deep fryer. It all comes down to the breading setup, and once you see it, you won’t go back, ever!

Why You’ll Love These Homemade Baked Chicken Tenders
Honestly, this recipe is a weeknight lifesaver. You can whip up something unbelievably satisfying in under 40 minutes total. It’s such a crowd-pleaser because you get all the flavor without the guilt of deep frying. Here’s why these quickly became our go-to dinner:
- You get that satisfying, audible crunch on the outside. Seriously, you won’t believe it’s baked!
- Prep Time is lightning fast—we’re talking 15 minutes max before they hit the oven.
- It’s a much healthier alternative, perfect for when the kids ask for “nuggets.”
- The coating sticks perfectly, unlike those sad, soggy tenders you sometimes get from the oven.
If you’re looking for another way to make your chicken extra crunchy, you should check out my recipe for crunchy hot honey chicken; that one is amazing too!
Essential Ingredients for Perfect Homemade Baked Chicken Tenders
The key to these amazing homemade baked chicken tenders isn’t fancy spices; it’s just setting up your station correctly! You’ll need about 1.5 pounds of boneless, skinless chicken breasts. The absolute most important prep tip I can give you here is to cut those breasts into strips that are all about the same size—roughly 1 inch thick. If they aren’t uniform, some will dry out while others are still cooking, and that drives me crazy!
For the breading station, grab 1 cup of basic all-purpose flour, 2 large eggs mixed with 1 tablespoon of water for your egg wash, and 1.5 cups of breadcrumbs. Don’t forget the seasoning mix for the crumbs: 1 teaspoon of salt, half a teaspoon of pepper, and half a teaspoon of paprika really makes them sing. Trust me, even simple ingredients shine when handled right. For more great main dishes, take a peek at my chicken sausage and peppers recipe!
Step-by-Step Guide to Making Homemade Baked Chicken Tenders
This is where the magic happens, but I need you to pay attention here because the order of operations is everything! If you get the dredging station set up right, the cooking process is foolproof. I often make this part of the cooking process right after I get home from work because it moves so quickly. If you’re looking for another comforting complete meal after these tenders, you should bookmark my easy chicken pot pie!
Preparation and Setting Up the Dredging Station
First things first: crank that oven up to 400 degrees Fahrenheit (that’s 200 Celsius). You need the heat right away! Then, get your baking sheet ready. I usually just spray it lightly, but using parchment paper is a great insurance policy against sticking.
Now, set up your assembly line using three shallow dishes—pie plates work perfectly for this. In Dish One, put your plain flour. In Dish Two, whisk those two eggs together with that tablespoon of water until they’re totally combined. This is your wet glue! Finally, Dish Three gets your breadcrumbs, salt, pepper, and paprika all mixed up well. Remember, we already seasoned the crumbs, which is way better than seasoning the chicken raw!
Coating Each Homemade Baked Chicken Tender Perfectly
Now we coat. Don’t just toss them in! Dredge each piece of chicken first in the flour. This is crucial: shake off every bit of excess flour you can manage. We want a thin layer, not a powdery dough ball sticking to the raw chicken.
Next, dip that floured tender right into the egg wash. Let the extra egg drip back into the dish—again, less liquid means crispier coating. Finally, transfer it to the seasoned breadcrumbs. Here’s the trick: use your fingers to gently press that breadcrumb mixture onto the chicken. You want to completely cover it and make sure those crumbs are really sealed on tight. This pressing step is what stops them from falling off mid-bake!
Baking for Maximum Crispiness
Lay your perfectly coated homemade baked chicken tenders onto that prepared sheet. Make sure they aren’t touching! Crowd them and they steam, and steamed chicken is sad chicken. Before they go into the oven, give the tops a light, even spray with cooking spray. That little bit of fat helps everything brown up beautifully.

Bake them for about 18 to 22 minutes total. But listen to me: you absolutely must flip them halfway through! This ensures even cooking and crispiness on both sides. You’re aiming for an internal temperature of 165 degrees Fahrenheit (74 Celsius). When they look golden and feel firm, they’re done! If you are curious about other ways to make awesome chicken dishes, you absolutely need to check out my recipe for black pepper chicken!
Tips for Achieving Extra Crispy Homemade Baked Chicken Tenders
Okay, so you followed the steps, but maybe you want that *next* level of bakery-style crispiness on your homemade baked chicken tenders? I have a couple of tricks up my sleeve that really seal the deal. My absolute favorite hack, especially if I’m making a big batch, is to use a wire cooling rack—the kind you use for cookies—placed right on top of your greased baking sheet.
Setting the tenders on a rack lets air circulate underneath them while they bake. This means the bottom doesn’t get soggy from sitting in accumulated chicken juices or oil. It’s a game-changer! If, after 20 minutes, they look a little pale on top but are definitely cooked through, don’t panic. You can carefully switch your oven setting to broil for just 60 seconds. Watch them like a hawk, though! Broilers work fast, and you don’t want to burn that beautiful coating we worked so hard on. Honestly, if you love getting things crispy, this air fryer wrap recipe has some great tips on heat circulation, too!
Serving Suggestions for Your Homemade Baked Chicken Tenders
Now that you have this amazing batch of homemade baked chicken tenders, what are you going to dip them in? This recipe is fantastic because it pairs with literally anything savory, but I always go back to the classics. Of course, you can’t beat a high-quality BBQ sauce or a tangy honey mustard. My family loves it when I whip up a batch of my dairy-free jalapeno ranch; the kick really cuts through the savory coating!
For sides, keep it simple! Think quick sweet potato fries or a big, fresh cucumber salad to balance out the meal. These tenders are so satisfying, they really don’t need much crowding on the plate. Don’t get distracted by trying to make dessert right now, though—save that energy for my easy homemade caramel later tonight!
Storage and Reheating Homemade Baked Chicken Tenders
Even though these homemade baked chicken tenders disappear fast, sometimes you get lucky and have a few leftovers. Don’t you dare throw them out! Store any extras in an airtight container in the fridge. They usually last quite nicely for about four days.
The most important part is reheating them correctly. Please, please, please skip the microwave! That’s the enemy of crispiness. You want to get them back to their former glory, so pop them in a 375-degree oven for about 8 minutes, or even better, toss them in an air fryer for 3 or 4 minutes. They come out crunchy again, almost as good as fresh!
Frequently Asked Questions About Homemade Baked Chicken Tenders
I always get questions when I post these homemade chicken tenders online because people are shocked they aren’t fried! Here are some of the things I hear most often when people try this baked chicken recipe for the first time. If I missed yours, just drop a comment below!
Can I use Panko breadcrumbs instead of regular breadcrumbs for these baked chicken tenders?
Oh, absolutely! If you want to step up the crunch factor on your baked chicken tenders, Panko is the way to go. They are flakier than regular breadcrumbs, so they absorb less moisture and get incredibly light and crisp. My only advice is to check them just a couple of minutes earlier than the recipe calls for, maybe around the 17-minute mark, just because the crunch happens faster!
What is the best way to ensure my homemade chicken tenders stay moist?
Moisture is key, right? You want crispy outside and juicy inside! My biggest advice is twofold: First, make sure your chicken pieces are cut to a uniform thickness so everything cooks evenly—this prevents thinner pieces from drying out. Second, you must pull them out as soon as they hit that 165°F internal temperature. Don’t be tempted to bake them for extra long “just in case.” Overcooking is the real enemy of moisture!
Can I prepare the dredging station ahead of time for my baked chicken tenders?
That’s a smart question for busy weeknights! You can totally get the dry components ready ahead of time. Cover your flour dish and your breadcrumb/seasoning dish tightly and leave them on the counter. However, please do not mix the egg wash until right before you are ready to start coating. Egg washes break down quickly, and they won’t adhere as well if they sit too long. Once you start breading, you need to move fast!
When you’re planning out your week and need dinner ideas, take a look at this chicken stir-fry guide for some fast, flavorful alternatives!
Nutritional Estimates for Homemade Baked Chicken Tenders
I know some of you are tracking macros or just watching what goes into your body, and I totally get that! Since these are baked and not fried, they are already a fantastic, healthier choice for dinner. Keep in mind, these numbers are just estimates based on the ingredients I listed, and they might shift a little depending on the brand of breadcrumbs or chicken breast you grab.
Here is the ballpark breakdown for one serving (that’s about 4 excellent tenders):
- Calories: Roughly 320
- Protein: A huge boost at about 40 grams! Great for feeling satisfied.
- Total Fat: Only about 6 grams, which is amazing for coating.
- Carbohydrates: Around 25 grams.
As you can see, we’re maximizing the protein here while keeping the overall fat count quite low, which is exactly why I love leaning on the oven instead of the fryer for my chicken fix. If you are really focused on low-calorie meals that taste incredible, you should absolutely look at the numbers on my 300-calorie meal post. It’s all about smart substitutions and cooking methods like the one we used for these baked chicken tenders!
Share Your Crispy Homemade Baked Chicken Tenders Experience
Alright, that’s it! You’ve made some seriously crispy, guilt-free homemade baked chicken tenders. I’m so excited for you to try this simple method. Now, the best part: I need to know how they turned out for you and your family!
If you followed along and these tenders knocked your socks off, please do me a huge favor and jump down to the comments section. Give this recipe a rating—a solid 5 stars if you think my breading technique worked its magic! Even better, snap a picture of your golden-brown beauties and tag me on social media. I absolutely love seeing all your creations!
Did you serve them with my jalapeno ranch? Or maybe try a new dipping sauce? Don’t be shy about sharing your successes or even asking a quick question if something wasn’t quite right. We’re a community here! And if you ever need to get in touch with me directly, feel free to hop over to the contact page. Happy eating!
Print
Homemade Baked Chicken Tenders
- Total Time: 37 min
- Yield: 4 servings 1x
- Diet: Low Fat
Description
Simple recipe for making crispy baked chicken tenders at home.
Ingredients
- 1.5 lbs boneless, skinless chicken breasts
- 1 cup all-purpose flour
- 2 large eggs
- 1 tablespoon water
- 1.5 cups breadcrumbs (plain or seasoned)
- 1 teaspoon salt
- 0.5 teaspoon black pepper
- 0.5 teaspoon paprika
- Cooking spray
Instructions
- Preheat your oven to 400 degrees Fahrenheit (200 degrees Celsius). Lightly grease a baking sheet or line it with parchment paper.
- Cut the chicken breasts into uniform tender shapes, about 1 inch thick.
- Set up a dredging station with three shallow dishes.
- In the first dish, place the flour.
- In the second dish, whisk the eggs and water together.
- In the third dish, mix the breadcrumbs, salt, pepper, and paprika.
- Dredge each chicken tender first in the flour, shaking off excess.
- Dip the floured tender into the egg mixture, letting excess drip off.
- Coat the tender thoroughly in the breadcrumb mixture, pressing gently so the crumbs adhere.
- Place the coated tenders on the prepared baking sheet.
- Spray the tops of the tenders lightly with cooking spray for better browning.
- Bake for 18 to 22 minutes, flipping halfway through, until the internal temperature reaches 165 degrees Fahrenheit (74 degrees Celsius) and the coating is golden brown.
Notes
- For extra crispiness, you can bake them on a wire rack placed over the baking sheet.
- Serve immediately with your preferred dipping sauce.
- Prep Time: 15 min
- Cook Time: 22 min
- Category: Main Course
- Method: Baking
- Cuisine: American
Nutrition
- Serving Size: 4 tenders
- Calories: 320
- Sugar: 1
- Sodium: 450
- Fat: 6
- Saturated Fat: 1
- Unsaturated Fat: 5
- Trans Fat: 0
- Carbohydrates: 25
- Fiber: 1
- Protein: 40
- Cholesterol: 110
Keywords: baked chicken tenders, homemade chicken tenders, healthy chicken, baked chicken recipe, easy dinner