
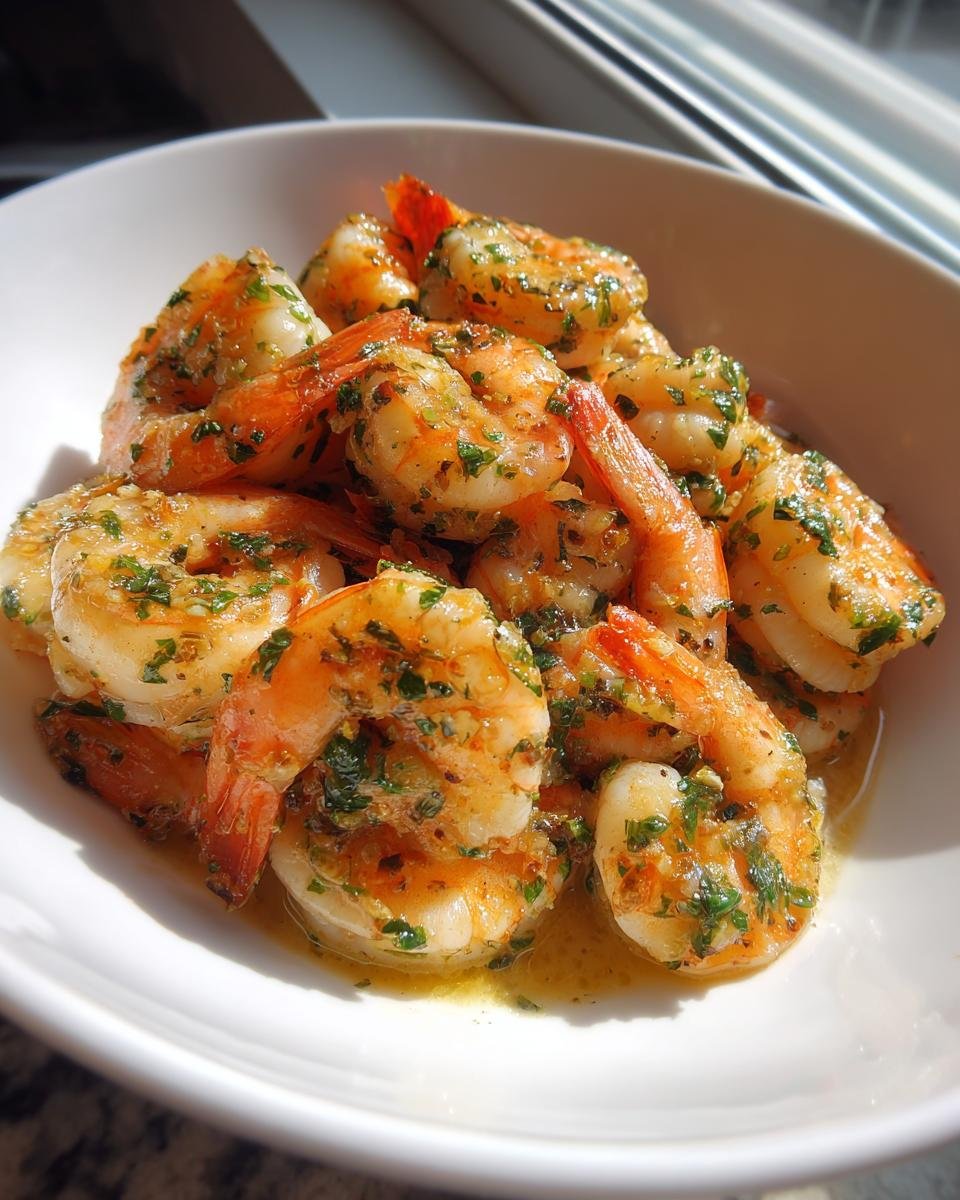
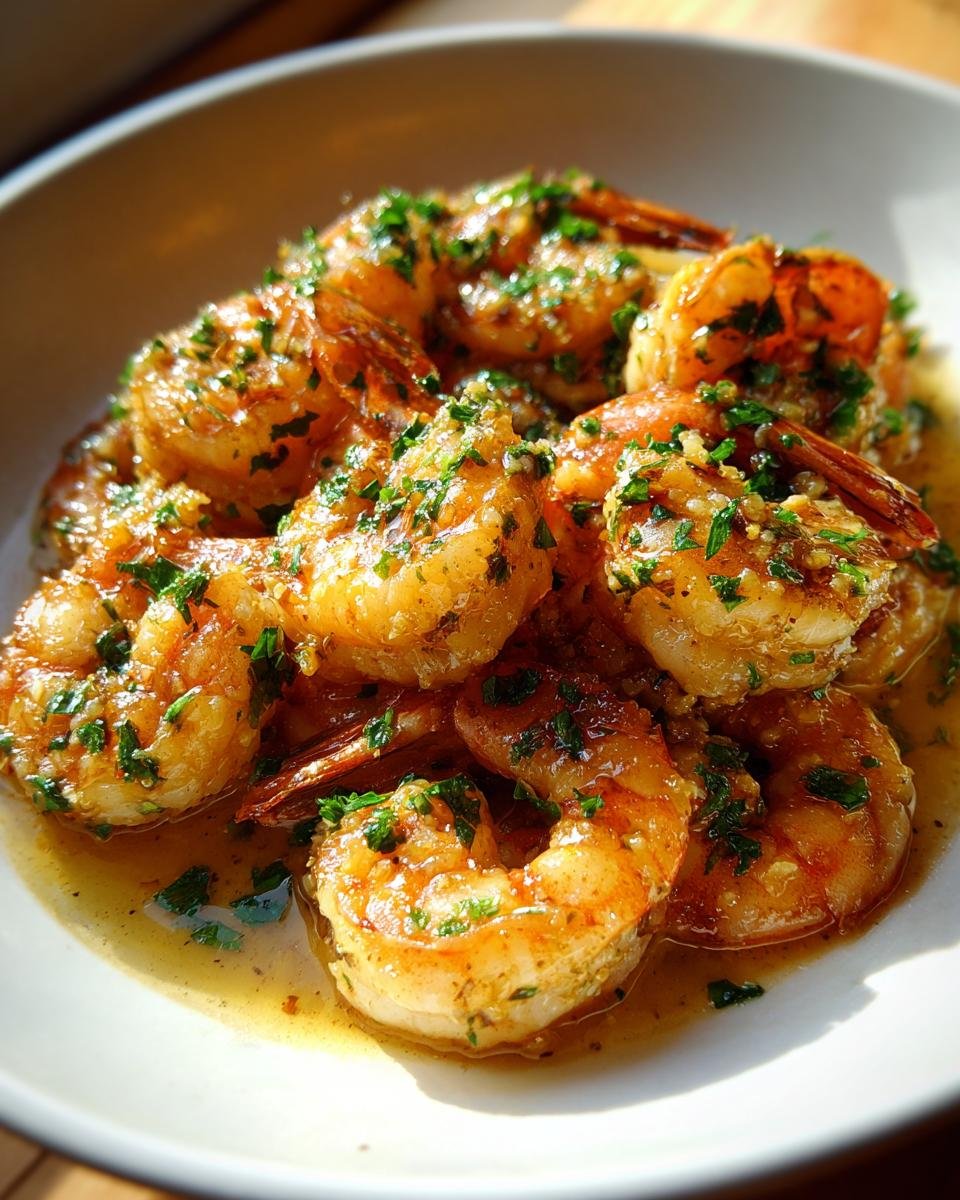
Oh, when life gets completely hectic and you realize dinner needs to be on the table *yesterday*, this is the recipe I always run to. Forget complicated seafood dinners! This simple, zesty take on **Hawaiian Garlic Shrimp** is my absolute weeknight lifesaver. Seriously, we are talking about shrimp cooked, sauced, and ready to eat in twenty minutes flat. It tastes like you spent hours basting it in melted butter, but I promise you, it’s stupidly easy.
I always tell people that learning the foundations of great cooking, like how to quickly build flavor, is so important. If you want to know more about where I get my cooking philosophy, you can always check out my thoughts over at the Tastiqa team page. I remember the first time I made this; I had totally forgotten I was supposed to bring a main dish to a last-minute neighborhood potluck. Panic set in! But I threw this together, and people went absolutely nuts for the bright lemon and heavy garlic flavor. It’s honestly the closest thing to that famous garlic shrimp you get straight off the trucks in Oahu, but you can make it right here without leaving your kitchen. Trust me, if you only make one seafood recipe this year, make this one!
Why You Will Love This Quick Hawaiian Garlic Shrimp Recipe
It’s hard to beat a dish that delivers so much flavor for so little effort, but this shrimp recipe manages it every time. I really think this one is going to earn a permanent spot on your go-to list. Here’s why I keep whipping this up:
- It’s unbelievably fast! Honestly, start measuring your ingredients while the pan is heating up, and you’re probably looking at about 20 minutes total time from start to finish. Perfect for those hectic weeknights.
- The flavor payoff is huge. You get that wonderful richness from the butter, a big punch of fresh garlic, and then that brightness from the lemon juice—it’s totally addictive. You’d swear this took way longer than it did!
- Cleanup is a breeze. Since we’re only using one large skillet, you’re not faced with a giant pile of dishes when you finally sit down to eat. That’s a win in my book, especially after a long day.
- It’s wonderfully customizable. If you want a bit more kick, toss in extra pepper flakes. If you’re feeling fancy, check out some of these other seafood ideas for inspiration on adding different herbs or citrus.
- The sauce! Seriously, that buttery, lemony, garlicky sauce you create in the pan? You will want to use a piece of bread or your rice spoon just to mop up every last drop. Don’t waste it!

Essential Ingredients for Authentic Hawaiian Garlic Shrimp
You don’t need a huge grocery list for this one, which is part of why it comes together so fast. But the quality of these few items really matters, especially when you’re working with something as delicate as shrimp. When I’m shopping for this, I always try to grab the biggest shrimp I can find—size truly makes a difference in presentation and texture here.
If you’re ever wondering about ingredient sourcing or quality checks, I put together some thoughts on how I approach selecting the best items for my kitchen, which you can see right here. But for this specific recipe, here is exactly what you need standing by:
- 1 pound large shrimp, peeled and deveined. Look for shrimp that feel firm and smell fresh, like the ocean, not fishy!
- 4 tablespoons unsalted butter. Don’t skimp here; real butter creates the best sauce base, period.
- 4 cloves garlic, finely minced. I mean *really* mince these! Garlic is the star, so we want a lot of it, finely distributed.
- 1/4 cup fresh lemon juice. Fresh is non-negotiable! The bottled stuff just doesn’t have that clean, bright acidity we need to cut through the butter.
- 1 tablespoon soy sauce. This adds that tiny touch of umami depth that makes it taste properly seasoned, not just garlicky.
- 1/2 teaspoon red pepper flakes. This is where you control the heat! Start with a half teaspoon, then feel free to bump it up next time if you like things sizzling.
- 2 tablespoons fresh parsley, chopped. This is for that beautiful pop of green and fresh flavor right at the end.
My biggest tip on sourcing is this: If you can only find frozen shrimp, that’s fine! Just make sure you thaw them overnight in the fridge and pat them *aggressively* dry before they hit that hot pan. Moisture is the enemy of the sear!
Step-by-Step Guide to Perfect Hawaiian Garlic Shrimp
Okay, let’s get cooking! This is where you see just how fast this comes together. Seriously, get your hands on a good, wide skillet because we want room for everything to cook evenly. I always like to have my spatula ready to go. If you want to look at some great tool recommendations that make quick sautéeing easier, check out this equipment guide I put together!
Preparing the Garlic Butter Base for Hawaiian Garlic Shrimp
First up, we melt that beautiful butter over medium heat. As soon as it’s shimmering, toss in your finely minced garlic. This is crucial: let it go for about sixty seconds until it smells absolutely incredible—like a warm hug in a pan! But listen closely: If that garlic even starts to whisper about turning brown, you’ve gone too far. Browned garlic gets bitter, and we want sweet, mellow garlic flavor for our homemade Hawaiian Garlic Shrimp, not bitterness!
Cooking the Shrimp: Achieving Perfect Texture in Your Hawaiian Garlic Shrimp
Once the garlic is happy, it’s shrimp time! Toss in your peeled and deveined shrimp, the fresh lemon juice, the soy sauce, and those fiery red pepper flakes. Now, the secret weapon here is fast cooking. Shrimp cook SO quickly when they are submerged in hot liquid like this. We’re talking 2 to 3 minutes on one side until they start turning nice and pink, then flip them quickly and cook another 2 or 3 minutes on the other.

Don’t walk away! Overcooked shrimp turns rubbery, and we absolutely don’t want that chewy texture. If you’re doubling the recipe, do it in two batches! Trust me, overcrowding the pan lowers the temperature and just steams the shrimp instead of searing them beautifully. When they feel firm and look opaque, kill the heat immediately.
Finally, right off the heat, stir in that fresh parsley. It just brightens everything up instantly. That’s it! Dinner is done.
Expert Tips for Next-Level Hawaiian Garlic Shrimp
Look, even though this recipe is super simple, there are a few little secrets I’ve learned over the years that just take the whole experience up a notch. I’m sharing these insider details because I want your shrimp to be legendary, just like mine!
When you master these small techniques, you look like a kitchen wizard, even though nobody knows you spent less than twenty minutes on this. If you’re looking into other ways to really elevate simple seafood dishes, I wrote a whole piece on perfecting your approach to things like this—you can read more about my secrets for better cooking here.
Here are the things I always do without fail:
- Don’t Fear the Heat (But Watch the Garlic!): We put the skillet on medium heat initially, but once you add the liquids—the lemon and soy sauce—you need to let that mixture bubble up nicely before the shrimp go in. That quick burst of high heat is what starts building that amazing flavor glaze around the shrimp. Just remember: garlic burns fast! If you see it starting to darken prematurely, pull the pan off the burner for thirty seconds to cool it down again before adding the shrimp.
- The Parsley Timing is Everything: I know it seems tedious to chop parsley when you’re already excited about eating, but do yourself a favor and have that parsley chopped and measured *before* you even turn the stove on. Sticking fresh herbs into a hot pan at the very last second is what gives you that vibrant color and fresh bite. If you add it too early or cook it with the shrimp, it just wilts and loses all its punch. We want that pop of fresh flavor waking up the dish!
- Paddling Out the Sauce Richness: Once everything is cooked and you’ve taken the pan off the heat, give the sauce a quick, vigorous whisk right before you serve it. Sometimes the butter separates a little bit. If you whisk it energetically, you temporarily emulsify the butter and the lemon juice/soy sauce mixture, creating the richest, silkiest sauce possible that clings perfectly to every single piece of shrimp. It’s a momentary difference, but it makes the final presentation shine.
- Pat That Shrimp Dry: I mentioned this above, but I’m saying it again because it bears repeating! Whether your shrimp started fresh or frozen, use paper towels to get them as dry as you possibly can before they meet the butter. Excess moisture equals steam, and steam means limp, slightly boiled shrimp instead of those satisfyingly firm ones.
Ingredient Notes and Substitutions for Hawaiian Garlic Shrimp
Nobody’s pantry looks exactly the same, right? Sometimes you’re out of something crucial, or maybe you just prefer a different flavor profile. That’s totally fine with this garlic shrimp recipe because it’s so forgiving! The core elements—shrimp, butter, and garlic—are the must-haves, but we have some wiggle room on the supporting cast.
When I was first figuring out the perfect ratios for this dish, I wasted so much time worrying about exact substitutions. I finally learned that if you stick to the spirit of the ingredient—acidity, saltiness, freshness—you’re usually golden. I talk a lot about my philosophy on making smart swaps in the kitchen without compromising flavor in this article here about pantry management.
Let’s talk about the swaps that actually work:
Lemon vs. Lime Juice for Brightness
If you are out of lemons, or maybe you just bought a bag of beautiful limes, you can absolutely switch them out! The recipe calls for 1/4 cup of lemon juice, so use 1/4 cup of fresh lime juice instead. Lime is slightly more tart and floral, which actually works really well with the shrimp, giving it an almost Key Lime Pie vibe, which I happen to love. Just make sure you juice them fresh; the bottled stuff tastes completely different, and we want that vibrant zing!
The Importance of Good Butter
When your sauce is only made of butter, garlic, and acid, the butter has to pull its weight, folks. I highly recommend using unsalted butter here because it lets you control the exact amount of saltiness using the soy sauce. But more importantly, use real, creamy butter. Those sticks of margarine or vegetable oil spreads just don’t melt and brown the same way. They sit heavier in the pan and don’t create that beautiful, light glaze that coats the shrimp so nicely. If you can find European-style butter with a higher fat content? Go for it. It makes the sauce unbelievably rich!
Handling the Spice Level
That 1/2 teaspoon of red pepper flakes is for a mild warmth, nothing truly spicy. If you’re sensitive to heat, you can skip them entirely, or just use a tiny pinch to start. On the flip side, if you love the burn, don’t be shy! You can easily bump that up to a full teaspoon, or even add a dash of your favorite hot sauce right alongside the soy sauce. Just remember, the heat increases as the shrimp cook down, so taste a tiny bit of the liquid before you add the shrimp if you’re unsure.
Serving Suggestions for Your Delicious Hawaiian Garlic Shrimp
Now that you have this beautiful, zesty, garlic-soaked shrimp sitting in that incredible skillet sauce, the biggest decision of the evening is upon you: what are we going to eat this with?
Since this is an adaptation of that famous North Shore truck food, you know the best choice is going to soak up all that delicious garlic butter sauce. I love making a big batch of simple steamed white rice. It’s the perfect blank canvas! You spoon those gorgeous shrimp right over the top, and then you push a little bit of rice around to catch every single last drop of that lemon-garlic mixture. You just can’t let that sauce go to waste!
If you want a different kind of carb delivery system, I actually have a couple of other ideas that work marvelously. If you’re feeling inspired by other quick seafood meals, you can check out some fantastic pairings here, but for this specific garlic shrimp, I recommend keeping the sides light so the shrimp shine.
The Perfect Rice Pairing
Steamed white rice is classic for a reason. It’s neutral, it’s fluffy, and it handles liquid like a champion. If you want to jazz it up slightly, stir in a tiny pat of butter and a sprinkle of salt into the rice right before you serve it. Even better? Use brown rice if you want a slightly nuttier flavor, though the texture won’t be quite as light!
Go Crusty or Go Green
What if you’re trying to keep the carbs low? No problem at all! The second best way to devour this is with a thick slice of crusty sourdough bread. You use that bread to scoop up the sauce—it acts like a sponge! Just make sure the bread is still warm so it softens just slightly in the hot butter. If you want something fresh and green to balance out all that richness, a very simple side salad works wonders. Think crisp romaine, maybe a few cherry tomatoes, and keep the dressing super light, like a simple vinaigrette. The acidity of the salad dressing complements the lemon in the shrimp sauce perfectly!
Serving Immediately is Key
Since this dish is essentially sautéed, it’s best served *immediately* off the heat. I mean, take the time to fluff your rice, but don’t let the shrimp sit around waiting for the table to be set! The shrimp firm up a little too much if they cool down completely, and you lose that gorgeous steamy aroma that hits everyone when you bring the skillet out.
Storing and Reheating Leftover Hawaiian Garlic Shrimp
We rarely have leftovers of this Hawaiian Garlic Shrimp, because truthfully, it’s too tempting, right? But if you manage to keep some for the next day—lucky you!—you need to know the proper way to store and reheat it so it still tastes like you just made it.
Shrimp is one of those tender proteins that can get tough really fast if you try to reheat it too aggressively. We need to be gentle! I actually gathered a few pointers on how I handle storing all kinds of different delicious leftovers in this little guide on minimizing food waste, but for this garlicky goodness, here’s the lowdown.
The Best Way to Store Leftover Garlic Shrimp
First things first: refrigeration time is short. Because this dish is loaded with butter and seafood, you really want to eat any leftovers within two to three days, max. Any longer than that, and the texture just starts to degrade, which is a total waste of that beautiful garlic flavor!
Make sure the shrimp and sauce have cooled down completely before you seal them away. Pop them into a shallow, airtight container. Shallow is better than deep because it helps everything chill down faster and prevents condensation from building up inside the container, which leads to sogginess. If you want to keep the rice separate, that’s a great idea too, just store it in its own container!
Gentle Reheating is Mandatory
This is the most important step! You cannot microwave this shrimp on high power—I guarantee you that will turn your lovely shrimp into tiny pink rubber balls. We need low and slow heat to gently melt that butter sauce back into its liquid state and warm the shrimp through without cooking them any further.
The absolute best method is on the stovetop: Put a non-stick skillet over medium-low heat. Add the shrimp and sauce directly to the pan. Cover the skillet and let it warm up for just a few minutes. Keep shaking the pan gently every minute or so until you see that sauce simmering lightly around the edges. You are aiming for warm, not sizzling hot!
If you absolutely must use the microwave, use a low power setting (maybe 50% power) and heat in short 30-second bursts, stopping to stir between each one. It takes longer, but it gives you much more control. Once it’s steaming hot and the sauce is liquid, stir in a tiny squeeze of fresh lemon juice—it wakes up the entire dish again!
Frequently Asked Questions About Hawaiian Garlic Shrimp
I get so many great questions about this recipe, and honestly, it usually means people are trying to find ways to make it work in their own crazy schedules, which I totally respect! If you’ve got a burning question about substitutions or technique, chances are someone else is wondering the same thing. For more general tips on making quick seafood dishes shine, you can always check out my favorite tricks for fast weeknight meals!
Can I use frozen shrimp for this garlic butter shrimp recipe?
Yes, you totally can use frozen shrimp, but you *must* thaw them properly first! Don’t just throw icy shrimp into the hot pan expecting magic. Thaw them overnight in the fridge, then the most important part: drain them well and pat them completely dry with paper towels. Extra surface moisture will steam the shrimp instead of searing them, and we want that nice texture you get from quick sautéing.
How spicy is this Hawaiian Garlic Shrimp, really?
As written, with only 1/2 teaspoon of red pepper flakes, this is really just a mild background warmth—it’s definitely not considered a spicy dish! The primary flavor profile is garlicky and bright from the lemon. If you like heat, feel free to double the pepper flakes, or even add a dash of cayenne pepper along with the soy sauce. Just add a little bit at a time until you find your sweet spot!
What if I don’t have fresh parsley on hand for topping?
Oh, the dreaded missing fresh herb! If you are totally out of fresh parsley, don’t sweat it too much. You can definitely skip it; the shrimp will still taste amazing because the garlic and lemon are so dominant. However, if you happen to have dried parsley, you can stir a tiny pinch (like 1/4 teaspoon) into the sauce *at the very end* just to add a little color back into the dish. Just remember that dried herbs are much less potent than fresh ones, so use them sparingly.
Can this recipe be made with shrimp that has the shells on?
You can, but I highly discourage it for this recipe, especially if you’re aiming for that 20-minute target! Shell-on shrimp requires longer cooking times to cook through, and since we’re cooking this so quickly to keep the meat tender, you risk completely overcooking the meat under the shells. For the best results with this quick garlic butter shrimp, go for peeled and deveined every time. It’s just easier and yields better texture!
Is there a way to make this recipe low sodium if I’m watching my salt?
That’s a great question, particularly since we rely on soy sauce for that savory depth. The soy sauce is the main source of sodium here! If you need to lower the salt content, you can substitute the tablespoon of regular soy sauce with low-sodium soy sauce. If you don’t have low-sodium on hand, try just using one teaspoon of regular soy sauce and adding a tiny pinch of kosher salt instead—that way you control exactly how much sodium is going in with the butter base.
Nutritional Snapshot of This Garlic Butter Shrimp
I know some of you are tracking things super closely, so I always like to wrap up the post by giving you a general idea of what you’re eating when you whip up this easy Hawaiian Garlic Shrimp. It’s important to remember that these numbers are estimates, based on the ingredients listed and assuming you’re serving just the shrimp itself, not the rice or any extra oil you might be using!
If you’re wondering about my personal approach to keeping recipes balanced and understanding what goes into the food we eat, I share some of my core beliefs about transparency and sharing health information over on my privacy policy page—it’s all about trust in what you’re preparing!
Based on a serving size of 1/2 the recipe, here is the general breakdown for just the shrimp itself:
- Calories: Approximately 350 per serving. Not bad for something so rich in flavor!
- Fat: About 18g total fat. Remember, this comes primarily from the unsalted butter we use, and that’s what makes the sauce so good!
- Protein: Wow, look at that! You’re getting around 42g of protein, which is fantastic if you’re trying to keep things satisfying and light on carbs.
- Carbohydrates: Very low, only about 3g, since this doesn’t include rice or any added thickening agents.
- Sodium: Around 450mg, mostly coming from the tablespoon of soy sauce.
A quick note on these numbers: If you use a different size shrimp, or if you soak your rice in extra butter like I sometimes sneakily do, these totals will shift upwards. This snapshot is really to show you why this seafood dish feels so light yet satisfying—it’s loaded with great protein and good fat, making it a perfect seafood dinner anytime you need something fast!
Print
Hawaiian Garlic Shrimp
- Total Time: 20 min
- Yield: 2 servings 1x
- Diet: Low Fat
Description
A simple recipe for flavorful shrimp cooked in garlic butter sauce.
Ingredients
- 1 pound large shrimp, peeled and deveined
- 4 tablespoons unsalted butter
- 4 cloves garlic, minced
- 1/4 cup fresh lemon juice
- 1 tablespoon soy sauce
- 1/2 teaspoon red pepper flakes
- 2 tablespoons fresh parsley, chopped
Instructions
- Melt butter in a large skillet over medium heat.
- Add minced garlic and cook for 1 minute until fragrant. Do not brown the garlic.
- Add the shrimp, lemon juice, soy sauce, and red pepper flakes to the skillet.
- Cook shrimp for 2-3 minutes per side until pink and cooked through.
- Remove from heat. Stir in the chopped parsley.
- Serve immediately.
Notes
- Serve this shrimp over white rice to soak up the extra sauce.
- You can substitute lime juice for lemon juice if desired.
- Prep Time: 10 min
- Cook Time: 10 min
- Category: Dinner
- Method: Sautéing
- Cuisine: American
Nutrition
- Serving Size: 1/2 recipe
- Calories: 350
- Sugar: 1
- Sodium: 450
- Fat: 18
- Saturated Fat: 10
- Unsaturated Fat: 8
- Trans Fat: 0
- Carbohydrates: 3
- Fiber: 0
- Protein: 42
- Cholesterol: 300
Keywords: Hawaiian, garlic shrimp, shrimp scampi, quick seafood, garlic butter shrimp