
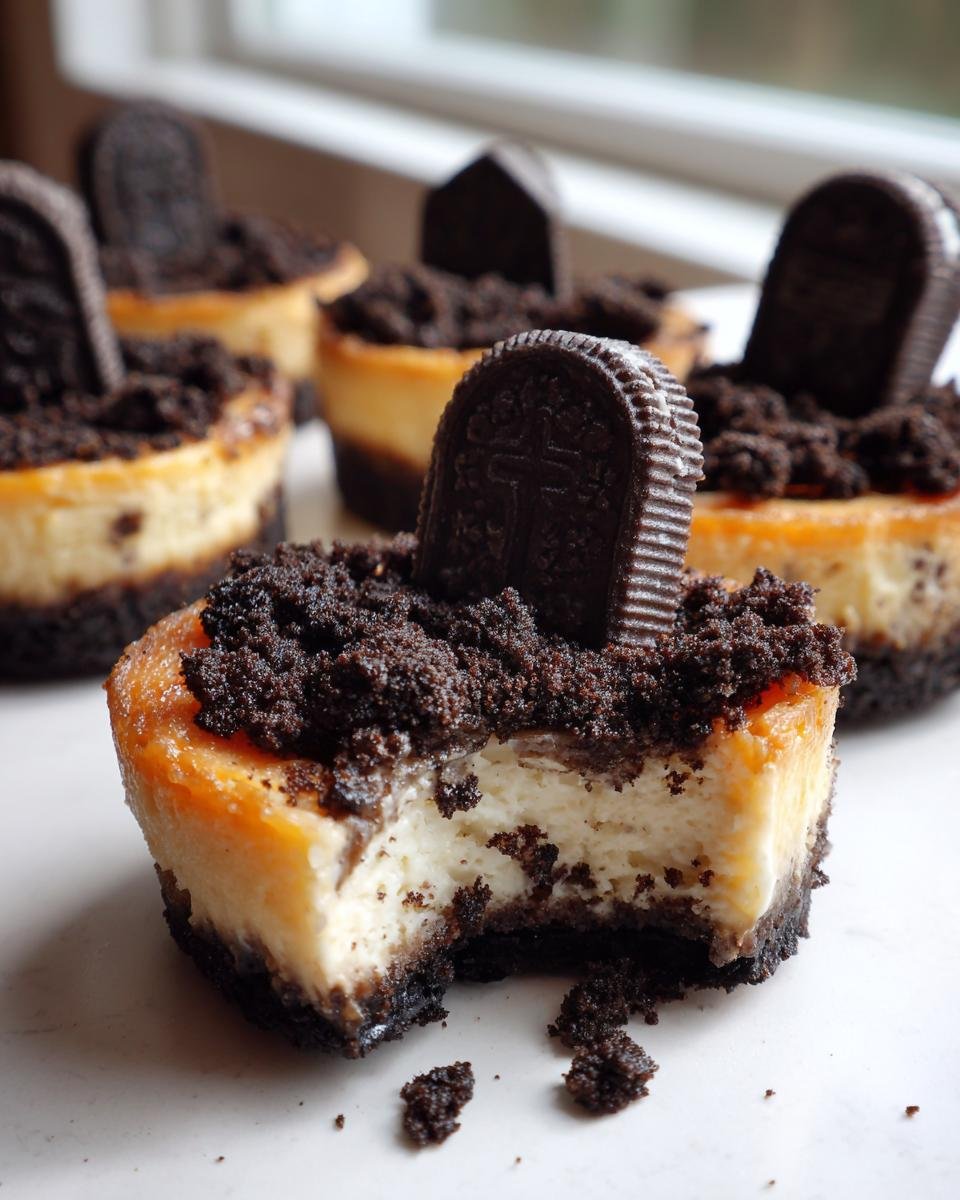
Okay, forget the endless parade of candy calories this Halloween, because I have found the perfect balance between spooky fun and rich, creamy satisfaction! I’m talking about my Classic Halloween Graveyard Cheesecake Bites, and trust me, they are ridiculously easy but look like you spent all day slaving over them. I live for handheld desserts for parties; no cutting, no mess, everyone gets their own perfect little portion. These individual cheesecakes are topped with delicious crushed cookie ‘dirt’ and tiny Milano tombstones. Seriously, they are the easiest showstopper you’ll make all season!

Why You Will Love These Classic Halloween Graveyard Cheesecake Bites
I promise you, these bites are what holiday potlucks are made for. There’s nothing better than having perfectly made treats that are ready to grab and go. If you’re looking for inspiration on making more batch cheesecakes, you should check out my tips on how to bake 12 mini cheesecakes without any drama.
Perfectly Portioned Fun
First off, individual servings mean zero stress for you! You don’t have to worry about slicing a big cheesecake perfectly—everyone gets an equal amount of crust and filling. They are neat, tidy, and so much easier for guests to handle while mingling.
Spooky Yet Simple Decoration
Honestly, this is the genius part. The graveyard theme looks incredibly detailed, right? But it’s all achieved with crushed cookies and a fancy-looking cookie tombstone. Anyone can do this, even if you think you’re terrible at decorating. It’s all about the atmosphere!
Gathering Ingredients for Classic Halloween Graveyard Cheesecake Bites
Okay, let’s get down to what you need before we start mixing! The quality of your cream cheese really makes a difference here; I always splurge on the good stuff because when you’re making something this simple, you need that rich texture. If you are interested in other cheesecake variations, take a peek at how I whip up marshmallow whip cheesecake when I need a quick fix!
For the No-Bake Crust Base
We only need two things to make that perfect little base:
- 12 graham crackers, crushed up super fine.
- 1/4 cup of butter that’s been nicely melted down.
For the Mini Cheesecake Filling
This is where the creamy magic happens! Remember, your cream cheese absolutely has to be softened to room temperature, or you’ll get lumps, and we definitely don’t want that!
- 8 oz of cream cheese, softened until it’s happy and spreadable.
- 1/4 cup of plain granulated sugar.
- 1/2 teaspoon of pure vanilla extract.
- 1 large egg—that’s all we need for structure here!
For the Graveyard Toppings
This is where our graveyard comes to life! Make sure you crush those chocolate cookies until they look like rich cemetery soil.
- 1/4 cup of chocolate sandwich cookies, crushed finely for the dirt.
- 12 small Milano cookies—these are our tombstones, so try to keep them whole!
- Some black food coloring for writing on the cookies.
- And if you want a little color pop, grab some small candy pumpkins!
Step-by-Step Instructions for Classic Halloween Graveyard Cheesecake Bites
Getting these graveyard bites ready is so straightforward, but timing is everything, especially when it comes to the texture of that creamy filling. If you want a batch that doesn’t crack, pay close attention to the mixing steps! It’s easy to overdo it when you are excited, but patience pays off here. Speaking of patience, if you want to see what happens when you just use one single ingredient, check out my wild one-ingredient watermelon honey discovery!
Preparing the Crust and Oven
First things first, crank that oven up to 325 degrees Fahrenheit. While it’s warming up, line your 12-cup muffin tin with paper liners—this saves you so much cleanup later! For the base, take your crushed graham crackers and melted butter and mix them until they look like wet sand. Scoop about 1 tablespoon of that mixture into the bottom of each liner and press it down firmly. That’s your foundation!
Mixing the Cheesecake Batter
In a separate bowl, beat your softened cream cheese, sugar, and vanilla extract together. You want this creamy and completely smooth, see? Now, add the egg, but this is the critical part: beat it only until it’s just combined. Stop mixing right then! Overmixing the egg is what introduces air bubbles that cause cracks later on. We want smooth surfaces for our tombstones!
Baking and Cooling
Spoon that beautiful batter right over your crusts, trying to keep it even across all 12 cups. They only need about 15 to 18 minutes in the oven. You’ll know they are done when the edges look set, but the very centers still have a tiny bit of wobble to them. Let them cool completely on a wire rack. And I really mean *completely* cool—don’t rush decorating!

Decorating Your Classic Halloween Graveyard Cheesecake Bites
Time for the fun part! Grab a toothpick and dip it into your black food coloring. Carefully write ‘RIP’ or something spooky on your Milano cookies—sometimes I call these my spooky little headstones! While those dry a little, take your crushed chocolate cookies and mix them with just a tiny bit of melted chocolate or even water, until it forms a damp, crumbly dirt. Sprinkle this ‘dirt’ over the cooled cheesecake tops, and then gently press one decorated Milano cookie into the center of the crumbs. Don’t forget those little candy pumpkins if you use them!
Tips for Perfect Classic Halloween Graveyard Cheesecake Bites
You know I love a shortcut when holiday menus get hectic, so let’s talk about making these graveyard bites even easier on you! Since the cheesecake base is so simple, we can afford to save time elsewhere. If you’re aiming for an even quicker assembly, don’t be afraid to use a store-bought graham cracker crust mix instead of making it yourself. It works just fine! If you’re interested in another easy-bake treat, I have a fantastic dreamy lemon cheesecake recipe you might want to try next.
Crust Time-Saving Swaps
Look, if crushing 12 crackers feels like too much work, go ahead and grab a ready-made mix! The flavor is mostly covered by that sweet, creamy filling anyway. It’s a perfectly valid move for making sure you get these done before the trick-or-treaters arrive.
Achieving the Best ‘Dirt’ Texture
This is where you get serious about your soil consistency! If you just use water to dampen the cookie crumbs, you get fluffy, dark dirt, which is great for presentation. But if you want a *firmer* dirt—maybe one that holds up better if it’s a warmer day—mix your cookie crumbs with just a tiny bit of melted dark chocolate instead. It sets up a bit when chilled, making those tombstones extra secure!
Tombstone Substitutions
What if you don’t have Milano cookies on hand? Don’t panic! You can absolutely swap those out. Rectangular vanilla wafers work like a charm for making the tombstones. Just make sure whatever cookie you use is sturdy enough to stand up in that soft cheesecake topping!
Storage and Make-Ahead for Classic Halloween Graveyard Cheesecake Bites
Planning a big party means you need treats ready ahead of time, and these cheesecake bites are perfect for that! The instructions say you need to chill them for at least 2 hours before serving, and that’s absolutely true—you need that time so the filling sets up nicely. But honestly? They taste even better the next day once they’ve really settled in the fridge. You can make them completely, crust to tombstone, a full day before Halloween, which takes so much pressure off serving day. If you’ve never made a dessert that tastes better chilled overnight, you really need to see how amazing this funfetti Oreo icebox cake tastes after a full night in the cold. Just make sure you keep them covered tightly in the muffin tin or transferred to an airtight container!
Serving Suggestions for Your Classic Halloween Graveyard Cheesecake Bites
Since these bites are so rich and creamy, you don’t want to overpower them with a super sweet drink. I find that a nice, strong cup of black coffee cuts through that cheese tang perfectly. A slightly smoky black tea works beautifully too, especially if you’re serving these later in the evening. If you are looking for something fun for the kids (or adults pretending to be kids!), try them alongside my spiked hot chocolate—just make sure to keep the two separate!
Frequently Asked Questions About Classic Halloween Graveyard Cheesecake Bites
It’s no surprise that when you mix cheesecake with spooky fun, people have questions! I’ve gathered the most common ones I hear about these mini cheesecake treats. These bites are usually pretty straightforward, but texture and decoration advice always surface. If you’re looking for ways to mix up the flavors in batch cheesecakes, I’ve got a whole list of ideas in my article about cheesecake bites variations.
Can I make the cheesecake filling without baking?
That’s a great question! While you *can* make no-bake cheesecake, this specific recipe relies on that quick 18-minute bake time to set the egg properly and give you that dense, classic cheesecake texture. If you skip the oven time, the filling will stay too soft, and your little graveyard won’t hold up to the toppings. Stick to baking for the best result here.
What is the best way to make the ‘tombstone’ writing stand out?
When I write on those Milano cookies, I like to slightly dampen the cookie surface first with just a tiny bit of water on the toothpick before dipping it in the black food coloring. This helps the color flow a tiny bit smoother onto the cookie surface. If you are using store-bought black decorating gel icing, you can put the cookies back in the fridge for 10 minutes after writing—that cold helps the gel set up fast and prevents it from smearing onto your hands when you place it!
How far in advance can I assemble the graveyard topping?
You want to time the topping application carefully! The cheesecake *must* be completely chilled before you add the ‘dirt.’ I recommend assembling the cookie crumbs and pressing in the tombstone no more than 2 to 3 hours before you plan to serve them. If you let the moist cookie crumbs sit for too long on the cheesecake filling, they can start to get spongy and lose that nice dry, earthy look. Keep the cookies crushed and the tombstones decorated ahead of time, but add them right before the party starts for the sharpest look.

Estimated Nutritional Breakdown of Classic Halloween Graveyard Cheesecake Bites
So, you want to know what you’re digging into, right? Because these delicious little graves are rich, they definitely have some sugar, but they are perfectly portioned for a treat! Here are the rough estimates for one single bite. Remember that these are just guidelines because the exact nutrition depends on what brand of cream cheese or cookies you ended up using for your graveyard build. If you are trying to maximize your protein intake snack-wise, you might want to check out my high-protein cottage cheese recipe!
- Calories: Around 220
- Fat: About 14g
- Carbohydrates: Roughly 20g
- Protein: A solid 4g
- Sugar: Approximately 15g
Share Your Spooky Creations
Now it’s your turn to get out there and haunt the neighborhood with these bites! I absolutely love seeing what you all come up with when it comes to decorating. Seriously, seeing your creative tombstones makes my whole week. Did you use funny epitaphs? Did you add gummy worms crawling out of the dirt? Snap a picture and share it with me!
Please leave a rating for these Classic Halloween Graveyard Cheesecake Bites right here on the blog if you tried them out. Those ratings really help other bakers decide what spooky dessert to tackle next. And if you get a chance, you can always read a little more about my kitchen adventures over on the About Me page. Happy Halloween baking, and may your graveyards be perfectly spooky!
Print
Classic Halloween Graveyard Cheesecake Bites
- Total Time: 2 hours 38 min
- Yield: 12 bites 1x
- Diet: Vegetarian
Description
Small, individual cheesecake portions decorated to look like a miniature graveyard scene for Halloween.
Ingredients
- 12 graham crackers
- 1/4 cup melted butter
- 8 oz cream cheese, softened
- 1/4 cup granulated sugar
- 1/2 teaspoon vanilla extract
- 1 large egg
- 1/4 cup chocolate sandwich cookies, crushed (for ‘dirt’)
- 12 small Milano cookies (for ‘tombstones’)
- Black food coloring
- Small candy pumpkins (optional)
Instructions
- Preheat your oven to 325 degrees Fahrenheit. Line a 12-cup muffin tin with paper liners.
- Crush the graham crackers finely. Mix the crumbs with the melted butter. Press about 1 tablespoon of this mixture into the bottom of each liner.
- Beat the softened cream cheese, sugar, and vanilla extract until smooth. Beat in the egg until just combined. Do not overmix.
- Spoon the cheesecake batter evenly over the crusts in the muffin cups.
- Bake for 15 to 18 minutes, or until the edges are set. Let the cheesecakes cool completely on a wire rack.
- While cooling, prepare the tombstones. Use a toothpick dipped in black food coloring to write ‘RIP’ or other simple messages on the Milano cookies. Let them dry slightly.
- Once the cheesecakes are cool, mix the crushed chocolate cookies with a small amount of melted chocolate or water to make a damp, crumbly mixture resembling dirt. Sprinkle this mixture over the top of each cheesecake.
- Gently press one decorated Milano cookie into the ‘dirt’ on each cheesecake to resemble a tombstone.
- Chill the bites for at least 2 hours before serving. Add a small candy pumpkin if desired.
Notes
- You can use a store-bought graham cracker crust mix to save time.
- For a firmer ‘dirt,’ mix the cookie crumbs with a tiny bit of melted dark chocolate instead of water.
- If you do not have Milano cookies, use rectangular vanilla wafers for the tombstones.
- Prep Time: 20 min
- Cook Time: 18 min
- Category: Dessert
- Method: Baking
- Cuisine: American
Nutrition
- Serving Size: 1 bite
- Calories: 220
- Sugar: 15
- Sodium: 150
- Fat: 14
- Saturated Fat: 8
- Unsaturated Fat: 6
- Trans Fat: 0
- Carbohydrates: 20
- Fiber: 1
- Protein: 4
- Cholesterol: 45
Keywords: cheesecake bites, Halloween dessert, graveyard, individual cheesecake, no-bake crust, mini cheesecake