
I am telling you, sometimes you just need a serious sugar rush that doesn’t involve turning on the oven, right? Forget complicated rolling, baking times, or worrying about cracked edges. When I need a guaranteed crowd-pleaser ready in about an hour—mostly hands-off chilling time, thank goodness—I whip up my famous **Butterfinger Balls**. These little nuggets of peanut-butter heaven are my secret weapon for holiday cookie plates and last-minute potlucks because they are just so ridiculously easy and decadent.
Seriously, the combination of that crunchy candy bar mixed with creamy cheese and then dipped in smooth chocolate? It’s what dreams are made of. My family expects these now whenever we get together, and honestly, I don’t even mind because they come together so fast, even when I think I’m out of time!
Why You Will Love Making These Butterfinger Balls
I could go on and on about how good these taste, but let’s talk about why this recipe should jump right to the top of your easy-fix list. These treats are pure magic without the mess. Seriously, they are the shortcut to gourmet candy!
- Absolutely No Oven Required: Prep time is all you spend actively working. This means no frantic oven juggling when you’re already stressed hosting a party. And for more no-bake brilliance, check out my guide on four homemade no-bake truffle recipes.
- Speed Demon Dessert: From counter to chill time is super fast. You mix it up, roll it, and let the fridge do the hard work. They set up beautifully so you’re never waiting around for hours.
- That Incredible Flavor Combo: You get the unmistakable salty crunch of Butterfinger bars married perfectly to creamy fillings. It’s that classic peanut butter and chocolate combination that just hits the spot every single time.
- Perfectly Portable: Because they are chilled and coated in chocolate, they hold their shape wonderfully. I make huge batches and just stack them in containers; they’re wonderful for bake sales or dropping off to neighbors!

Essential Ingredients for Perfect Butterfinger Balls
When you’re making a recipe this simple, the quality of your starting materials really shines through, so pay attention to these few core items! We aren’t using much, but every single component counts toward making these the best **Butterfinger Balls** you’ve ever made. You start with a whole package of those darling miniature Butterfinger bars—and yes, you have to crush them yourself; no shortcuts here if you want that perfect texture!
Next up is the binder, which is 8 ounces of cream cheese. Now, this must be softened completely—and I mean *soft*. If it’s still cold when you bring it together with the crunchy bars, you’re going to end up with little hard lumps, and nobody wants a surprise hard lump in their otherwise smooth candy ball. You’ll balance that richness with two full cups of powdered sugar, which melts right into that creamy base. Finally, you need 12 ounces of semi-sweet chocolate for the glorious bath they take at the end.
Ingredient Specifics and Substitutions for Butterfinger Balls
Let’s talk quality control for a second. You want your cream cheese sitting out for at least an hour before you even think about mixing. If you forget (which happens to me all the time, oops!), just microwave it for about 10 seconds. Check it carefully, because too long and it turns soupy fast. Remember, soft, not melted!
For your chocolate coating, semi-sweet is my recommendation because it cuts through the sweetness of the cream cheese filling perfectly. But hey, if you are a milk chocolate loyalist, go for it! Milk chocolate will make them sweeter overall, so maybe knock half a cup of the powdered sugar down a bit to compensate. Dark chocolate is also a fantastic, slightly more sophisticated choice!
As for the Butterfingers, using the miniature size is easier because you don’t have to deal with unwrapping the big long bars. Just toss them in a zippered bag and give them a good whack with a rolling pin or the flat side of a meat tenderizer until they are finely crushed. You want some sandy pieces, but you also want a few decent little chunks left for that signature crunch!
Equipment Needed for Your Butterfinger Balls Recipe
You don’t need a fancy stand mixer or anything complex for this no-bake wonder! I keep my equipment simple, which is part of why I love this recipe so much. Seriously, if you have a couple of bowls, you’re halfway there.
You will definitely need a good, sturdy medium mixing bowl for bringing that glorious dough together. Grab another bowl, a slightly deeper one, for melting your chocolate coating. I always use parchment paper—don’t skip this! Line a standard baking sheet with it; this saves your cleanup time by a mile when you set the balls to chill.
Oh, and make sure you have a small cookie scoop or a spoon handy for measuring out the balls evenly. Consistency is key if you want them all to dip nicely in the chocolate coating!
Step-by-Step Instructions to Make Amazing Butterfinger Balls
This is where the magic happens, and believe me, it is so quick you’ll wonder why you didn’t make these **Butterfinger Balls** sooner! We move from mixing to cooling to dipping in a flash. Just follow these steps, and you’ll have professional-looking candy ready for the fridge in no time. Remember, this recipe is totally adaptable, just like the secrets I shared for making amazing three-ingredient peanut butter balls, but that crunch really sets these apart!
Mixing the Filling Base for Your Butterfinger Balls
First things first: get those crushed Butterfinger bars into your mixing bowl. You want them finely chopped, remember? Then, toss in that nice, soft cream cheese. Now, mix those two until they are just happy together—you don’t need to whip them into fluffiness yet. Once they look mostly combined, start adding that powdered sugar slowly, a little bit at a time.
Keep mixing until it starts to look like a cohesive dough. This is important! If you mix too long once the sugar is in, you risk overworking the cream cheese and the whole mixture can get a little too soft or even sticky later on. Stop mixing as soon as you can scrape the sides and gather the mixture into a ball. It should feel firm enough to roll easily, almost like playdough.
Chilling and Shaping the Butterfinger Balls
Now we need to make them uniform! I grab a small spoon—or honestly, I just use my small cookie scoop—and roll the dough into little balls, aiming for about an inch each. They should look cute and round! Place all your finished balls on that parchment-lined baking sheet we talked about.
This next part is non-negotiable for successful coating: they must chill! Pop that whole sheet into the refrigerator for a solid 30 minutes. Why? Because if they are cold and firm, they won’t fall apart when they hit the melted chocolate. Trust me on this one; warm balls and hot chocolate equal a melted mess!
The Chocolate Coating Process for Your Butterfinger Balls
While the balls are chilling, melt your 12 ounces of semi-sweet chocolate. I usually use the microwave method because I am impatient! Put the chocolate in a microwave-safe bowl and zap it in 30-second bursts, stirring well between each burst, until it’s mostly smooth. A few tiny lumps are okay because stirring those little lumps will melt them right out with the residual heat. You want it smooth and dippable, but not scalding hot.
Take the chilled balls out, and working quickly, stab one gently with a fork or use two regular forks to drop it into the chocolate. Roll it around until it’s completely coated. Lift it out, tap the fork gently on the side of the bowl to let the excess chocolate drip off—don’t wipe it on the side, or you’ll get a messy chocolate “foot”—then transfer it back to the parchment paper.
Once they are all dipped, pop them right back into the fridge. They only need about an hour to set up beautifully, but honestly, they are usually firm enough after about 45 minutes if your fridge is colder! When the chocolate is hard to the touch, you’re done!

Tips for Success When Preparing Butterfinger Balls
Even though these **Butterfinger Balls** are super simple, there are a couple of little hiccups that can crop up, usually around the chocolate dipping stage. Trust me, I’ve learned these lessons the hard way, usually ending up with a sticky mess on my counter! But don’t worry, a few simple tricks will ensure you get that perfect, professional-looking candy shell every single time.
My biggest piece of advice revolves around that chocolate coating. If your melted chocolate starts looking thick, dull, or like it’s hardening way too fast—that’s called seizing—and it usually means a tiny drop of water got in there. You can sometimes save it by stirring in a teaspoon of vegetable oil or shortening to thin it out again, but honestly, sometimes it’s best to just melt a new batch if you can. For a really smooth coat, check out my ideas for keto Butterfinger bars for advice on chocolate consistency!
Another common mistake is trying to skip the chilling step. If you roll warmish dough, it squishes into the chocolate, and when you lift it out, it drags the coating underneath with it, creating a huge, uneven puddle. When you place the chilled balls back on the parchment paper, leave a little space between them. If they touch while the chocolate is setting, they might stick together or create unsightly seams when you try to separate them after they cool.
Also, if you prefer a slightly thinner coating, try adding a half-teaspoon of coconut oil to your melted chocolate. It makes the coating really thin out but firms up beautifully in the fridge—it gives them a satisfying snap when you bite into them!
Storage and Make-Ahead Options for Butterfinger Balls
Because these are totally no-bake, they are absolute treasures for making ahead of time! Seriously, I love whipping up a huge batch of these **Butterfinger Balls** three or four days before any big event. They hold up so beautifully in the fridge, and sometimes I think they actually taste even better the next day once all those flavors have really settled into the creamy filling.
The key here, just like with most good cream cheese-based treats, is keeping them cold and covered. Once that chocolate coating is completely set up—and I mean bone dry and hard—transfer them immediately to an airtight container. If you skip the airtight seal, they can dry out a tiny bit, or worse, pick up any funky smells from other things hanging out in your fridge!
I usually place a single sheet of wax paper or parchment between the layers if I have too many to fit in one container. This prevents them from sticking to each other, especially if your kitchen is a little warm. They will last perfectly well in the refrigerator for up to a week, which is why you should totally double the recipe! Imagine being set for dessert all week long!
If you are looking to make these even further ahead—maybe prepping for a holiday cookie exchange that’s weeks away—you can actually freeze them! You don’t even need to thaw them completely before serving them. Just place the finished, coated balls in a freezer-safe container, letting them freeze solid. When you want to serve them, take them out of the freezer and let them sit on the counter for just 15 to 20 minutes. That little bit of warming takes the chill off the chocolate so it’s not rock hard, but the center stays cool and fresh. They are an amazing make-ahead solution, offering the same joy as my no-bake funfetti Oreo cake, but in single-serving candy form!
Serving Suggestions for Your Homemade Butterfinger Balls
Once you’ve got these beauties chilling and gleaming, the fun part is figuring out where to put them! These aren’t just any old chocolate candy; they are showstoppers when presented right. Because they are rich and satisfying, you don’t need a huge platter, but the presentation does make them feel extra special.
When I take these to a party, I never just dump them in a bowl. I like to line a simple white or silver serving platter with some decorative paper doilies—you know, the lacy ones Grandma always used? Place the **Butterfinger Balls** nestled together, making sure the chocolate coating faces upward so everyone gets a good look at that perfect shell.

They are absolutely amazing right out of the fridge, but if you’re serving them for a long evening, try pulling them out about 15 minutes before people start grazing. That slight warming just takes the edge off the chocolate so it melts beautifully in your mouth. They pair wonderfully with something strong, like a hot coffee or maybe even an iced latte if it’s warmer weather.
Honestly, these are fantastic candidates for holiday treat boxes. I often mix them in with some simple fudge or maybe some peanut butter cups—if you love peanut butter treats, you must check out my guide on four other delicious dessert recipes! Just tucking two or three of these little chocolate-coated wonders into a cellophane bag with a nice ribbon makes a thoughtful, delicious little gift that everyone appreciates because they taste so homemade and indulgent!
Frequently Asked Questions About Butterfinger Balls
I know you’ve got questions! When you are dealing with no-bake candy and melted chocolate, sometimes you just need a little extra reassurance before diving in. I’ve gathered some of the things people ask me most often when they are preparing these amazing **Butterfinger Balls** for the first time.
Can I make these Butterfinger Balls ahead of time?
Absolutely! Seriously, these are the superstar of make-ahead desserts because they need to be chilled anyway. You can mix, roll, and chill the centers for up to two days before you plan to dip them in chocolate. Once they are fully coated, they store beautifully in an airtight container in the fridge for a whole week. They even freeze well, which is great if you’re stocking up for a big holiday!
What’s the best way to crush the Butterfinger bars finely?
Listen, I used to just throw them in a plastic bag and hit them with a hammer, but that works, it just creates a huge mess! The easiest, neatest way I’ve found is to put the mini bars into a food processor and just pulse them a few times. You want them finely chopped, but you still need some texture left over so it doesn’t taste like butter-flavored paste. If you don’t have a food processor, a heavy rolling pin inside a sturdy Ziploc bag works wonders!
My chocolate seized up while melting—what went wrong?
Oh, the dreaded seizing! This is almost always caused by a tiny bit of water hitting the melted chocolate. Be careful not to let any steam creep into your bowl during microwaving, or better yet, don’t stir with a damp spoon. If it happens, don’t panic! If you have some vegetable oil handy, stir in about a teaspoon. It acts as a wonderful shortener and thins the chocolate right back out so you can rescue your coating for these **peanut butter candy** favorites.
Can I use store-brand peanut butter bars instead of Butterfinger?
You can, but trust me, it won’t be the same! The real magic in this no-bake candy comes from that distinct, flaky crunch of the actual Butterfinger bar. A generic peanut butter filling bar just won’t give you that authentic flavor profile or texture you need for this specific recipe. Stick to the name brand here; it’s worth it!
How do I get the chocolate coating so smooth, like in the bakery?!
A smooth coat is all about temperature and technique. Make sure your chocolate isn’t too hot when you dip; warm, not steaming hot! After you coat the chilled ball, lift it out on a fork and—this is the part everyone forgets—gently tap the fork handle against the side of the bowl. This vibrating action shakes off the excess drips, leaving you with a thin, glossy coat that sets up perfectly without drips or clumsy puddles on the bottom. If you want to explore another rich, chocolatey experience, you should look at my recipe for amazing Buckeye brownies!
Estimated Nutritional Data for This Treat
Okay, so because these **Butterfinger Balls** are packed with creamy filling and chocolate coating, they definitely fall into the ‘treat yourself’ category, not the ‘eat three every day’ category! I had my nutritionist friend run the numbers, and here’s what she came up with for one perfect little ball. Just remember, this is just an estimate based on what standard brands of cream cheese and chocolate chips use, so every batch might vary just a tiny bit.
But honestly, when they taste this good? I’m not logging every single calorie. I’m just too busy grabbing another one! These are meant for joy, not spreadsheets, but for those of you who like to plan things out, here’s the general breakdown per serving (which is one ball, by the way).
- Serving Size: 1 ball
- Calories: 180
- Fat: 10g
- Saturated Fat: 6g
- Carbohydrates: 21g
- Sugar: 18g
- Protein: 2g
- Sodium: 110mg
- Cholesterol: 15mg
See? Worth every single bite. Enjoy them responsibly, or don’t—I won’t tell!
Print
Butterfinger Balls
- Total Time: 1 hour 25 min
- Yield: 24 servings 1x
- Diet: Vegetarian
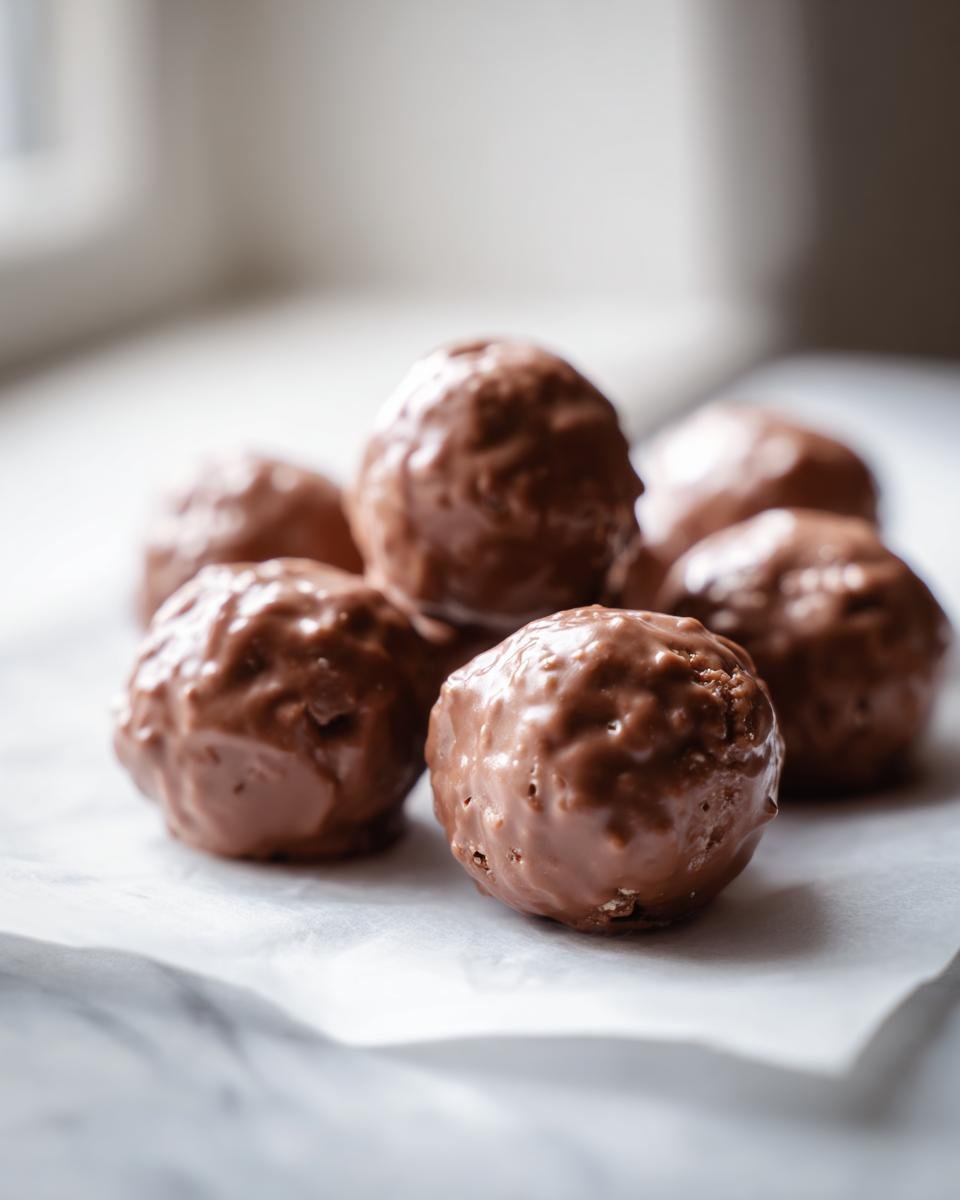
Description
Simple, no-bake candy balls made with crushed Butterfinger bars and cream cheese.
Ingredients
- 1 (10.5 ounce) package miniature Butterfinger bars, crushed
- 8 ounces cream cheese, softened
- 2 cups powdered sugar
- 12 ounces semi-sweet chocolate, melted
Instructions
- Place crushed Butterfinger bars in a medium bowl.
- Add softened cream cheese to the bowl and mix until combined.
- Gradually mix in the powdered sugar until a dough forms.
- Roll the mixture into small balls, about 1 inch in diameter.
- Place the balls on a baking sheet lined with parchment paper.
- Chill the balls in the refrigerator for 30 minutes.
- Dip each chilled ball into the melted chocolate, coating completely.
- Return the coated balls to the parchment-lined sheet.
- Refrigerate until the chocolate is set, about 1 hour.
Notes
- You can use milk chocolate or dark chocolate instead of semi-sweet.
- Store leftover balls in an airtight container in the refrigerator.
- Prep Time: 25 min
- Cook Time: 0 min
- Category: Dessert
- Method: No Bake
- Cuisine: American
Nutrition
- Serving Size: 1 ball
- Calories: 180
- Sugar: 18
- Sodium: 110
- Fat: 10
- Saturated Fat: 6
- Unsaturated Fat: 4
- Trans Fat: 0
- Carbohydrates: 21
- Fiber: 0
- Protein: 2
- Cholesterol: 15
Keywords: Butterfinger Balls, no bake candy, peanut butter candy, chocolate candy, easy dessert