
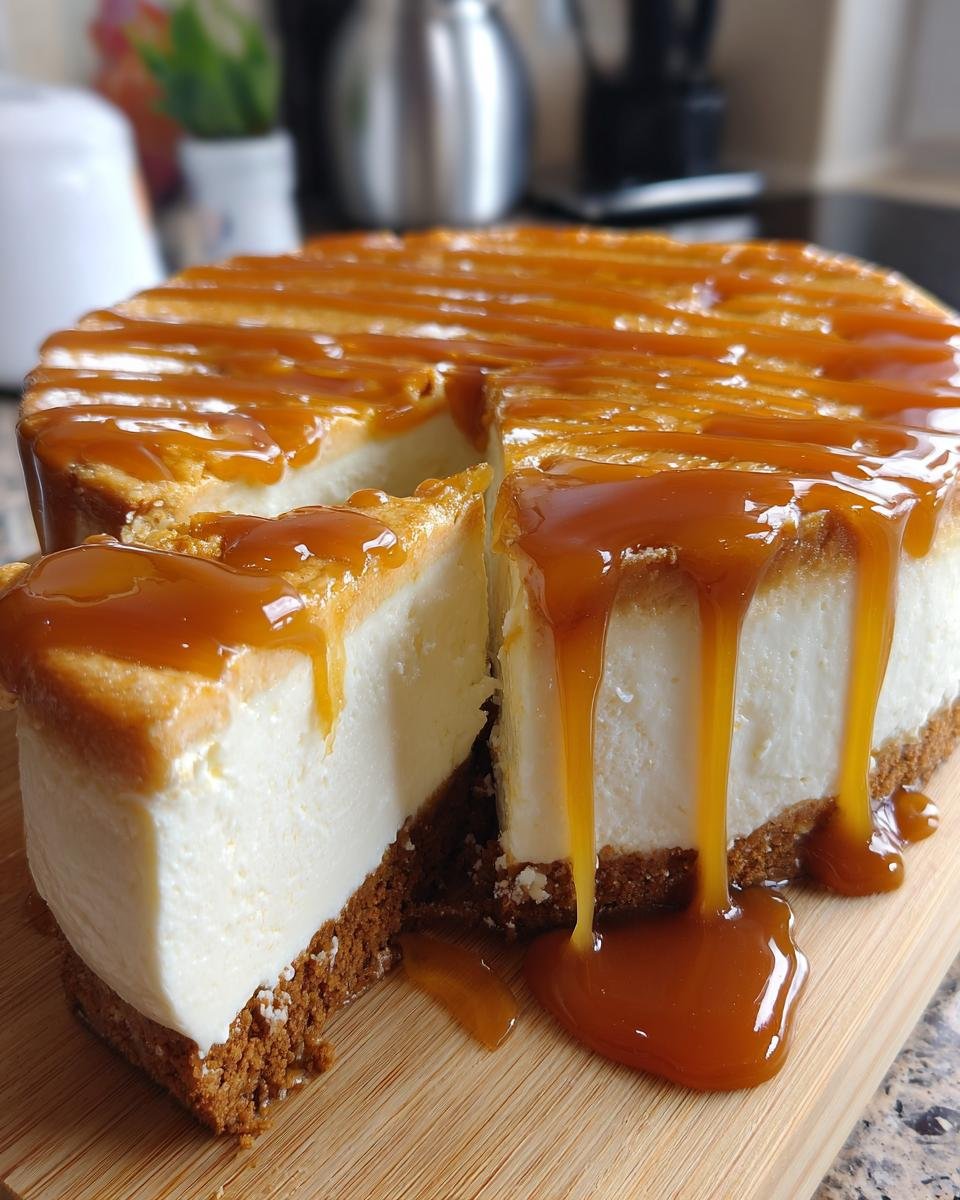
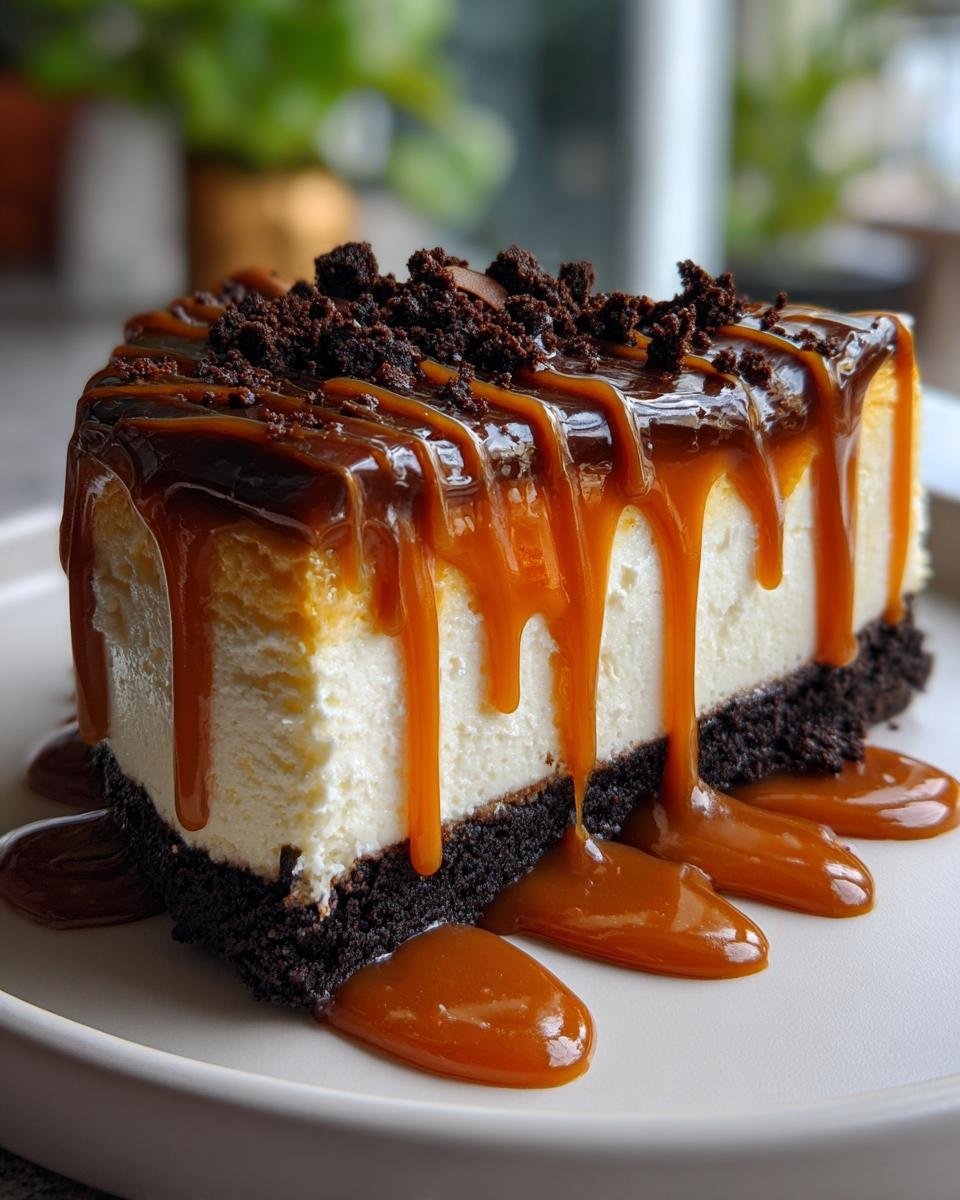
If you’re like me, you want your desserts to scream indulgence but whisper, “I took five minutes to make this.” Seriously, who has time for water baths when there’s coffee to drink? That’s why I’m practically vibrating with excitement to share this absolute showstopper: the no-bake Biscoff Salted Caramel Cheesecake. I first made this for a last-minute gathering last summer, and I swear, the pan was licked clean before I even set out the good coffee cups. It’s unbelievably rich, creamy, and layered with that amazing caramelized spice flavor we all love!
Why This Biscoff Salted Caramel Cheesecake is Your Next Favorite Dessert
Okay, honestly, what’s not to love about this one? It hits every single mark when you’re craving something truly special but you’ve run out of energy for complicated baking. This recipe sings because it makes the impossible look easy.
- No Oven Required! The entire recipe is no-bake, which means zero last-minute preheating panic.
- Maximum Flavor, Minimal Effort. You get that deep, spiced cookie crust paired with tangy cream cheese and luscious caramel.
- Ultimate Crowd-Pleaser. Everyone loves Biscoff, trust me. It’s a guaranteed success for any get-together.
If you want more of my best decadent desserts, check out my dedicated page for spectacular dessert recipes!
Gathering Ingredients for the Perfect Biscoff Salted Caramel Cheesecake
Listen, the success of any no-bake item hinges entirely on having the right stuff ready to go. You can’t improvise much here! Make sure you check my list twice before you start mixing, especially when it comes to temperatures—that’s everything for a creamy cheesecake, right?
For the Biscoff Crust
We start simple, just paving the way for that incredible filling to sit on!
- 1 1/2 cups Biscoff cookie crumbs
- 1/4 cup unsalted butter, melted
For the No-Bake Cheesecake Filling
This needs your attention! The texture depends on these things being exactly right. Remember, the heavy cream should be ice cold!
- 16 ounces cream cheese, softened (leave it out for about an hour!)
- 1 cup powdered sugar
- 1 teaspoon vanilla extract
- 1/4 teaspoon salt
- 1 cup heavy whipping cream, cold
For the Topping and Swirl
These are the glorious ribbons of flavor that make this recipe a showstopper. Don’t skip the drizzle!
- 1/2 cup salted caramel sauce, plus extra for drizzling
- 1/4 cup Biscoff spread (optional, but I highly recommend it for that extra swirl!)
Step-by-Step Instructions for Your No-Bake Biscoff Salted Caramel Cheesecake
Now for the fun part! Even though there’s no oven involved, technique still matters a ton here, especially when we’re whipping cream. Getting that crust perfectly firm is my biggest tip; press it down with the bottom of a measuring cup really hard. It gives the whole dessert backbone!
If you’re looking for other amazing baked (and no-bake!) cheesecake ideas, you absolutely have to peep my recipe for mini cinnamon roll cheesecakes—they are adorable!
Preparing and Chilling the Crust
First things first: we make the buttery base! Mix up your 1 1/2 cups of Biscoff cookie crumbs with the 1/4 cup of melted butter until it looks like wet sand. Press that mixture down super firmly into the bottom of your 9-inch springform pan. Make sure you get the sides nice and tight too. Pop that pan in the fridge for about 15 minutes while you tackle the filling mixture. It needs just a quick chill to firm up!
Creating the Creamy Cheesecake Filling
Grab your mixer for this! Beat the 16 ounces of softened cream cheese until it’s cloud-smooth—no lumps allowed, make sure you scrape the bowl down. Then, add the powdered sugar, vanilla, and salt until it’s just blended in. You absolutely must whip the heavy cream separately until you get stiff peaks. When you fold that whipped cream into the cream cheese base, be gentle! We want to keep all that air we just whipped in there so the cheesecake isn’t too dense later.
Assembling and Setting the Biscoff Salted Caramel Cheesecake
Time for layering! Pour half of that dreamy filling over your chilled base. Now, take half of your salted caramel sauce and drizzle it right on top. If you’re using the optional Biscoff spread, dollop gobs of it here and use a knife to swirl it around gently—don’t overmix! Smooth the rest of the filling over the caramel layer. Cover the whole thing up and put it in the fridge for at least 6 hours. Honestly, overnight is always better for the creamiest set.

Expert Tips for the Best Biscoff Salted Caramel Cheesecake Texture
I’ve made this Biscoff Salted Caramel Cheesecake more times than I care to admit, and I’ve learned a few tricks to make sure it sets up perfectly every single time. Since this is a no-bake recipe, we rely on the chill and the cream cheese doing all the structural work, but sometimes it needs a little extra help, especially if your kitchen is warm!
If you’re worried about it falling apart when you slice into it, I have a little secret weapon. Check out my recipe for Samoa Cheesecake—it uses a similar technique for help with structure.
The Gelatin Trick for a Super Firm Set
For those truly perfect, clean slices, you might want to introduce gelatin to the party. This isn’t required, but if you need that extra assurance, here’s what you do: bloom one teaspoon of unflavored gelatin in about two tablespoons of hot water until it completely dissolves and looks clear. Whisk that liquid gelatin right into your cream cheese mixture right after you add the salt and sugar, but *before* you fold in the whipped cream.
It sounds fancy, but it’s just a little insurance policy for firmness. Just make sure the gelatin isn’t hot when you add it, or it’ll deflate your cream cheese!
Don’t Skimp on Biscoff Quality
I know you can find cheaper speculoos-style cookies out there, but for this showstopper, you absolutely have to stick with the real deal Biscoff cookies for the crust and the spread if you use it. The flavor of Biscoff is unique—that deep, caramelized spice just can’t be replicated perfectly.
High-quality cookies mean a deeper flavor in the crust, which really holds up to the richness of the salted caramel. You’ll taste the difference immediately!
Cream Cheese Temperature is Non-Negotiable
This is critical for any cheesecake, baked or not: your cream cheese must be softened. I mean truly softened—poke it, and your finger should sink in easily. If the cream cheese is too cold, no matter how long you beat it, you’re going to end up with little hard chunks of cheese in your otherwise smooth filling. And trust me, nobody wants to bite into a cold, hard piece of cream cheese in their dessert!
Ingredient Notes and Substitutions for Your Biscoff Salted Caramel Cheesecake
Even when we stick to a fantastic recipe like this Biscoff Salted Caramel Cheesecake, sometimes the pantry fairies haven’t been generous, right? Don’t panic if you’re missing one tiny piece! We can usually pivot, though I always stress that the core ingredients—the cream cheese and the Biscoff itself—are worth hunting down.
If you love making things from scratch, you can check out my recipe for easy homemade caramel if your store-bought sauce isn’t quite hitting the spot. But let’s talk about substitutions!
The Biscoff Spread Dilemma
The recipe calls for Biscoff spread for that optional internal swirl, and honestly, it adds such a beautiful depth of spice and texture. If you simply cannot find Biscoff spread, you have a couple of options. You can omit it entirely, and the cheesecake will still be amazing—it just becomes a more classic salted caramel cheesecake, which is wonderful on its own!
Or, if you want that flavor back, you could try melting down a few extra Biscoff cookies and mixing them with a tiny knob of softened butter until it forms a very thick paste, though it won’t swirl quite as nicely as the original spread. But omitting it works out just fine!
What if I only have block cream cheese?
This is the most important thing: your cream cheese must be soft. If you pull out the 16 ounces of block cream cheese and realize it’s still hard as a rock straight from the fridge, don’t try to beat it! It will never come together smoothly. You need to let it sit on the counter for at least an hour, maybe more if your kitchen is chilly. If you are truly rushed, cut the blocks into small cubes—this increases the surface area and helps them soften faster.
Trust me, trying to beat cold cream cheese just results in lumps, and you’ll end up spending five extra minutes scraping the bowl when you should be enjoying your victory lap!
Can I switch the cookie type for the base?
Look, you *can* use graham crackers or even Oreos if you’re in a real pinch, but you’re going to lose that signature Biscoff spiced snap. If you switch to plain graham crackers, you might need to add a tiny pinch of cinnamon and maybe a little extra sugar into the mix since graham crackers aren’t nearly as sweet as the cookies are.
If you use Oreos, you absolutely must scrape out all the white filling first. If you leave it in, it throws off the fat ratio needed for the crust to hold together properly once it chills!
Serving Suggestions for Your Biscoff Salted Caramel Cheesecake
This Biscoff Salted Caramel Cheesecake is incredibly rich, so remember we serve it cold—straight from that long chill time! It’s dense and decadent, meaning you don’t need much alongside it. Cut those slices thin, maybe even serve them on smaller dessert plates.
Since the flavor profile is so heavy on the spice, sugar, and caramel notes, the best pairings are things that cut through that richness. I always reach for something bright and tart, like a small scoop of tart raspberry sorbet or maybe a very simple, crisp coffee. If you want to keep the beverage theme rolling, check out some of my favorite drink recipes to balance things out!
Storage and Reheating Instructions for Biscoff Salted Caramel Cheesecake
Because this is a no-bake cheesecake, we need to treat it right in the fridge so it stays fresh and doesn’t absorb any funky smells from the rest of your leftovers! Moisture and odor are the enemies of a perfect cheesecake crust, so listen up.
Keeping it Fresh in the Refrigerator
This beauty absolutely thrives in the cold. Once it’s completely set—after that glorious overnight chill—you can store it covered in the springform pan itself, or carefully transfer the cake off the base and stick it onto a serving plate. The key is covering it tightly.
I always use plastic wrap, but you have to be careful not to let the wrap touch the surface, especially if you didn’t use a thick layer of caramel on top. If the plastic sticks to the filling, it’ll tear the surface when you pull it off later! If you have an airtight cake carrier, that’s the best bet. It should stay perfectly delicious in the fridge for up to four days.
Why Reheating is a Big No-No
Okay, now for the important part: we do not reheat this! This is the magic of a no-bake recipe—it sets with cold, not heat. If you try to warm up your Biscoff Salted Caramel Cheesecake, two things will happen, and neither is good. First, the butter in the crust will melt, making the whole bottom greasy and crumbly. Second, the filling—which relies on the firmness of the cream cheese and stabilized heavy cream—will turn soupy and sad.
Just keep it in the fridge until you want to serve a slice, that’s all it needs! If you leave a piece out on the counter for dessert service, just try to eat it within an hour so it doesn’t get too room temperature soft.
Freezing for Later Indulgence
You can absolutely freeze this recipe, which is great if you need to make it ahead of time for a party! Wrap the entire chilled cheesecake tightly in two layers of plastic wrap, and then cover it again with foil to prevent any freezer burn or weird smells from sneaking in. It freezes really well for up to one month.
When you’re ready to eat it, move the whole wrapped cake to the refrigerator the day before you plan to serve it. Let it thaw slowly in the fridge for a good 12 to 24 hours. Never try to thaw it on the counter or in the microwave; it needs that slow temperature adjustment to stay creamy!
Frequently Asked Questions About Biscoff Salted Caramel Cheesecake
You know I always get a ton of questions after I post a recipe this popular! People want to know about making it ahead, swaps, and just how firm this beauty gets. I’ve gathered the most common things folks ask about this no-bake treat right here so you can bake with confidence!
If you are interested in another fantastic cold dessert, you should really check out my recipe for a dreamy lemon cheesecake—it’s another winner!
Can I make the Biscoff crust ahead of time?
Oh absolutely, that’s one of the best parts! You can totally make the Biscoff crust a day ahead of time. Just press it into the springform pan, cover it tightly with plastic wrap—making sure the wrap doesn’t smudge the surface—and keep it in the fridge. It holds up beautifully for 24 hours. When you’re ready to start the filling, just take it out while you mix your ingredients, and it’s ready to go!
How firm should the final no-bake cheesecake be?
Since this isn’t baked, it relies on chilling time, not heat, to set! When it’s perfectly done, it should feel firm to the touch around the edges, and when you press the center very lightly with a clean finger, it should spring back slightly without leaving a deep indent. If it feels too soft, it just needs more time chilling—don’t cheat on that 6-hour minimum, or it’ll just ooze out when you try to slice it!

What if I use graham crackers instead of Biscoff cookies for the crust?
I strongly suggest using the real Biscoff cookies because that spiced flavor is central to the whole experience, but if you have to substitute, graham crackers will work! Just remember that graham crackers are less sweet and less rich in fat than the cookies. If you switch, I usually recommend adding just a tiny sprinkle (maybe 1/2 teaspoon) of ground cinnamon to your crumb mixture to try and mimic some of that warm spice flavor we lose.
Can I skip the heavy whipping cream and just use Cool Whip?
While I love a good shortcut sometimes, please try to avoid swapping the heavy whipping cream for a tub of pre-whipped topping here. The heavy cream is what you whip up to stiff peaks, and that mechanical aeration is what gives the filling its light, airy structure when folded into the cream cheese. If you use stabilized whipped topping, your cheesecake will end up way too dense and heavy—more like a block of spiced cream cheese than a lovely, light no-bake cheesecake!
Is it okay if my salted caramel sauce is thick when drizzling?
That depends on the caramel! If your jarred sauce is super thick and practically solid, you might want to warm it up just a tiny bit—maybe 10 seconds in the microwave. You don’t want it hot, just warm enough to flow nicely in those beautiful ribbons over the filling. If you pour thick caramel, it can actually drag the soft filling underneath it and ruin your layers. Aim for a smooth, pourable consistency!
Nutritional Estimate for Biscoff Salted Caramel Cheesecake
Now, let’s talk numbers. Since this Biscoff Salted Caramel Cheesecake is definitely on the decadent side, I always recommend just focusing on how amazing it tastes! But for those of you who like to keep track, here is a general estimate of what you’re looking at per slice. Remember, I’m a cook, not a scientist, so these figures are based on standard ingredient sourcing and portioning—your exact results might vary!
We aim for about 10 generous servings when making this in a 9-inch pan. Everything in this treat is rich, so keep that in mind!
- Serving Size: 1 slice
- Calories: 450
- Sugar: 35g
- Sodium: 250mg
- Fat: 30g
- Saturated Fat: 18g
- Unsaturated Fat: 12g
- Trans Fat: 0.5g
- Carbohydrates: 40g
- Fiber: 1g
- Protein: 6g
- Cholesterol: 95mg
Because of the cream cheese, butter, and caramel sauce, we know this is high in fat and sugar—that’s just the cost of ultimate indulgence, isn’t it? But since it’s no-bake, we skip the extra fats sometimes associated with baking stabilizers. Enjoy every single bite!
Print
Biscoff Salted Caramel Cheesecake
- Total Time: 6 hr 25 min
- Yield: 10 servings 1x
- Diet: Vegetarian
Description
A rich, no-bake cheesecake featuring a Biscoff cookie crust, creamy filling, and a salted caramel topping.
Ingredients
- 1 1/2 cups Biscoff cookie crumbs
- 1/4 cup unsalted butter, melted
- 16 ounces cream cheese, softened
- 1 cup powdered sugar
- 1 teaspoon vanilla extract
- 1/4 teaspoon salt
- 1 cup heavy whipping cream, cold
- 1/2 cup salted caramel sauce, plus extra for drizzling
- 1/4 cup Biscoff spread (optional, for swirl)
Instructions
- Combine cookie crumbs and melted butter. Press mixture firmly into the bottom of a 9-inch springform pan. Chill crust for 15 minutes.
- In a large bowl, beat the softened cream cheese until smooth.
- Gradually add powdered sugar, vanilla extract, and salt. Mix until just combined.
- In a separate bowl, whip the cold heavy cream until stiff peaks form.
- Gently fold the whipped cream into the cream cheese mixture until smooth.
- Pour half of the cheesecake mixture over the chilled crust. Drizzle with half of the salted caramel sauce. If using, swirl in the Biscoff spread gently.
- Top with the remaining cheesecake mixture. Cover and chill for at least 6 hours, or preferably overnight.
- Before serving, drizzle the top with remaining salted caramel sauce.
Notes
- For a firmer texture, you can add 1 teaspoon of unflavored gelatin dissolved in 2 tablespoons of hot water to the cream cheese mixture before folding in the whipped cream.
- Use high-quality Biscoff cookies for the best flavor in the crust.
- Prep Time: 25 min
- Cook Time: 0 min
- Category: Dessert
- Method: No-Bake
- Cuisine: American
Nutrition
- Serving Size: 1 slice
- Calories: 450
- Sugar: 35
- Sodium: 250
- Fat: 30
- Saturated Fat: 18
- Unsaturated Fat: 12
- Trans Fat: 0.5
- Carbohydrates: 40
- Fiber: 1
- Protein: 6
- Cholesterol: 95
Keywords: Biscoff, cheesecake, no-bake, salted caramel, dessert, cookie crust