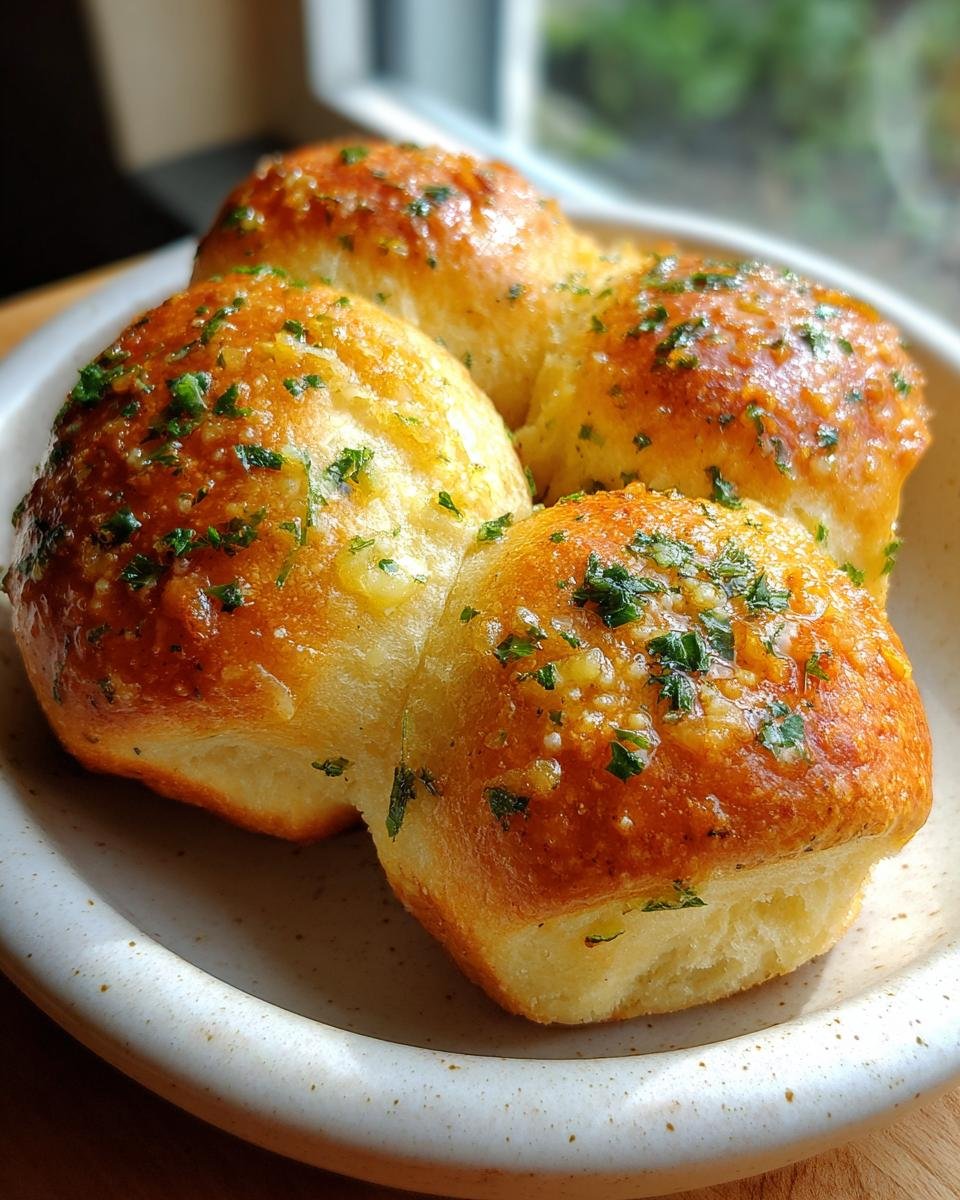
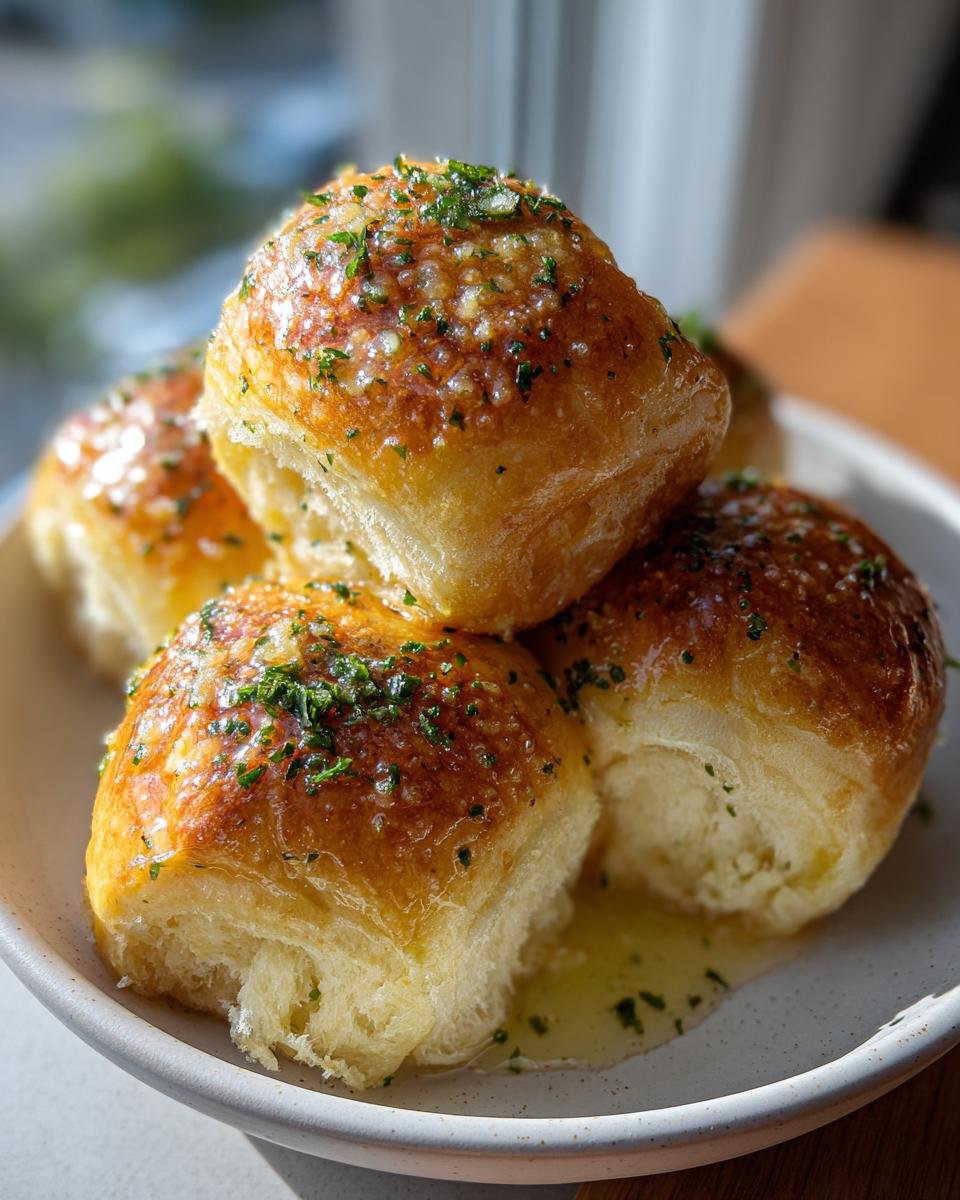
Oh my goodness, nothing beats the *smell* of fresh bread bubbling straight out of the oven, especially when it’s coated in garlic and herbs! If you think amazing garlic bread rolls mean spending half your weekend kneading and waiting, trust me, you haven’t tried my method yet. We are making the absolute **Best Garlic Bread Rolls** here—they’re cloud-soft on the inside and perfectly golden on top.
I swear by these rolls. I once forgot to plan dessert for a last-minute potluck, panicked, and whipped these up in just under two hours total. Everyone raved! They completely saved the night, and honestly, they disappeared before the main course was even finished. This recipe is my secret weapon when I need something impressive but easy. I’m so excited for you to try them! If you want to learn more about making simple, reliable recipes like this one, you can check out my philosophy over at my story page.

Why You Will Make the Best Garlic Bread Rolls Every Time
Honestly, once you try making your own bread rolls, you’ll never go back to store-bought. These aren’t just ‘good’ garlic rolls; they are wildly addictive. I keep this recipe bookmarked for emergency dinners because it gives you maximum flavor for minimal fuss. What’s not to love?
- The texture is pure magic! They are so incredibly soft and pillowy inside, feeling lighter than air. You’ll find yourself pulling them apart before they even get to the table.
- The flavor hits exactly right. We use fresh garlic and parsley, so the butter topping is vibrant—not that oily, flat flavor some recipes end up with. It’s just perfect Italian-American comfort food.
- It’s surprisingly low-stress. If you’re nervous about yeast, don’t be! The initial proofing part is simple, and the kneading is fast. It’s a beginner-friendly dough that yields professional results. You can see another one of my reliable yeast recipes right here if you need more confidence building!
- The yield is excellent for a weeknight. Eight lovely rolls are perfect for pairing with a big bowl of soup or spaghetti, but they pull apart easily if you want to stretch them for a slightly larger crowd.
- They smell like heaven while baking, instantly elevating whatever meal you’re serving them with. Seriously, the aroma alone is worth the effort.
Essential Ingredients for the Best Garlic Bread Rolls
You only need a few pantry staples for this recipe, but the quality really matters, especially when it comes to that gorgeous garlic flavor we’re aiming for. Everything comes together so fast here, which is why I love this dough so much. If you’re looking for another simple, delicious recipe using basic pantry items, check out this one using canned tomatoes—it’s a lifesaver!
Here is exactly what you need for the dough and the topping. Please pay close attention to the water temperature; that’s where beginners sometimes stumble with yeast dough!
First, the roll base:
- One cup of warm water. And I mean *warm*, not hot! Aim for that sweet spot between 105 to 115 degrees Fahrenheit. If it’s too cold, your yeast snoozes; too hot, and you kill it dead.
- Two and a quarter teaspoons of active dry yeast. Make sure that stuff isn’t ancient in your pantry!
- One tablespoon of plain sugar. This just feeds the yeast so it wakes up happy and active.
- Two and a half cups of all-purpose flour. You might need a tiny bit more for dusting later, but this is the core amount.
- One teaspoon of salt. Don’t forget this! It adds structure and flavor, believe it or not.
- One quarter cup of unsalted butter, melted for mixing into the dough.
Now for the part that makes these the Best Garlic Bread Rolls—the topping!
- The remaining four tablespoons of unsalted butter, melted again.
- Two cloves of fresh garlic, minced really finely. Don’t use that powder, please! Fresh garlic shines here. It’s one of my firm believer tips—using fresh whenever possible really boosts the flavor integrity, which is what we aim for in home baking.
- Two tablespoons of fresh parsley, chopped up nice and green.
That’s it! Simple, right? But those simple ingredients, treated with respect, create something truly special.
Expert Tips for Preparing the Best Garlic Bread Rolls Dough
Okay, the dough is where the magic starts, and it’s less scary than you think! When you’re working with yeast, you have to treat it gently at first. This dough recipe is fantastic because it doesn’t need a super long rest, but those first few minutes are crucial for structure. If you want to see another dough recipe where technique is everything, check out my guide on making perfect pizza crust; the principles are similar!
Activating the Yeast for Perfect Rise
You absolutely must use water that measures between 105 and 115 degrees Fahrenheit. I use one of those cheap little instant-read thermometers because I can never judge by my wrist anymore! Mix the water, yeast, and sugar, and then *wait*. If you don’t see a nice, frothy layer develop on top within about five minutes—I mean bubbly, foamy, maybe even slightly thick—then your yeast is dead, and you need to start over with fresh yeast. That foam is proof everything is ready to go!
Kneading Technique for Soft Best Garlic Bread Rolls
Once you mix everything, you’ll get a shaggy mess, and that’s fine! Turn it out onto a lightly floured counter and work it. You’re looking for about five to seven minutes of consistent kneading. You’ll feel the dough change almost magically from sticky and rough to smooth and velvety elastic under your hands. Don’t stop early! If you under-knead, those rolls will bake up dense and heavy, almost like a hockey puck. We want fluffy clouds, not hockey pucks, remember?
Step-by-Step Instructions to Bake the Best Garlic Bread Rolls
Alright, buckle up, we are getting these golden beauties in the oven! Baking bread is all about timing, so try to keep an eye on the clock during those rise periods. I’m obsessed with watching the dough expand—it’s such a satisfying visual confirmation that the yeast is doing its job perfectly. Speaking of timing, if you want to see another recipe that relies on precise timing for perfection, take a look at my guide on perfectly cooked rice; the concepts are similar!
Once your dough is kneaded and smooth, put it in that greased bowl, cover it up tight, and stick it somewhere warm. We need a full hour for the first rise. Don’t rush this part! When it’s doubled—and I mean truly doubled in size—it’s time to get aggressive and punch that air out. Then we move straight into shaping.
The First Rise and Shaping the Rolls
After you punch the air out, you need to gently turn the dough onto a lightly floured surface. Now, here’s where you prepare for eight perfect rolls. I use a kitchen scale sometimes, but mostly I just eyeball it—the main goal is consistency. Divide the dough evenly into eight pieces. You want them pretty close to the same size so they bake evenly.
Roll each piece up into a tight little ball between your palms. Think about creating surface tension on the outside seam—that helps them keep their shape. Place these neat little rounds on a baking sheet that you’ve lined with parchment paper first. Seriously, don’t skip the parchment; it saves your sanity later! Cover them again lightly and let them rest for twenty minutes. This second rest lets the yeast kick back up before baking. Preheat your oven to 375 Fahrenheit while they rest!
Creating the Signature Garlic Butter Topping
This is the fun part where the aroma starts taking over your entire house! While those rolls are taking their last little nap, whip up the butter mixture. Melt those last four tablespoons of butter until soft and liquidy.
Toss in your minced garlic—and I mean fresh!—and those bright green parsley flecks. Stir it up really well so the garlic is distributed everywhere. Now, when the 20 minutes are up and the oven is hot, grab a pastry brush and smother those tops! Don’t be shy; make sure they get a generous, thick coating of that gorgeous garlic butter. This liquid gold sinks in during baking and creates that amazing crust on your Best Garlic Bread Rolls.
Bake them for 15 to 18 minutes. Keep an eye on them after the 15-minute mark. They are done when they look deeply, gloriously golden brown across the top!
Tips for Success When Making Your Best Garlic Bread Rolls
When it comes to yeast dough, little things can make a huge difference between a good roll and a roll that disappears instantly! I learned over the years that paying attention to ingredient temperature makes the process smoother overall. If you can, take your butter out about an hour ahead of time, even the butter for the topping, so everything incorporates seamlessly. This little bit of advanced planning really helps ensure we hit that soft texture every time. Before you dive in, check out this guide on another easy baking concept that can use similar temperature control methods!
Here are a few hard-won tips to guarantee your Best Garlic Bread Rolls are perfect:
- Use Foil for Maximum Softness: This is one of my Grandma’s tricks, adapted for speed. If you really, really want those ultra-soft, almost steamed rolls, cover the baking sheet loosely with aluminum foil for the first 10 minutes of baking. This traps the heat and steam, keeping the tops from forming too hard a crust right away. Pull the foil off for the last 5–8 minutes so they can brown up nicely!
- Spice it Up Naturally: The recipe calls for parsley, which is fantastic, but if you happen to have some dried oregano in the spice rack—throw a tiny pinch into that melted butter mixture! Oregano and garlic are best friends, and that little extra dry herbal punch pushes the flavor profile right over the top. It just makes them taste richer, somehow.
- Don’t Overbake! Garlic burns faster than bread browns, so keep a close eye on that timer once you’ve removed the foil. If you see any little bits of garlic starting to turn dark brown, pull them immediately. Burnt garlic tastes bitter, and we are aiming for sweet, fragrant garlic goodness here.
- Cooling is Crucial: Resist the urge to tear into them the second they come out of the oven—I know, it’s torture! Let them sit on the baking sheet for about 5 minutes before you start messing with them. This gives the internal structure a chance to set up. If you try to move them right away, they might deflate or smoosh because they are so soft.
Serving Suggestions for Your Homemade Garlic Bread Rolls
Okay, now you have these warm, pillowy, gloriously garlicky rolls sitting on your cooling rack. What do you serve them with? That’s the easiest question I’ve heard all week! The beauty of these rolls is that they are a perfect, substantial side dish for almost anything cozy. They are fantastic just grabbed straight from the basket, obviously, but here are a few ways I usually dress up a meal with these beauties.
First off, pasta night is non-negotiable. If you’re making anything with a rich red sauce—spaghetti and meatballs, lasagna, baked ziti—you absolutely have to soak up every last drop of that marinara with one of these rolls. Do not bother with plain breadsticks; these are better and they scream “home-cooked meal.”
They are also incredibly comforting when paired with something soupy. I love dipping them into thick, creamy soups. Think hearty chili or a robust tomato bisque. When you dip these soft rolls into hot soup, they absorb the liquid without immediately falling apart, which is exactly what you want. If you’re looking for a super satisfying soup companion, I highly recommend my recipe for creamy tomato bisque—it’s divine with these.
And don’t forget about stews, especially beef stew or chicken and dumplings! These rolls have enough structure and flavor from the butter and garlic that they hold their own right alongside a hearty main course. I might even put a tiny dollop of butter on them right before serving, just because why not? You deserve it after making homemade bread!
Storage and Reheating Instructions for Best Garlic Bread Rolls
These rolls are dangerously delicious, so honestly, you might not even have leftovers! But if you do manage to save a few—and trust me, you should save them because they are still great the next day—how you store and reheat them changes everything. Nobody wants a dry, sad garlic roll the next evening. Before we talk storage, if you’re interested in other recipes that hold up well to make-ahead preparation, take a peek at this handy guide on meal prepping basics; it might inspire you!
Storing Your Best Garlic Bread Rolls
For short-term storage, say, if you plan on eating them the next day for lunch, keep them airtight at room temperature. Tuck them into a zip-top bag or a sturdy container, but make sure you press most of the air out before sealing. Because they have that yummy butter topping, leaving them out on the counter for too long risks making the crust go a little soft or oily, so aim to eat them within 24 to 36 hours if you aren’t freezing them.
If you need them to last longer, freezing is your best bet! Once the rolls are completely cool—and I mean stone cold, not even slightly warm—you can freeze them for up to three months. Wrap them tightly in plastic wrap first, sealing out as much air as possible, and then tuck that whole package into a heavy-duty freezer bag. You can freeze them individually or keep them grouped together. The wrapping is key to avoiding freezer burn!
The Secret to Reheating for that Fresh-Baked Taste
This is the part that separates the lukewarm leftovers from the ‘fresh-out-of-the-oven’ experience. The microwave is your enemy here; it heats them too fast and just turns that soft bread into chewy rubber. We want to bring them back to life gently.
For rolls straight from the counter, wrap them loosely in a bit of foil and pop them into a cooler oven—say, about 325 degrees Fahrenheit—for about 5 to 7 minutes. That little bit of foil traps enough warmth to make the butter melt back into the bread, restoring that soft texture you loved first time around.
If you are reheating frozen rolls, you need a little more time. Unwrap them completely first! Place them directly on a baking sheet and pop them into that 350-degree oven. They usually take about 10 to 12 minutes to get fully warm through. When you pull them out, the butter will be bubbly and fragrant, and honestly, they will taste like you just made them. Trust me on the oven method; it’s worth the extra 10 minutes!
Frequently Asked Questions About These Garlic Bread Rolls
I know you soak up all the details, but sometimes you just have a quick question about swaps or shortcuts! That’s totally fine. Baking is about learning the rules so you know exactly when you can break them safely. These rolls are quite robust, but there are a few things worth discussing before you start if you’re missing an ingredient or planning ahead. If you are concerned about data privacy since you are using my site, you can review my official policy here, but now let’s focus on the flour and garlic!
Can I substitute the flour in this Best Garlic Bread Rolls recipe?
This is a tricky one because yeast dough is sensitive! The structure we build during kneading relies heavily on the protein in all-purpose flour. If you try swapping everything to whole wheat flour, your rolls will end up far denser than the fluffy clouds we are aiming for. The bran in whole wheat actually cuts the gluten strands, making it harder to develop that elasticity we need for a great rise.
However, you *can* make a partial swap! I’d recommend replacing maybe a quarter cup of the all-purpose flour with whole wheat flour. This gives you a bit more fiber and nuttiness without totally ruining the texture. If you do this, you might need an extra teaspoon or two of water to keep the dough from feeling too stiff during the kneading process. Stick mainly to white flour if you want the absolute softest Best Garlic Bread Rolls, though!
Can I use garlic powder instead of fresh minced garlic?
Oh, my heart aches a little, because, yes, you *can*, but please know that it is a totally different experience. Fresh garlic, especially when steeped in melted butter, gives you that aromatic, slightly sweet, complex flavor. Garlic powder is more condensed and can taste sharp or almost dusty if you use too much.
If you are in a real pinch, you can swap it out. The conversion isn’t perfectly even, but for this 4 tablespoons of butter topping, I’d start with about half a teaspoon of good quality garlic powder. Mix it in well, and maybe add a tiny pinch more salt with it. But please, promise me you’ll try it with fresh garlic next time? That vibrant flavor is what elevates these from good bread to the Best Garlic Bread Rolls!
Nutritional Estimate for Homemade Garlic Bread Rolls
Baking bread at home is such a rewarding act of love, but let’s be real—we aren’t making these rolls for their low-calorie count, are we? We make them because they taste incredible! Still, I believe in being totally transparent about what goes into our comfort foods, so I did a quick calculation of the ingredients list breakdown. It really helps to know what you are serving, even if we sometimes look the other way after the first bite!
This information is based on dividing the total recipe yield into 8 equal rolls. If you happen to find a super handy guide on calculating macros, let me know, but for now, here is a general estimate based on the ingredients we used to make this batch of Best Garlic Bread Rolls. If you’re looking to compare nutritional profiles against hearty meals, take a glance at the data I put together for my slow-cooker pot roast recipe!
Please remember, this is just a ballpark figure! The actual brand of flour you use or exactly how much butter soaks into the parchment paper can shift things around a bit. Consider this your baseline guide:
- Serving Size: 1 roll
- Calories: Roughly 220 per roll – that’s a respectable side dish calorie count!
- Fat: Around 9 grams of fat total.
- Saturated Fat: About 5 grams, mostly from that lovely butter topping we slathered on, which is totally necessary by the way!
- Carbohydrates: About 30 grams.
- Protein: A nice little bonus of 6 grams from the flour and yeast.
- Sodium: We use 1 teaspoon of salt for the whole batch, so expect about 250mg per roll. If you are watching salt, you can definitely pull this back slightly because the garlic butter adds so much flavor on its own.
- Sugar: Just 3 grams, mostly from the sugar we fed the yeast!

See? Not too bad for homemade bread smothered in garlic butter! You get all that amazing flavor and texture without loading up on tons of sugar. That’s a win in my book!
Print
Best Garlic Bread Rolls
- Total Time: 1 hour 48 min
- Yield: 8 rolls 1x
- Diet: Vegetarian
Description
Simple recipe for soft, flavorful garlic bread rolls.
Ingredients
- 1 cup warm water (105-115F)
- 2 1/4 teaspoons active dry yeast
- 1 tablespoon sugar
- 2 1/2 cups all-purpose flour
- 1 teaspoon salt
- 1/4 cup unsalted butter, melted, plus 4 tablespoons for topping
- 2 cloves garlic, minced
- 2 tablespoons fresh parsley, chopped
Instructions
- Combine warm water, yeast, and sugar in a bowl. Let stand for 5 minutes until foamy.
- In a large bowl, mix flour and salt. Add the yeast mixture and 1/4 cup melted butter. Mix until a shaggy dough forms.
- Knead the dough on a lightly floured surface for 5-7 minutes until smooth.
- Place dough in a greased bowl, cover, and let rise in a warm place for 1 hour, or until doubled.
- Punch down the dough. Divide it into 8 equal pieces and shape each into a small roll. Place rolls on a baking sheet lined with parchment paper.
- Cover the rolls and let them rest for 20 minutes.
- Preheat your oven to 375F (190C).
- In a small bowl, mix the remaining 4 tablespoons of melted butter, minced garlic, and chopped parsley.
- Brush the garlic butter mixture generously over the tops of the rolls.
- Bake for 15-18 minutes, or until golden brown.
Notes
- For extra soft rolls, cover them with foil for the first 10 minutes of baking.
- You can add a pinch of dried oregano to the butter mixture for more flavor.
- Prep Time: 30 min
- Cook Time: 18 min
- Category: Side Dish
- Method: Baking
- Cuisine: American
Nutrition
- Serving Size: 1 roll
- Calories: 220
- Sugar: 3
- Sodium: 250
- Fat: 9
- Saturated Fat: 5
- Unsaturated Fat: 4
- Trans Fat: 0
- Carbohydrates: 30
- Fiber: 1
- Protein: 6
- Cholesterol: 20
Keywords: garlic bread rolls, homemade bread, yeast rolls, easy bread recipe, side dish