
When those first sunny days of spring finally show up, I just crave color on my dessert table! Forget heavy, fussy baked goods; my family wants something cool, bright, and fast. That’s why this recipe is my absolute go-to for Easter Sunday. Seriously, if you need a showstopper that takes next to no effort at all, you have to try this Easter Jell O Pie. It’s completely no-bake, which means I can actually spend time hunting eggs with the kids instead of wrestling with my oven!
I started making this because my Aunt Clara used to bring it every year, and it was always the first thing gone. Now, it’s my job to bring the brightly colored goodness! It uses simple ingredients you probably have hanging around, but the result looks totally gourmet and screams springtime celebration. Trust me, this light, creamy Easter Jell O Pie is going to become your new holiday tradition, too.
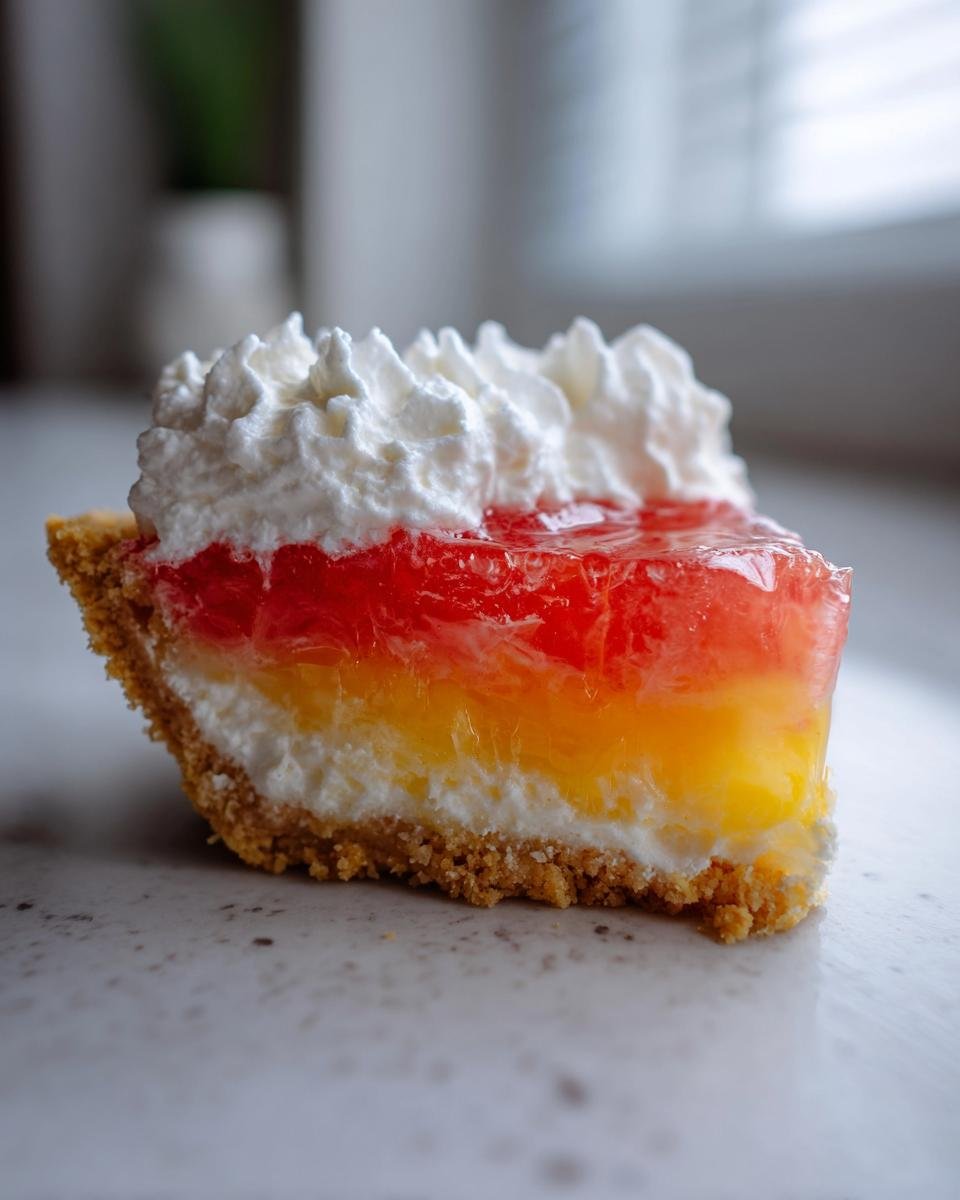
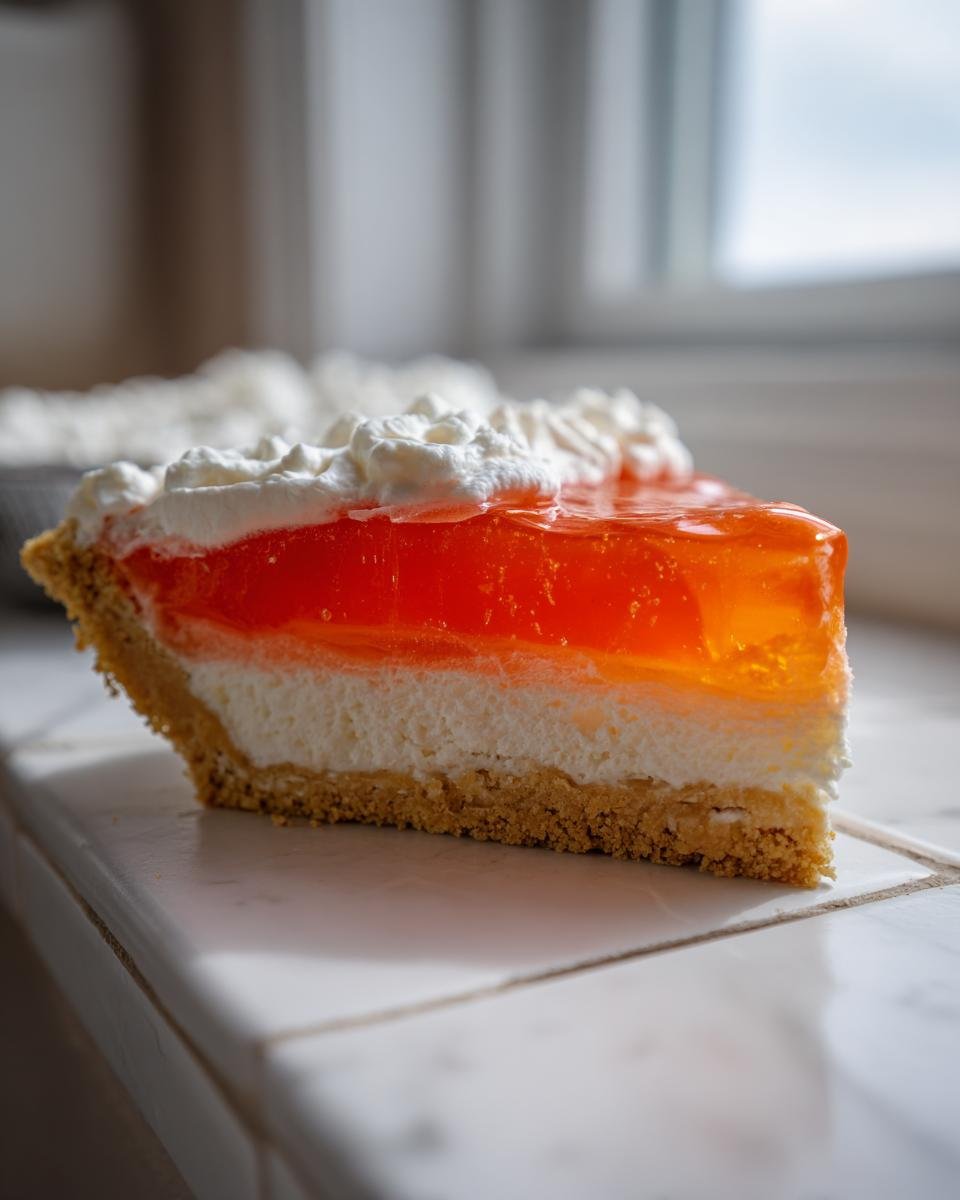
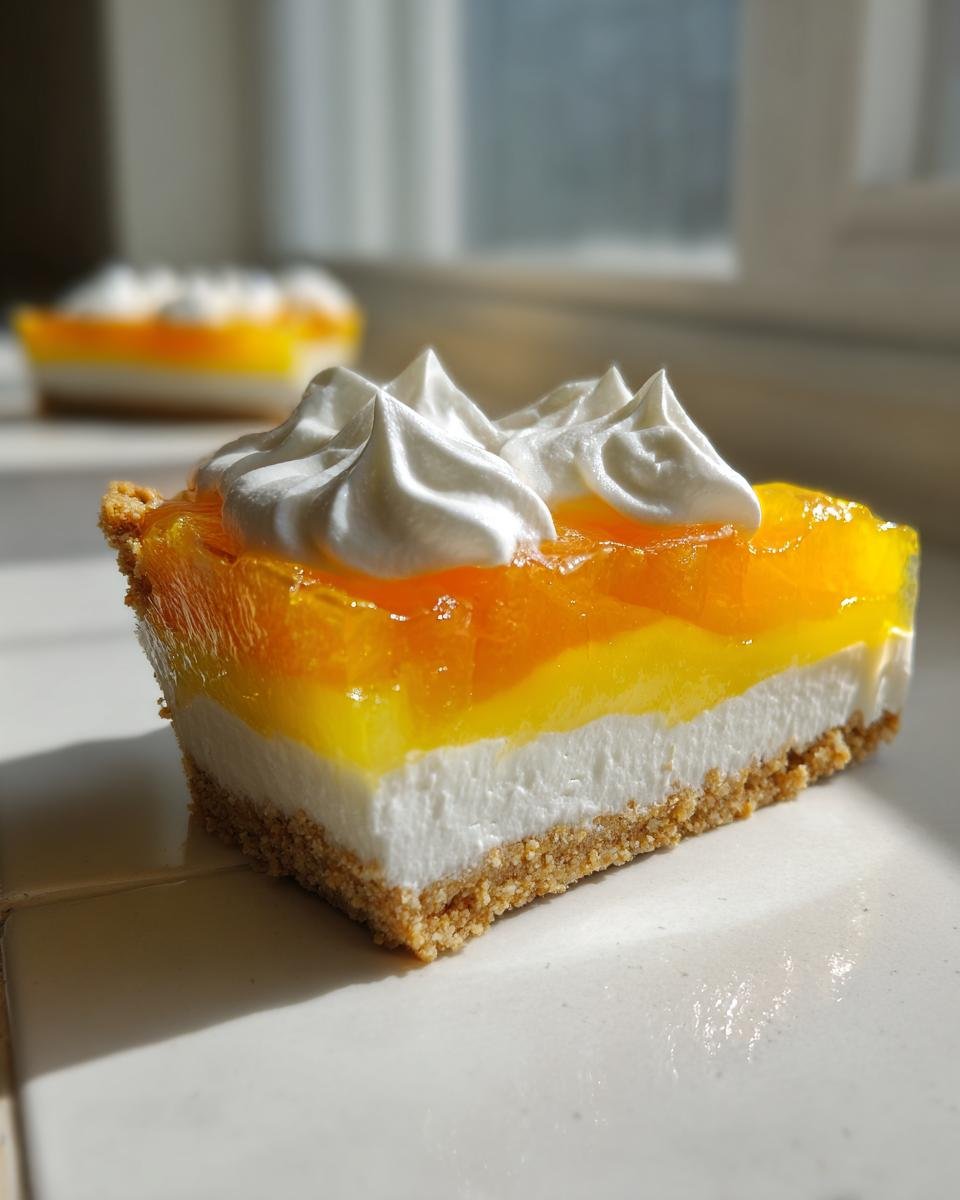
We’re going to use a basic graham cracker crust as the base for this beauty, and then we build this incredible, fluffy filling that just sets up like magic in the fridge. I usually go for lime or lemon to get that perfect pastel green or yellow—it looks gorgeous against the white whipped cream when you slice into it. Ready to see how easy it is to make a dessert that feels instantly festive? You can check out more of my favorite quick treats over here: my go-to spring desserts.
Why This Easter Jell O Pie is Your Perfect Spring Dessert
Honestly, what’s not to love about this dessert? It checks every single box when I’m in a rush but still want something impressive for the holiday table. It’s the kind of recipe that lets you relax instead of stressing. If you want fewer steps, check out these amazing recipes that save time.
- It requires zero actual baking time—just mixing and waiting! That means no worrying about your oven being tied up when you’re trying to roast the ham.
- The vibrant colors just scream springtime and go perfectly with pastel Easter baskets and decorations.
- It’s incredibly light! After a big holiday meal, a fluffy slice of this chilly Easter Jell O Pie is exactly what everyone craves.
Quick Prep and No-Bake Convenience
The best part? You’re looking at only about 20 minutes of actual work from start to finish. Just dissolve, whip, fold, and chill. I can throw this together while the kids are already messing around with the Easter egg dye. Since we aren’t using an oven at all, you never have to worry about over or under-baking. It’s foolproof!
Vibrant, Festive Colors for Your Easter Jell O Pie
This is where the fun really starts! Gelatin comes in so many gorgeous colors—think soft pink for strawberry, light yellow for lemon, or pale green for lime. You can tailor the look perfectly to whatever theme you’re going for. I always splurge on the lime flavor because that bright green against the white creamy filling is just stunning and really pops on the table.

Gathering Ingredients for the Best Easter Jell O Pie
Okay, you guys know I love recipes where the ingredient list is short but mighty. For this Easter Jell O Pie, we keep it super simple. We’re relying on that pre-made crust for speed, but everything else is about building that fluffy texture. When you’re shopping, make sure your heavy cream is very, very cold—it makes all the difference when whipping! You only need a handful of things, and you can find more tips on sourcing cheap pantry staples right here on the blog.
The magic combination is the gelatin, the water (hot and cold!), and the triple-threat whipped cream topping. Here is exactly what you need to have ready on the counter before you start mixing:
- One perfect 9-inch graham cracker crust—no need to make your own!
- One standard 3-ounce package of gelatin, whatever flavor your heart desires (lime or lemon are my faves!).
- One cup of boiling water and one cup of straight-up cold water.
- One cup of heavy cream, straight from the fridge.
- Half a cup of powdered sugar—don’t try to swap this for granulated, trust me!
- Just one teaspoon of pure vanilla extract for that warm background note.
- Optional, but highly recommended: a drop or two of food coloring if you want that Easter egg shade to really POP!
Expert Tips for a Perfect Easter Jell O Pie Filling
Look, this pie is easy, but there’s one step where you really need to pay attention, or your great Easter Jell O Pie will turn soupy instead of fluffy. I’ve made this mistake before—folding the whipped cream into hot gelatin? Total disaster! It just melts everything right back down. If you follow these little secrets I picked up over the years, your filling will be light as air and hold its shape beautifully.
Achieving the Right Gelatin Consistency
This is the make-or-break moment. After you dissolve the powder in boiling water and stir in the cold water, you cannot rush the cooling process. You have to let it sit on the counter—no cheating in the fridge for this part! You are waiting for it to get “slightly thickened,” which usually takes about 30 minutes for me. Think of it like very loose pancake batter. If it’s too liquid, it will just dissolve your whipped cream when you fold it in. If it’s too thick, you’ll get streaks and won’t be able to mix it smoothly into the cream. Don’t worry if you need to stir it gently every ten minutes while you wait!
Whipping Cream to Stiff Peaks
For the creamiest, most stable filling, your heavy cream needs to be frigid! I always try to keep my cream in the coldest part of the fridge—sometimes I’ll even chill my mixing bowl and whisk attachments in the freezer for about ten minutes before I start whipping. Cold fat whips up way better and holds those stiff peaks much longer. You want the peaks to stand up straight when you lift the whisk. If they flop over just a little, they aren’t quite ready for folding into that slightly cooled gelatin mixture.
If you want to see how I tackle other tricky textures, I wrote a whole guide on common pitfalls in creamy no-bake desserts. Seriously, proper gelatin cooling is the key here!
Step-by-Step Instructions to Make Your Easter Jell O Pie
Alright, deep breaths! We’ve got our ingredients waiting, and our gelatin is cooling down perfectly—remember, we are aiming for that soft, slightly thick consistency, maybe about the texture of egg whites that haven’t been beaten yet. This chilling time is your moment to whip up the topping! This whole process flows so smoothly once you know the timing. If you need a reminder on getting that perfect cream texture, check out my rundown on whipping cream techniques.
First things first, you need to get your gelatin dissolved properly. Take your lime or lemon powder and dump it into a medium bowl. Pour exactly one cup of boiling water over it and stir it like crazy until you cannot see a single grain left—it needs to be totally clear! Then, stir in that cold water. Set this mixture aside to cool off; this is where that 30 minutes flies by.
While that’s cooling, jump over to your cold heavy cream. Whip it up with the powdered sugar and vanilla extract. You must keep going until you hit stiff peaks—I mean, when you pull the beaters out, the tip should stand straight up without wobbling at all. If you stop too soon, your Easter Jell O Pie filling will flatten out!
Now for the assembly! Make sure that gelatin mixture is cooled but still liquid enough to pour. Gently pour the whipped cream bowl right into the bowl with the cooled gelatin. You need to fold these together very carefully using a spatula. Don’t stir vigorously! You are trying to incorporate the air you just whipped into the cream, so use scooping and turning motions. If you want that extra bright Easter color, now is the time to drop in a tiny bit of food coloring and give it just a couple of final folds.
Take your pre-made graham cracker crust and pour that beautiful, fluffy filling right into it. Smooth the top gently if you need to. Then, cover it loosely with plastic wrap (don’t let it touch the filling!) and pop it into the fridge. You’ve got to let it set up for at least four hours, though I always just leave mine overnight to be safe. That’s it! Slice it cold, and enjoy the applause.
Ingredient Notes and Substitutions for Your Easter Jell O Pie
One of the things I love most about this simple Easter Jell O Pie is just how flexible it is. You aren’t locked into one flavor, which is great if you’re trying to match a theme or just use what’s in your pantry. If strawberry gelatin is all you have, go for it! It makes a lovely pale pink, which is just as Easter-perfect as the traditional lemon or lime.
If you happen to be out of graham cracker crusts, don’t panic. You can absolutely swap that out! A vanilla wafer crust works wonderfully here, or if you have a few minutes to spare, you can make a quick shortbread crumb crust. Just crush up about 1.5 cups of vanilla wafers, mix them with 1/3 cup of melted butter, press it into your pie plate, and bake for about 8 minutes to set it up before pouring in the filling. For more great crust hacks, I put together a handy guide on how to manage different pie bases.
Also, regarding the gelatin itself: you absolutely can use the sugar-free version if you need to cut back on sugar for whoever you’re serving. Just remember, sugar plays a role in how that gelatin structure sets up, so you might need an extra 30 to 45 minutes of chilling time to make sure it’s firm enough before you add the whipped cream.
Serving Suggestions for This No-Bake Dessert
Since this dessert is all about that light, airy fluffiness, we don’t want to weigh it down with heavy syrups or thick icings. We want toppings that celebrate the cool, bright flavor of the gelatin inside! The best part about this pie structure is that it’s a perfect blank canvas for some truly beautiful spring decorations.
My absolute favorite presentation is just a simple, generous swirl of fresh whipped cream right on top. It really enhances that marshmallow-like texture of the filling. You can pipe it with a star tip if you’re feeling fancy, or just use a big spoon to make beautiful swoops. If you’re looking for ideas on making your own killer whipped cream, I’ve got some notes over on my favorite topping combos here.
To really lean into that Easter spring vibe, you can’t beat fresh fruit scattered around the edges or sprinkled right on top of the whipped cream. Think about what colors you used for your filling! If you used lime Jell-O, a few bright red strawberries or raspberries look stunning placed around the border. If you went with lemon, maybe some blueberries would provide a perfect contrast. It adds a little burst of real fruit that pairs so nicely with the sweet, creamy filling.
If you happen to have a little bit of zest left over from maybe a cake you baked earlier in the week—lemon or orange zest makes a fantastic, fragrant garnish that you can just sprinkle right over the top. It smells amazing and lets everyone know this is a fresh, seasonal dessert!
Storage and Make-Ahead Guide for Your Easter Jell O Pie
Nobody wants to be scrambling on Easter morning, so let’s talk make-ahead strategies for this amazing Easter Jell O Pie! The good news is that this is actually a fantastic make-ahead dessert. I usually aim to have it completely set up in the fridge the night before our big meal, which is why I really appreciate that 4-hour minimum chill time kicking in overnight.
You can safely keep this pie covered tightly in the refrigerator for up to three days. That creamy filling stays perfectly light and delicious! I always use plastic wrap, making sure it doesn’t touch the top surface. If it interacts with the gelatin, it can sometimes get sticky, which is messy.
Now, the tough question: can you freeze it? Honestly, I advise against it. Because we are using heavy cream that gets whipped really high, freezing and thawing tends to damage the air pockets. When you thaw it, the filling can get weepy and separate a little bit due to the structure of the gelatin. For the best texture, just plan to keep any leftovers in the fridge. If you’re storing any extras, you can find my best tips for keeping chilled desserts fresh in general!
Frequently Asked Questions About Making a Jell-O Pie
I get so many messages about this no-bake dessert, and usually, the questions are about making sure that structure stays perfectly fluffy! It’s easy to get stuck on one step, so I pulled together the most common things people ask me when they are making their first Easter Jell O Pie or any other flavor of gelatin pie. If I haven’t covered your specific issue, you can always browse my troubleshooting library here!
Can I use sugar-free gelatin in this Easter Jell O Pie?
Yes, you absolutely can swap in the sugar-free version if that’s what you need! That keeps the calories down if you’re watching sugar content. The only thing you need to remember, though, is that sugar-free gelatin doesn’t always set quite as firmly as the regular kind. I always tell people to be extra patient and let it cool until it feels almost sticky before you even think about folding in that whipped cream. You might need an extra 15 or 20 minutes of cooling time!
What is the best way to get clean slices of this gelatin pie?
A perfectly clean slice of a chilled, fluffy pie? It’s the best look! First, make sure your pie is completely firm—I mean rock solid in the fridge. Then, forget cutting straight away. Grab a sharp, thin knife, dip it into a tall glass of very hot water for a few seconds, wipe it completely dry with a paper towel, and then make your cut. Wipe the knife clean and dip it in hot water for *every single slice*. It melts just enough of the cream and gelatin interface to give you those beautiful, clean wedges without pulling the filling apart.
How long does the gelatin mixture need to cool before folding?
This is the most important question for texture! You cannot fold the liquid gelatin into the whipped cream—it will just melt the air right out of your topping and you’ll end up with thin soup. You need that gelatin to be what I call “slightly thickened,” which is usually sitting at room temperature for about 30 minutes. It should look a little syrupy and hold its shape slightly when dripped off a spoon. If you’re worried, go a little longer. It’s much better to wait too long than to rush this component!
Estimated Nutritional Data for This Dessert
Okay, let’s talk numbers for a second, but please remember that since this is a no-bake recipe using a store-bought crust and variable amounts of whipped cream, these figures are just friendly estimates based on standard supermarket ingredients. I always tell people this isn’t the time to obsess over calories; it’s a holiday treat! If you’re trying to track things closely, you might need to calculate based on the exact brands you use, especially for the crust.
To give you a general idea of what’s in one average slice (which this recipe yields 8 servings of), here’s the breakdown. You can find more information about how we calculate our nutritional estimates by checking out our policy page.
- Serving Size: 1 slice
- Calories: Approximately 280
- Sugar: About 30 grams
- Total Fat: Around 14 grams (with 8 grams identified as Saturated Fat)
- Carbohydrates: Roughly 35 grams
- Protein: About 3 grams
See? It’s lighter than a traditional baked pie, which makes diving in after a big meal totally guilt-free in my book! Enjoy every bite of this cool, fluffy dessert.
Print
Easter Jell-O Pie
- Total Time: 4 hr 20 min
- Yield: 8 servings 1x
- Diet: Vegetarian
Description
A simple, colorful, no-bake pie perfect for an Easter dessert.
Ingredients
- 1 pre-made graham cracker crust (9 inch)
- 1 package (3 ounces) lime or lemon flavored gelatin
- 1 cup boiling water
- 1 cup cold water
- 1 cup heavy cream
- 1/2 cup powdered sugar
- 1 teaspoon vanilla extract
- Food coloring (optional, for brighter color)
Instructions
- Dissolve the gelatin powder completely in the boiling water in a medium bowl.
- Stir in the cold water. Let the mixture cool at room temperature until it is slightly thickened, about 30 minutes.
- In a separate bowl, whip the heavy cream, powdered sugar, and vanilla extract until stiff peaks form.
- Gently fold the whipped cream mixture into the slightly thickened gelatin mixture until just combined. If desired, add a drop or two of food coloring now.
- Pour the filling into the graham cracker crust.
- Refrigerate for at least 4 hours, or until the pie is firm.
- Slice and serve cold.
Notes
- You can use any flavor of gelatin you prefer.
- For a firmer set, chill the gelatin mixture until it is the consistency of unbeaten egg whites before folding in the whipped cream.
- Prep Time: 20 min
- Cook Time: 0 min
- Category: Dessert
- Method: No Bake
- Cuisine: American
Nutrition
- Serving Size: 1 slice
- Calories: 280
- Sugar: 30
- Sodium: 150
- Fat: 14
- Saturated Fat: 8
- Unsaturated Fat: 6
- Trans Fat: 0
- Carbohydrates: 35
- Fiber: 1
- Protein: 3
- Cholesterol: 35
Keywords: Easter, Jell-O, gelatin, pie, no-bake, dessert, spring