
Oh, stop whatever you are doing! If you’ve ever thought red velvet was too fussy or too labor-intensive, this recipe is about to change your whole baking life. Seriously, these are the most wonderfully gorgeous, bite-sized treats you’ll ever whip up, and they disappear instantly at any gathering. I’ve spent years messing around with full-sized cakes, but I finally cracked the code on making truly amazing, deeply colored, bite-sized desserts.
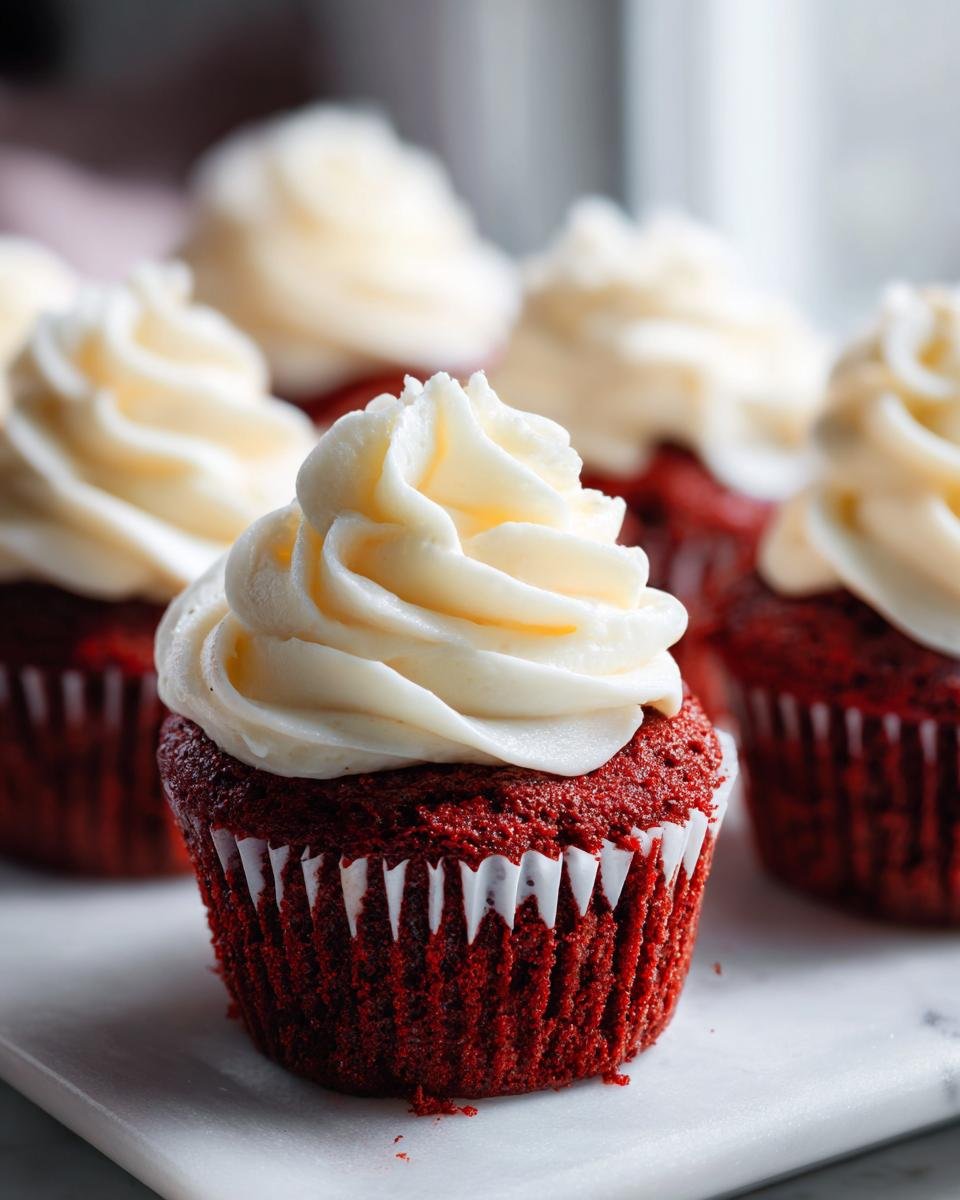
This isn’t just *a* recipe; this is my ultimate, tested-and-true Dessert Mini Red Velvet Cupcakes Recipe. We’re talking incredible tartness from the buttermilk reacting with the cocoa, that signature velvety texture, and a thick swirl of bright cream cheese frosting that somehow tastes even better when it’s tiny. You’ll see from the timing that we can have these beauties ready in under an hour total. Let’s get baking!

Why This Dessert Mini Red Velvet Cupcakes Recipe Stands Out
So many recipes look great but taste flat. Not this one! I promise you that once you try these, you’ll toss out every other mini cake recipe you’ve ever saved. They are just built different, trust me.
- The color is shockingly vibrant! We’re using the right amount of coloring to get that classic deep red without tasting like dye.
- That texture is spot-on—moist, a little tangy, and perfectly tender, thanks to the buttermilk magic.
- They bake up fast! Because they are mini, you get that amazing payoff in just 12 to 15 minutes.
- The frosting stays pipeable and thick; it doesn’t melt away into a sweet puddle like some thinner icing recipes I’ve tried. Check out my favorite piping tips over at this post if you want perfectly gorgeous swirls! Also, for more great tips on getting the perfect bake every time, you should definitely peek there too.
Gathering Ingredients for Your Dessert Mini Red Velvet Cupcakes Recipe
Okay, gathering your supplies is half the battle won! For these little beauties, you absolutely cannot cheat on the temperature of your dairy. I’ve learned the hard way that using cold butter or buttermilk means a lumpy batter instantly, and we want velvety smooth cakes, not chunky disasters!
Make sure your butter has been sitting out for at least an hour before you start. It should have that perfect gentle give when you press it—not melted, just soft. Also, buttermilk is key here; it works with the baking soda and vinegar to give us that signature slight tang and tenderness. If you need tips on getting baking ingredients ready ahead of time, I cover my setup routine in this quick guide!
For the Mini Red Velvet Cupcakes
These are the dry ingredients you’ll want to whisk together first:
- 1 1/2 cups all-purpose flour
- 1 1/2 teaspoons baking soda
- 1 teaspoon cocoa powder
- 1/2 teaspoon salt
And here’s what goes into the wet side. Quick expert tip: If you can find gel food coloring—not the watery liquid stuff—use that! It gives you that super intense red without making your batter too thin, which is so important for these little cakes.
- 1 cup granulated sugar
- 1/2 cup unsalted butter, softened
- 2 large eggs
- 1 teaspoon vanilla extract
- 1 cup buttermilk
- 1 tablespoon red food coloring (Gel is best!)
- 1 teaspoon white vinegar
For the Cream Cheese Frosting
This frosting is just as important as the cake itself, so don’t rush the softening process here either. The cream cheese and butter need to be truly soft—think almost spreadable, but not oily!
- 8 ounces cream cheese, softened
- 1/2 cup unsalted butter, softened
- 3 cups powdered sugar
- 1 teaspoon vanilla extract
Step-by-Step Instructions for the Dessert Mini Red Velvet Cupcakes Recipe
Now for the fun part! Follow these steps precisely, and I promise you’ll have picture-perfect results. When I first made these mini versions for a book club meeting, I thought they were too cute to eat. Big mistake! They were gone before the first chapter was finished. They’re just too easy to grab when they’re this small!
We need to move quickly between steps because the whole process is designed to be fast so the batter doesn’t deflate. If you ever need a quick refresher on creaming vs. whipping, I have a little guide on proper mixing techniques that might help!
Preparing and Baking the Mini Red Velvet Cupcakes
First things first: get your kitchen ready! Preheat your oven right now to 350°F (175°C). Don’t wait until the batter is mixed, or you’ll rush the creaming step.
- Make sure those mini muffin tins are lined with paper liners. Seriously, don’t skip this step for minis; they stick something awful!
- In a medium bowl, just whisk together the flour, baking soda, cocoa powder, and salt. Set that dry mix aside.
- In your big bowl, cream that 1 cup of sugar and the 1/2 cup of softened butter until it looks fluffy and pale yellow. Beat in those two eggs, one at a time, making sure each one is fully incorporated before adding the next. Stir in your vanilla.
- Now for the color magic! Mix your buttermilk, that bright red food coloring, and the vinegar in a separate little bowl.
- This is critical: add the dry ingredients to your wet ingredients slowly, alternating with the buttermilk mixture. Remember the rule: start and end with the dry ingredients. Mix ONLY until it just comes together. Stop mixing the second you don’t see white streaks!
- Fill those little liners about two-thirds full—no more!
- Bake them for about 12 to 15 minutes. They bake lightning fast because they are so small.
- Test them! Poke a toothpick into the center of a cupcake; it should come out clean, maybe with a few moist crumbs clinging to it, but no wet batter. Let them cool completely on a wire rack before you even think about frosting them.
Creating the Perfect Cream Cheese Frosting
While those little cakes are cooling down, we make our gorgeous, tangy topping! This frosting comes together so fast, but the temperature of the cream cheese and butter is what makes it silky smooth.
- In your mixer, beat the 8 ounces of cream cheese and the 1/2 cup of softened butter until they look completely smooth. Scrape down the sides once or twice.
- Add the powdered sugar gradually, then the vanilla. Beat it until it’s light and fluffy. If you find it seems too soft and soupy while you are whipping, pop the bowl into the fridge for just 10 minutes to firm up. This little trick prevents your beautiful piping swirls from collapsing later!
- Once the cupcakes are totally cooled, frost them up!
Tips for Success with Your Dessert Mini Red Velvet Cupcakes Recipe
It kills me when someone follows a recipe exactly but still ends up with dull red or slightly sunken cakes. Listen, baking small-batch items like these mini red velvets requires a couple of extra moments of attention, but I promise it’s worth it for that guaranteed wow factor.
Here are the three things I always double-check before hitting the oven:
- Go Bold with the Color: Don’t be shy with the red food coloring, especially if you’re using a natural alternative. To get that deep, signature red velvet hue, you need enough coloring to overcome the darkening effect the cocoa powder has on the batter. If you’re using liquid dye, you might need a little more than expected, but try to stick to gel if you can.
- The ‘Just Combined’ Rule is Law: Seriously, this is the most critical part of the Dessert Mini Red Velvet Cupcakes Recipe. Once that flour hits the wet ingredients, you mix until you see just a few faint streaks left, and then you stop immediately. Overmixing develops gluten, and that gives you tough, rubbery little cupcakes instead of tender velvet.
- Patience During Cooling: I know, I know, they smell amazing, and you want to frost them right away. But if you try to pipe icing onto a warm mini cupcake, the butter in your lovely cream cheese frosting will melt instantly and slide right off. Let them cool completely on the rack. If you’re in a hurry, you can cool them in the fridge for 15 minutes, but they have to be stone cold first.
For more troubleshooting on why your cakes might sink or spread too much, I wrote a whole breakdown over at this post. A little knowledge goes a long way with temperamental desserts like this!
Ingredient Notes and Substitutions for the Dessert Mini Red Velvet Cupcakes Recipe
Okay, let’s talk ingredients because here’s where we separate the good red velvet from the legendary red velvet. The beauty of this recipe is in the chemistry between the acid and the cocoa, so we can’t just swap things out willy-nilly!
The buttermilk, for example, isn’t just there for moisture; it’s essential! Buttermilk is acidic, and that acid is what reacts with the baking soda, giving the cake its light lift and that distinct, slightly tangy profile that cuts through the sweetness of the frosting. It’s non-negotiable for the best texture. But what if your fridge is empty? Don’t panic! You can totally make a quick substitute. Just take your normal milk—any kind works—and whisk in a teaspoon of white vinegar or lemon juice for every cup of milk you’re using. Let it sit on the counter for about five minutes until it looks a little curdled. Voila! Instant buttermilk substitute ready for your baking needs!
Also, a quick word on the cocoa powder: make sure you’re using regular, unsweetened cocoa powder, not Dutch-processed. If you use Dutch-processed, the acid in the buttermilk won’t react properly with the cocoa, and you’ll lose some of that classic, slightly chocolatey depth that defines a true red velvet. We want that slight chocolate background note, not a forward chocolate flavor, remember?
And please, for the love of cake, stick to unsalted butter for the cakes and the frosting. We need total control over the salt content, especially because we are balancing the sweetness of three cups of powdered sugar!
Serving Suggestions for Your Mini Red Velvet Cupcakes
Once these gorgeous little treats are frosted, the hard part is over, but now we get to the fun part: showing them off! Since these are mini cupcakes, they are just perfect for letting people graze, which means they look spectacular dressed up on a dessert table.
If you are hosting a shower or a tea party, you absolutely must get a tiered serving tray. Seriously, place them on different levels so people can admire all 24—or more, if you double the batch!—at once. They look so elegant clustered together.
When it comes to pairing flavors, red velvet is rich, thanks to the butter and cream cheese. It sings beautifully alongside something slightly bitter or warm. My go-to pairing is a strong, hot black coffee—nothing beats that intense flavor combo! A spicy chai latte is another winner in the fall. If you’re looking for other perfect pairing ideas for rich desserts, I actually broke down my favorites for coffee, wine, and tea pairings over at this helpful article.
For a really simple look, just a tiny dusting of powdered sugar right before serving is all they need, but if you created a beautiful piped swirl, let that frosting shine!
Storage and Make-Ahead Tips for Dessert Mini Red Velvet Cupcakes Recipe
I always want to bake these a day ahead because honestly, they taste even better the next day once those flavors have really settled in, but you have to store them right, especially with that fluffy cream cheese frosting on top!
The biggest thing to remember is that cream cheese frosting hates air exposure. It can dry out or start to absorb fridge smells if you just cover the container. Here’s how I handle it, whether I’m making a batch ahead or planning to freeze a few (because, let’s be real, sometimes 24 mini cupcakes is just too much temptation for one weekend).
Storing Frosted Minis (The Best Way)
If you’re planning to serve these within two or three days, definitely frost them first. Moisture is your friend here, but only if contained properly. You need an airtight container, obviously. But before you close that lid, you have to create a little humidity shield for them.
Place a very small piece of wax paper or parchment on top of the frosting swirls before putting the lid on the container. This prevents the plastic from sticking directly to your beautiful piping work, which is the absolute worst way to ruin a perfect cupcake!
Keep the container stored in the refrigerator. Because they are smaller, they cool down and firm up quickly, which is great. I always pull the container out about 30 minutes before serving to let them come slightly closer to room temperature—that makes the cake softer and the frosting perfectly creamy when you bite in.
Freezing Instructions for Later Enjoyment
If you know you won’t get to them for a week or two, freezing is your option, but you have to freeze them unfrosted. Attempting to freeze frosted cupcakes rarely works out well; the frosting texture gets weird or cracks when thawed.
- Bake your mini red velvet cupcakes and let them cool totally—and I mean totally—on the wire rack.
- Arrange the bare cupcakes in a single layer on a sturdy baking sheet.
- Place that baking sheet right into the freezer for about an hour until the tops are completely solid.
- Once they are rock hard, transfer them into a heavy-duty freezer bag. Squeeze out as much air as you can. They’ll hold up perfectly fine like this for about a month.
When you’re ready to eat them, just pull out what you need! Let them thaw completely on the counter (still sealed in the bag to prevent condensation from making them soggy), and then you can whip up your cream cheese frosting and frost them fresh. If you want more freezer tips for all kinds of baked goods, I’ve got a great printable guide on making things ahead over at my storage resource page!
Frequently Asked Questions About Mini Red Velvet Cupcakes
It’s totally normal to have questions when you’re dealing with a recipe that has such specific requirements, especially regarding color and flavor balance. I’ve gathered all the most common things people ask me about making these little treats. If you’re wondering about the perfect mini cupcake size or how to nail that authentic taste, you’ll find the answers right here!
Can I use natural food coloring instead of artificial dye for the Dessert Mini Red Velvet Cupcakes Recipe?
Oh, I totally get wanting to use natural options—I try too! The tricky thing with red velvet is that the natural colorings, like beet powder or even concentrated beet juice, don’t stand up well against the brown tint that the cocoa powder naturally creates. You can try using them, but you will need a lot more of them, and even then, you usually end up with more of a brownish-pink cake instead of that gorgeous deep red. For the classic look of this specific Dessert Mini Red Velvet Cupcakes Recipe, I really suggest sticking to a high-quality gel food coloring if you want that true, vibrant red!
What is the best way to get the classic red velvet flavor without overpowering the chocolate?
This is truly about balance, and it’s what makes red velvet red velvet and not just a faded chocolate cupcake! The key is twofold: first, use just the small amount of unsweetened cocoa powder listed—we want that slight hint of chocolate working in the background, not front and center. Second, you absolutely need that acid! Make sure you are using active buttermilk and the white vinegar that’s called for. The acid reacts with the baking soda and the cocoa, which helps mellow out the bitterness of the cocoa, resulting in that unique, slightly tangy flavor profile that everyone loves.
Why did my mini cupcakes bake so much faster than the recipe said?
That’s a fantastic sign that your oven is running a little bit hot, or perhaps you are using a very thin mini muffin pan! Mini cupcakes have a huge surface area compared to their volume, so they cook incredibly fast. If you peeked in at the 10-minute mark and they looked ready, you probably pulled them out just in time. I always recommend setting your timer for 10 minutes and then checking every minute after that. A toothpick check is foolproof!
Can I use milk instead of buttermilk if I forget to make a substitute?
You can, but you’ll notice a difference, and I want you to have the absolute best results! Plain milk won’t give your cake the necessary acid to react with the leavening agents properly. If you use plain milk, the cake tends to be a bit denser, and you lose that characteristic tang that cuts through the rich frosting. If you absolutely cannot swap it, at least add the full teaspoon of white vinegar to the milk and let it sit for 10 minutes before adding it to the batter. It helps a bit!
Nutritional Estimates for This Dessert
Now, I know we bake these mini red velvet cupcakes because they taste heavenly, not because we’re counting every gram of sugar, but it’s always good to have a rough idea of what you’re serving, right? Especially since these are so perfectly portioned, it feels like you’re getting away with murder!
These numbers are based on my final recipe breakdown, but since we all use slightly different brands of butter or powdered sugar, take these figures as a general guide for one single, glorious mini cupcake. Knowing the breakdown helps me plan what kinds of snacks I’ll serve alongside them!
If you want to learn more about my testing methodology and how I approach nutritional estimates on the site, you can always check out my general info page over at the About Us section!
- Serving Size: 1 cupcake
- Calories: 180
- Sugar: 20g (Yes, it’s a dessert, we know!)
- Sodium: 150mg
- Fat: 10g
- Saturated Fat: 6g
- Unsaturated Fat: 4g
- Trans Fat: 0g (We keep it clean!)
- Carbohydrates: 22g
- Fiber: 0.5g
- Protein: 2g
- Cholesterol: 35mg
The main thing to remember is that the fat and sugar content is high because we are using real butter and a generous amount of classic cream cheese frosting—it’s what makes them so unbelievably rich and satisfying. Since they are mini, you hopefully feel a little better about reaching for that second one!
Print
Mini Red Velvet Cupcakes
- Total Time: 40 min
- Yield: 24 mini cupcakes 1x
- Diet: Vegetarian
Description
A recipe for small, individual red velvet cupcakes with cream cheese frosting.
Ingredients
- 1 1/2 cups all-purpose flour
- 1 1/2 teaspoons baking soda
- 1 teaspoon cocoa powder
- 1/2 teaspoon salt
- 1 cup granulated sugar
- 1/2 cup unsalted butter, softened
- 2 large eggs
- 1 teaspoon vanilla extract
- 1 cup buttermilk
- 1 tablespoon red food coloring
- 1 teaspoon white vinegar
- 8 ounces cream cheese, softened
- 1/2 cup unsalted butter, softened
- 3 cups powdered sugar
- 1 teaspoon vanilla extract
Instructions
- Preheat your oven to 350°F (175°C). Line mini muffin tins with paper liners.
- In a medium bowl, whisk together the flour, baking soda, cocoa powder, and salt. Set aside.
- In a large bowl, cream together the 1 cup sugar and 1/2 cup butter until light and fluffy.
- Beat in the eggs one at a time. Stir in the vanilla extract.
- In a separate small bowl, mix the buttermilk, red food coloring, and vinegar.
- Gradually add the dry ingredients to the wet ingredients, alternating with the buttermilk mixture, beginning and ending with the dry ingredients. Mix until just combined.
- Fill the mini muffin liners about two-thirds full with batter.
- Bake for 12 to 15 minutes, or until a toothpick inserted into the center comes out clean. Cool completely on a wire rack.
- To make the frosting, beat the cream cheese and 1/2 cup butter until smooth.
- Gradually add the powdered sugar and 1 teaspoon vanilla extract. Beat until light and fluffy.
- Frost the cooled cupcakes.
Notes
- Use gel food coloring for a more intense red color.
- Do not overmix the batter after adding the flour.
- Chill the frosting briefly if it becomes too soft before piping.
- Prep Time: 25 min
- Cook Time: 15 min
- Category: Dessert
- Method: Baking
- Cuisine: American
Nutrition
- Serving Size: 1 cupcake
- Calories: 180
- Sugar: 20g
- Sodium: 150mg
- Fat: 10g
- Saturated Fat: 6g
- Unsaturated Fat: 4g
- Trans Fat: 0g
- Carbohydrates: 22g
- Fiber: 0.5g
- Protein: 2g
- Cholesterol: 35mg
Keywords: red velvet, mini cupcakes, dessert, cream cheese frosting, small cakes