
There’s just something about the holiday season that demands a glass of something rich, creamy, and just a little bit boozy, right? Forget those watery, overly sweet cartons you grab off the shelf! I’m telling you, once you see the color and taste the pure velvet of eggnog made completely from scratch, you’ll never go back. Seriously, this is the best **Homemade Eggnog Recipe** I have ever perfected.
I remember the first time I tried making it—I was terrified of scrambling the eggs! But my cousin showed me the trick, and now it’s my absolute favorite tradition to start the winter season. The aroma of fresh nutmeg and vanilla fills the whole house, and you just know something special is coming.
You need this recipe. It makes a true, thick, luxurious custard base that tastes like pure holiday magic. Grab your whisk and let’s get started!

Why This Homemade Eggnog Recipe Stands Out
There is a huge difference between the stuff you buy and what you make right here on your stove. This **Homemade Eggnog Recipe** gives you unbelievable flavor! Store-bought versions are often thin, but ours is velvety smooth and totally customizable. Seriously, if you want the real deal, you need to check out my full recipe details.
- Amazing, deep flavor only fresh eggs and real cream can offer.
- You control the sweetness and the *kick*—add more bourbon or skip it entirely!
- It’s way thicker and richer than anything you’ll find pre-made.
This version is a real treat, not just a quick drink.
Classic Custard Base for Richness
We make sure this eggnog is *quality* by cooking it gently. Tempering the eggs slowly prevents them from scrambling into sad little bits, which would ruin the whole batch! Trust me, cooking that custard base until it hits about 170 degrees F is non-negotiable. That perfect temperature kills any bad bacteria and gives you that signature thick texture you see in old movies.
Gathering Ingredients for Your Homemade Eggnog Recipe
Okay, let’s talk ingredients! Honestly, the beauty of this **Homemade Eggnog Recipe** is that it uses pretty simple stuff you probably have on hand, but the measurements have to be spot on. We need six large egg yolks—no whites, they make it foamy and we want dense velvet here! Then we’ve got a cup of sugar, a quart of whole milk, and a full pint—that’s two cups!—of heavy cream. Don’t skimp on the cream; that’s where the luxury comes from.
Don’t forget the flair: a teaspoon of vanilla extract and a quarter teaspoon of fresh nutmeg. That nutmeg is everything, so find the good stuff!
Alcohol Options and Substitutions
Now for the fun part! The recipe calls for half a cup of either bourbon or dark rum. If you’re skipping the booze for a family gathering, just leave it out! Totally fine. If you’re feeling adventurous, brandy works surprisingly well too, or maybe even some nice spiced rum. Remember, if you’re worried about salmonella in raw eggs—though we do cook ours—you can always swap in pasteurized eggs, which are available at most grocery stores now. Better safe than tipsy, right?
If you want to dive deeper into some other spirit-infused treats, check out my recipe for bourbon balls!
Step-by-Step Instructions for the Perfect Homemade Eggnog Recipe
Now we get to the good part—making the magic happen! When you tackle this **Homemade Eggnog Recipe**, remember that patience is your best friend, especially when dealing with those beautiful egg yolks. If you rush the heating or mixing, you’ll end up with sweet scrambled eggs, and nobody wants that on Christmas morning!
Tempering and Cooking the Custard Base
First thing’s first: whisk your yolks and sugar until they go pale and fluffy. It takes a minute, but it’s worth it to get air in there. While that’s happening, warm up your milk until you see those tiny little bubbles forming around the edges. Remember, don’t let it boil! Now comes the crucial move: tempering. While whisking the yolks like crazy, drizzle in just a tiny splash of that hot milk—very slowly. This gently wakes the eggs up. Once you’ve added maybe half a cup of milk this way, you can pour the tempered yolk mixture back into the saucepan with the rest of the milk.
Keep it on low heat and stir constantly with a wooden spoon. You’re looking for the mixture to thicken just enough so that when you lift the spoon, the liquid coats the back instead of immediately running off. If you have a thermometer, aim for 170 degrees F, but usually, that spoon test is all you need. Take it off the heat immediately!
Chilling and Finishing the Homemade Eggnog Recipe
Once it’s cooked, quickly stir in your heavy cream, vanilla, nutmeg, and that amazing optional bourbon or rum. Now, this step is one my mom absolutely insisted on for the best **Homemade Eggnog Recipe**: you need to strain the whole thing! Pour the warm liquid through a fine-mesh sieve into a clean bowl. This catches any tiny bits of egg that might have cooked too fast, ensuring that silky smooth finish we are aiming for.
Then comes the hardest part: waiting! Cover it up and stick it in the fridge for at least four hours. I like to leave mine overnight. Here’s a pro tip: it will thicken up quite a bit more as those fats and starches chill down, so don’t freak out if it seems a tiny bit thin right after straining. If you’re looking for other cozy holiday ideas, check out my post on spiked hot chocolate while you wait!
Tips for Success with Your Homemade Eggnog Recipe
Making a great **Homemade Eggnog Recipe** is all about avoiding a few sneaky pitfalls. When you’re dealing with a warm dairy and egg mixture, timing is everything! If you follow these little tricks I’ve picked up over the years, you’ll nail that perfect texture every single time without any curdling disasters.
Here are the three things I never skip:
- Use Fresh Grated Nutmeg: Okay, this sounds fussy, but seriously, buy a whole nutmeg and grate it fresh over the finished product. The pre-ground stuff loses all its punch. You want that bright, aromatic spice cutting through the richness. It’s a game-changer for flavor!
- The Whisk Never Stops During Tempering: I mean it! When you start pouring that hot milk into the yolks, you have to whisk non-stop, like you’re trying to churn butter by hand. If you stop for even five seconds, those hot spots will cook the eggs instantly, and you’ll have little white clumps floating around.
- Don’t Skip the Strain: Even if you think your tempering went perfectly, always strain the finished custard base through that fine-mesh sieve. I’ve learned that even the tiniest bit of overcooked egg sinks to the bottom of the strainer. Getting it out guarantees that velvety smooth mouthfeel. It’s like polishing a gem!
For some more great general kitchen wisdom that can help keep your ingredients fresh while you’re busy cooking up holiday treats, you might want to check out my tips on produce freshness. Keeping your kitchen running smoothly helps the baking flow!
Serving Suggestions for This Holiday Drink
Once your gorgeous, rich eggnog is perfectly chilled—and trust me, you’ll feel mighty proud pulling that pitcher out of the fridge—it’s time to serve it up! Presentation just makes the whole festive experience feel a million times better. Don’t just dump it in a mug; we eat with our eyes first, right?
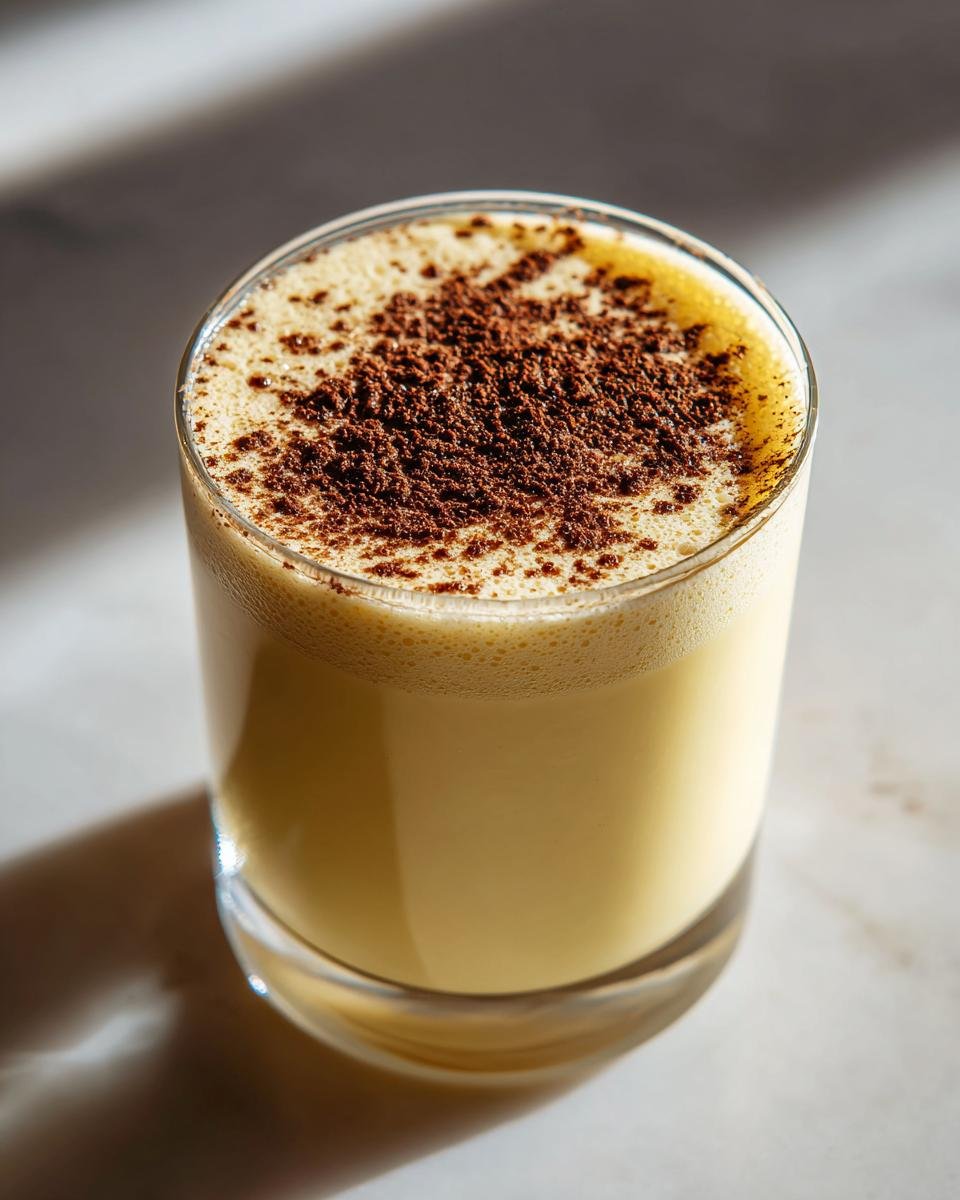
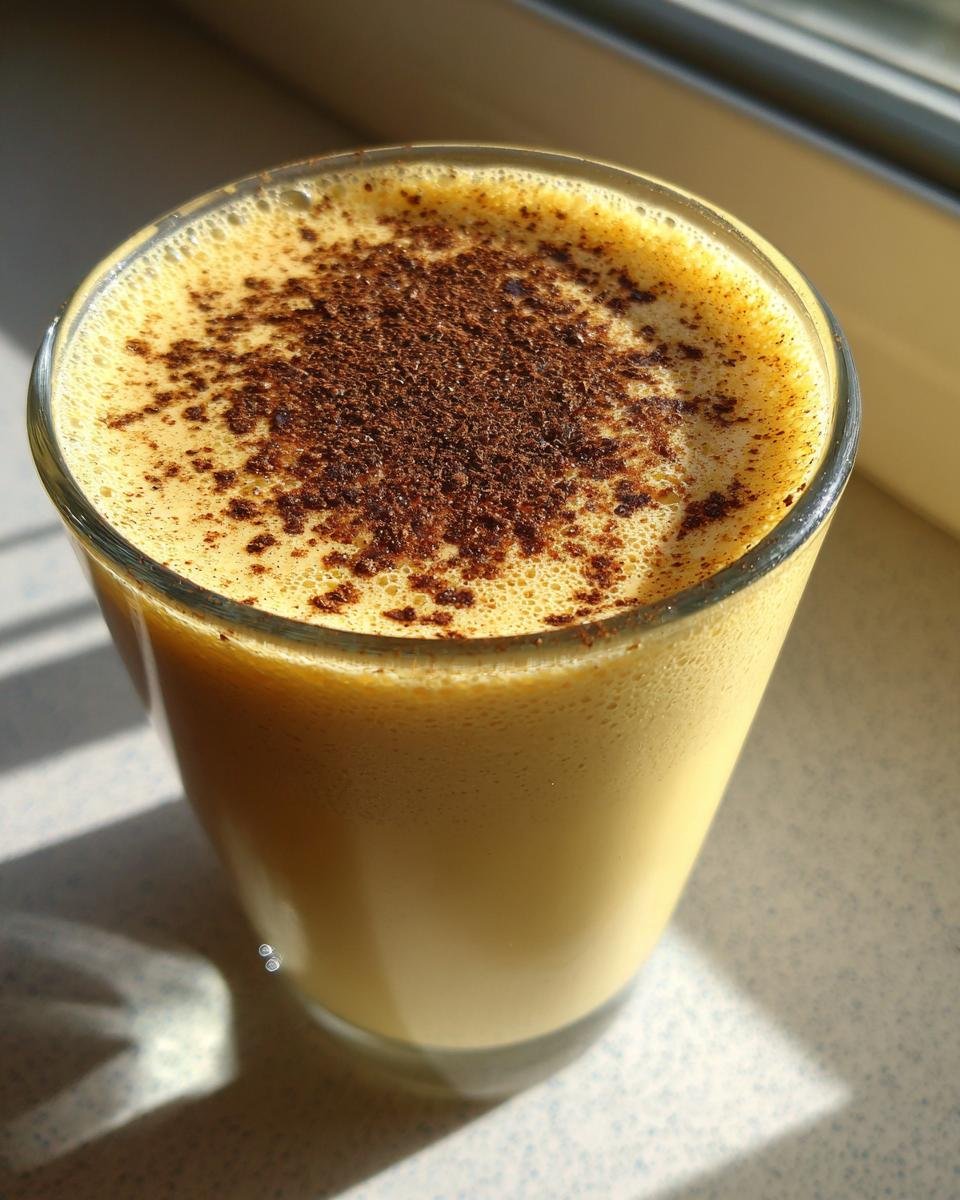
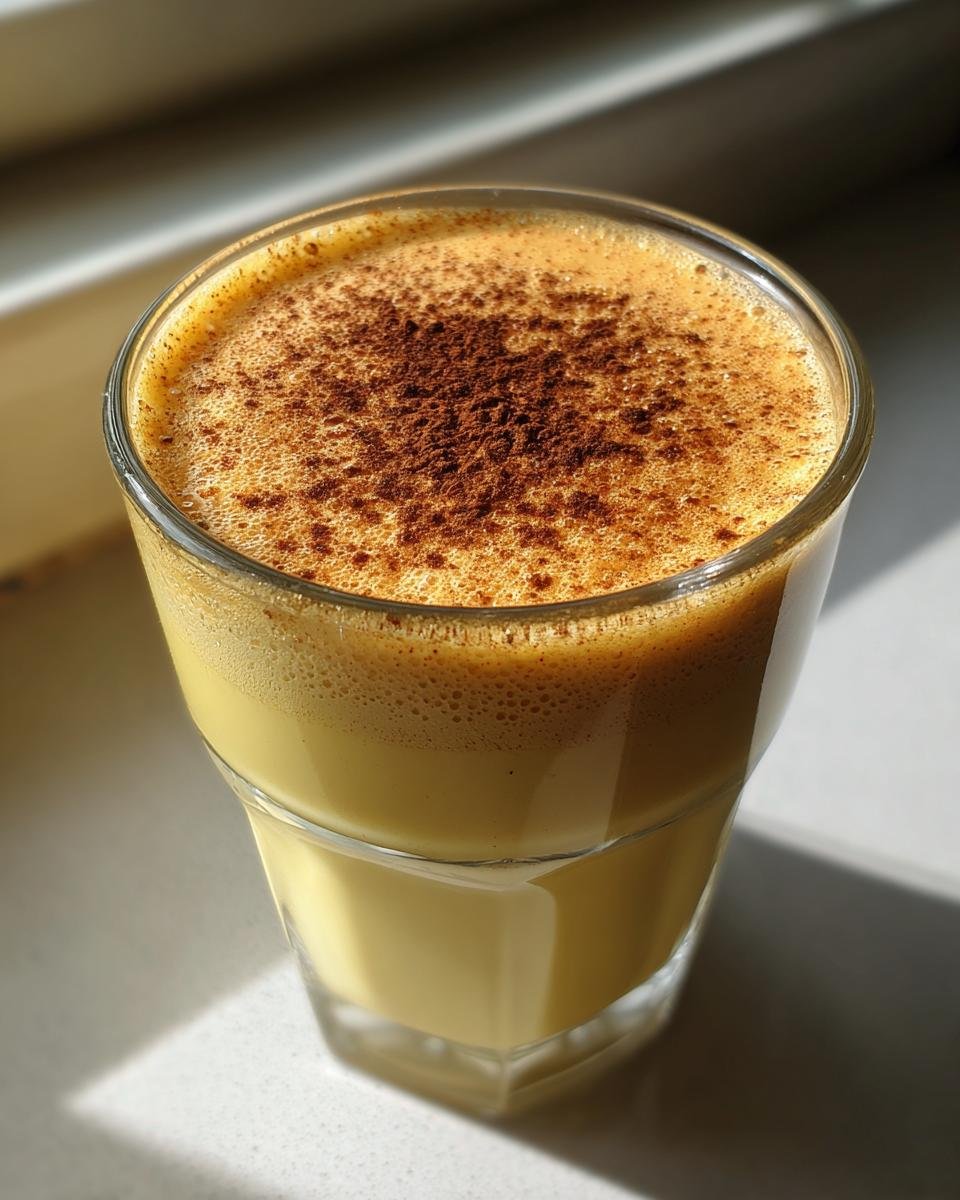
The classic topping has to be a generous sprinkle of freshly grated nutmeg right over the top of each glass. That earthy smell just screams Christmas morning. If you’re feeling extra fancy, grab a whole cinnamon stick and use it as a mini stirrer in the glass. It looks elegant and adds just a whisper of extra warmth to every sip.
What should you serve alongside this creamy delight? Sweet and simple is the way to go. These drinks are already super rich, so you want something that can stand up to it without being overwhelming. I absolutely love pairing a glass of cold eggnog with my decadent cinnamon roll sugar cookies. Those warm spices in the cookie complement the spice in the nog perfectly. Anything buttery or lightly spiced works wonders!
Also, feel free to serve it neat, or if you want to add a little extra celebratory sparkle, float a few roasted pecans or even a sprig of fresh mint on top for color.
Storage and Make-Ahead Advice for Homemade Eggnog Recipe
One of the best things about making a big batch of this **Homemade Eggnog Recipe** is that it truly tastes better the next day! Because all those wonderful spices—that vanilla and nutmeg—have time to marry the cream and the bourbon, the flavor deepens up so nicely overnight. You can absolutely make this ahead of time, which is a lifesaver when you have holiday parties coming up. I usually aim to make mine a full 24 hours before serving.
Keep it sealed tight in a clean glass pitcher or container in the coldest part of your fridge. Because we cooked the egg base, this stuff lasts a good long while. I find it tastes fantastic for about five days, maybe even a week if you made sure your milk and cream were super fresh when you started.
Now, you might be wondering about freezing. I’ve tried it—mostly because I’ve had too much leftover!—and honestly, I don’t recommend it for this specific recipe. Freezing and then thawing often ruins the texture of the dairy fats and the cooked custard. It can make the eggnog grainy or it might separate. You end up churning butter, not sipping eggnog! So, stick to making it a week ahead and keeping it chilled. For other make-ahead wonders, check out my advice on making gravy ahead of time—that freezes beautifully, unlike this creamy treat!
Frequently Asked Questions About Homemade Eggnog Recipe
I know coming up with something this rich can bring up a few questions! It’s my most requested recipe every single year, and I always get asked about safety and texture. Don’t worry, we’re covering all the bases so you can relax and enjoy your perfectly spiced **Homemade Eggnog Recipe**!
Is it safe to use raw eggs in eggnog?
That’s a great question, and it’s one I get all the time. In *this* recipe, we aren’t using raw eggs! We cook the yolk and sugar mixture gently on the stovetop until it reaches 170 degrees F. That heat cooks the eggs through, making them safe to consume. It transforms your ingredients into a lovely, cooked custard base. If you ever decide to skip the cooking step—maybe you’re in a wild rush—that’s when you absolutely need to use pasteurized eggs for safety. But trust me, cooking it is what makes this recipe so luxurious!
How thick should the Homemade Eggnog Recipe be before chilling?
I love this question because people panic right when they pull it off the stove! When you take the saucepan off the heat, the liquid should be thick enough that when you dip your wooden spoon in and run your finger across the back of it, the line holds clearly without the liquid running back together. That’s the coating test! If it looks like thin milk, keep cooking it slowly until it coats. Don’t worry if it still seems a little thin at this point, though. The real magic happens in the cold; the eggnog thickens up significantly once it has chilled for those four hours or longer. It turns into pure, luscious velvet!
Estimated Nutritional Snapshot
Now, I know some of you aren’t just making this for the holiday cheer; you want to know what you’re diving into! Since this **Homemade Eggnog Recipe** is made with whole milk, heavy cream, and that little bit of bourbon, it isn’t exactly diet food, but wow, is it worth every sip! Remember, these numbers are just my best guess based on the standard ingredients listed, so they can swing a little based on exactly how much bourbon sneaks in there before chilling!
Here’s a quick look at what one cup serving looks like, approximately:
- Calories: 450 (A festive burst of flavor!)
- Total Fat: 28g (That’s where the richness lives!)
- Saturated Fat: 16g
- Carbohydrates: 38g
- Sugar: 35g (Mostly from the milk and added sugar)
- Protein: 10g
This eggnog packs a punch of flavor thanks to the cream and yolks, giving you satisfying fats and carbs to get you through those chilly evenings. It’s definitely a treat to be savored between holiday cookies, not chugged while making dinner! Just remember, it’s homemade, so enjoy the decadence!
Share Your Homemade Eggnog Experience
Alright, my friends, that’s the whole scoop on making the richest, creamiest eggnog you have ever tasted! Now that you’ve got the secret to my family’s favorite holiday drink, I really want to hear what you think. Did you add bourbon or keep it cozy with just vanilla?
Seriously, rate this recipe! If you followed along and ended up with a pitcher of velvety perfection, please come back and give it five stars! It helps other bakers know they can trust this method.
I love seeing what variations people come up with. Did you add a splash of dark rum instead of bourbon? Maybe you topped yours with a sprinkle of cinnamon instead of nutmeg? Drop all your stories, tips, and any questions you might have down in the comments below. We’re all one big happy cooking family here!
If you tried this and had any issues or want to send me a picture of your beautiful chilled glasses, you can always reach out to me directly too. Happy sipping, everyone!
Print
Homemade Eggnog Recipe
- Total Time: 35 min
- Yield: 6 servings 1x
- Diet: Vegetarian
Description
A recipe for making classic eggnog at home.
Ingredients
- 6 large egg yolks
- 1 cup granulated sugar
- 1 quart whole milk
- 1 pint heavy cream
- 1 teaspoon vanilla extract
- 1/4 teaspoon ground nutmeg
- 1/2 cup bourbon or dark rum (optional)
Instructions
- Whisk egg yolks and sugar together in a bowl until the mixture is pale yellow and thick.
- Heat milk in a saucepan over medium heat until small bubbles form around the edges; do not boil.
- Slowly temper the egg mixture by pouring a small amount of hot milk into the yolks while constantly whisking.
- Pour the tempered egg mixture back into the saucepan with the remaining milk.
- Cook over low heat, stirring constantly with a wooden spoon, until the mixture thickens enough to coat the back of the spoon (about 170 degrees F). Do not let it boil.
- Remove from heat and stir in the heavy cream, vanilla extract, nutmeg, and alcohol if using.
- Strain the mixture through a fine-mesh sieve into a clean bowl.
- Chill the eggnog in the refrigerator for at least 4 hours, or until very cold.
- Serve cold, garnished with extra nutmeg.
Notes
- For a non-alcoholic version, omit the bourbon or rum.
- You can use pasteurized eggs if you prefer not to cook the yolks.
- The eggnog thickens as it chills.
- Prep Time: 20 min
- Cook Time: 15 min
- Category: Dessert
- Method: Stovetop
- Cuisine: American
Nutrition
- Serving Size: 1 cup
- Calories: 450
- Sugar: 35
- Sodium: 90
- Fat: 28
- Saturated Fat: 16
- Unsaturated Fat: 12
- Trans Fat: 1
- Carbohydrates: 38
- Fiber: 0
- Protein: 10
- Cholesterol: 250
Keywords: eggnog, homemade, holiday drink, custard, bourbon, rum, vanilla, nutmeg